Skip to content

Linear rails 30W DIY laser engraver

Advertising
Advertising
?
Creation quality: 5.0/5 (2 votes)
Evaluation of members on the printability, utility, level of detail, etc.

  • 4.2k views
  • 11 likes
  • 10 downloads
  • 1 comment

License
3D design format
PDF and STL Folder details Close
  • endstop_x.stl
  • endstop_y.stl
  • laser_instruction.pdf
  • left_leg.stl
  • linear_rails.stl
  • nawiew_13_04.stl
  • prowadnice.stl
  • right_leg.stl
  • tensioner_1.stl
  • tensioner_2.stl
  • tensioner_3.stl

Learn more about the formats

Publication date 2021-04-15 at 06:43
Design number 367089

TouringGuy

3D printer file info

3D model description

Hi guys!
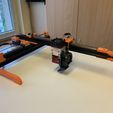
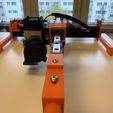
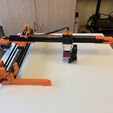
Basically what I wanted to achieve is to make simple DIY laser engraver for anyone who would like to do this on his own. My priority was to use linear rail and enstops, to make homing easy. My first build was very large laser with 4 sides and it was huge. When placed on a desk, it took up the entire surface. So I have been thinking what should I change? That’s how Linear rails laser engraver was born. 2 profiles, 2 linear rails, laser module, endstop, Arduino UNO and power supply. That’s it! Building is very easy. I made instruction, step by step how to mechanically build it, how to connect the wires and how to configurate your software which is LaserGRBL. So what will you need to start? In instructions you will find BOM – Bill of Materials. It’s list of everything you need to start your journey. You will also need 3d printer to print most of the parts. Laser module used in this project is Neje 30W. Linear rail laser engraver mount is designed to fit Neje module (30 & 40W, I don’t have 40W but they look the same). If you have decided to buy Neje 30W module, make sure that you pick option with black mount to adjust it height. Note that if you want to use different module, some changes are required. Total bill of this building is 200$ including everything.
I made simple design to mount air assist on your laser, you don't need any compressor or anything like that, just one m3 bolt with nut and 5015 5V fan.
Don't be afraid, everything is well explained!
Oh, and it has 200x240mm work area.
You can see how it works:
https://www.youtube.com/watch?v=c7LNfGxoxNQ
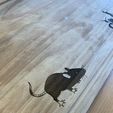
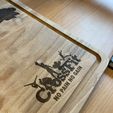
Two last photos shows what quality you can achieve with this laser engraver. It took approixamtely 6 to 7 minutes to engrave each of them.

3D printing settings

0.4 nozzle
0.2 layer height (0.12 for air assist).
35-50% infill
3 perimeters.

Advertising


Issue with this design? Report a problem.

Would you like to support Cults?

You like Cults and you want to help us continue the adventure independently? Please note that we are a small team of 3 people, therefore it is very simple to support us to maintain the activity and create future developments. Here are 4 solutions accessible to all:

  • ADVERTISING: Disable your banner blocker (AdBlock, …) and click on our banner ads.

  • AFFILIATION: Make your purchases online by clicking on our affiliate links here Amazon.

  • DONATE: If you want, you can make a donation via Ko-Fi 💜.

  • WORD OF MOUTH: Invite your friends to come, discover the platform and the magnificent 3D files shared by the community!


Sharing and downloading on Cults3D guarantees that designs remain in makers community hands! And not in the hands of the 3D printing or software giants who own the competing platforms and exploit the designs for their own commercial interests.

Cults3D is an independent, self-financed site that is not accountable to any investor or brand. Almost all of the site's revenues are paid back to the platform's makers. The content published on the site serves only the interests of its authors and not those of 3D printer brands who also wish to control the 3D modeling market.

100% secure payment by credit card, PayPal, Apple Pay, Google Pay, etc.
View all payment options.