Summary
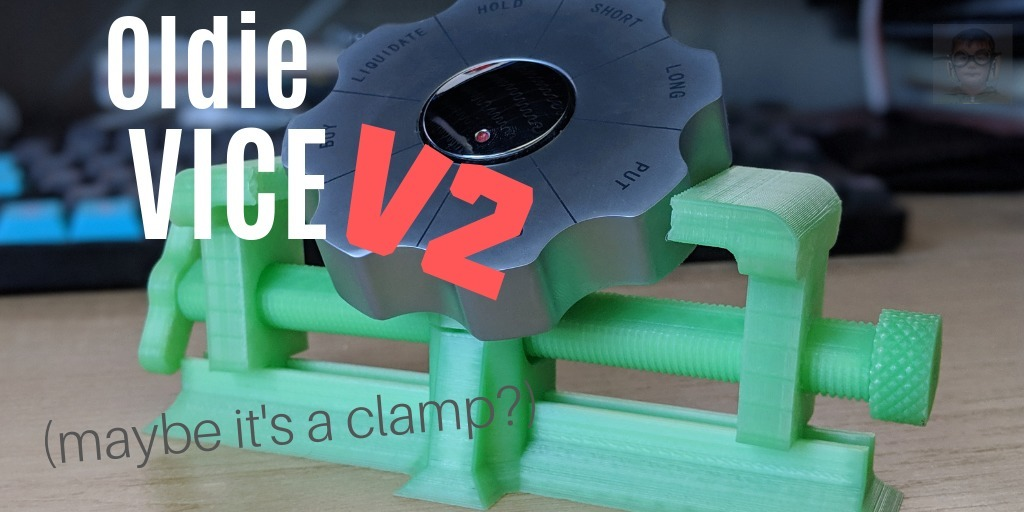
This is the second iteration of a 3D printable Vice made by Machinist Extraordinaire, This Old Tony recently put out a video on a cool vice design that I wanted to recreate. Now This Old Tony is a master of metal, and I just play with plastic. So, making a Vice from plastic that is operational is no easy task, but I think that this version is fully functional and strong enough to hold anything that will fit in its jaws. It is mechanically very simple and relies on a long rod with right-hand threads (clockwise) on one side and left-hand threads (counter-clockwise) on the other side. So, when the shaft is spun it causes the clamps to advance in opposite directions and at the same rate. This mechanism means that your workpiece is always dead center in the vice, and no matter the position of the clamps the vice takes up the same amount of area.

This model was made entirely in Fusion 360 using the This Old Tony Video as a reference. If you watch the video, This Old Tony does a great job explaining how the Vice works and showing off the unique mechanism that allows the Vice to function. My model is not a replica, and is designed from the ground up to be 3D Printed.

What is this Vice?
There are plenty of downsides to a tiny vice made out of plastic(Big surprise I know). However, this vice is perfect for holding small things at your desk. I use mine for soldering and it works great. Working with anything small or delicate this vice will work great, just don't expect to be able to hold a 20 lb piece of steel so you can file it.
Some Assembly Required
This model comes in seven different .stl files. Assembly is very simple and requires no glue or anything that's not 3D printed unless you choose to use glue on some of the parts for better functionality which I would recommend.

Thread on both clamps and Thread each clamp all the way down the thread going in a back and forth motion on any areas that give resistance to make sure it threads smoothly once fully assembled. Try to make sure they are both the same distance from the middle to ensure your clamped workpiece is always centered.
Attach both of the thread ends, the ends can become loose very easily, so its recommended to apply a little glue to make sure it stays but is not necessary. If you glue, it can become impossible to get off later without damaging the thread.
Place assembled thread into the bottom of the base making sure that the clamps are in the grooves of the base. Holding the thread down in the middle of the base with a finger, do a full spin from the jaws being completely closed to completely open to make sure there are no issues with the thread, or bottom of the base and that everything slides smoothly without any snags. Then make sure jaws are spaced the same from the middle and click the top of the base into place locking it into place. Depending on tolerances of your printer the top may have a loose fit, but can easily be glued into place to make it rigid.
Print Settings
Printer Brand: Creality
Printer: Ender 3
Filament: AmazonBasics PLA 3D Printer Filament, 1.75mm, Neon Green
In General
Below I will go into detail into what is recommended to get the best results for each part, but this is a very easy print, and every printer should be able to do the whole thing in about 6 hours for a quick print, but it depends on your infill and how rigid you want the vice to be. This print doesn't require any supports or rafts, but the orientation and layer height is important, and other details are what I will discuss below. The times and material cost are also taking into considering printing that particular .stl alone, but you should be able to print the whole thing at one time.
The assembly should be a very straightforward print, no supports should be necessary, and you shouldn't need any rafts either. Since this is a functional part, the more infill, the better, 20% would probably be the minimum. I also do 5 layers for the top, bottom, and perimeters.

baseBottom.stl
External Fill Pattern: I liked the look of concentric, but it shouldn't matter.
Super easy print and could easily be printed at .3 mm if you wanted to. This part is really strong and doesn't come under much force ever, but giving it a large amount of bottom layers could add some weight to the print which definitely imporves functionality.
baseTop.stl
External Fill Pattern: I liked the look of concentric, but it shouldn't matter.
Since this print has the tiny prongs anything higher than .2 mmm could make them super brittle. If you plan on gluing the model together, then this doesn't matter.
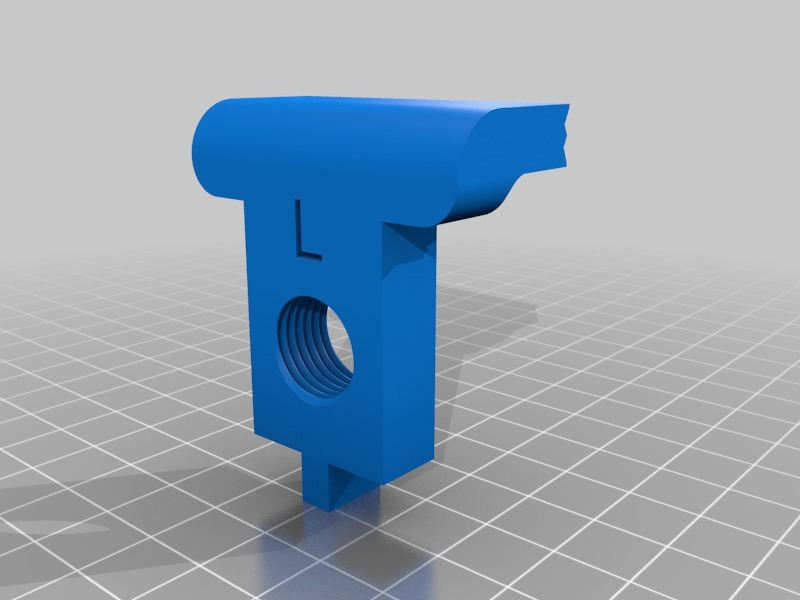
xxxClamp.stl
Since these have threads, I would print them at a small layer height, but since this thread is so large in diameter, you should be able to get away with a bigger layer height.
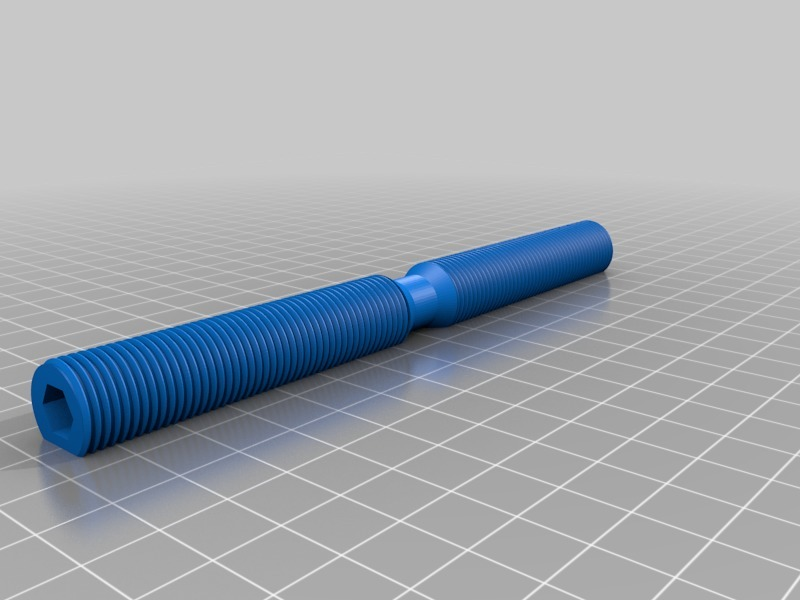
thread.stl
The lower the layer height, the better the thread will turn out. The Ender 3 printed correctly at .1 mm even using a cheap filament. Do keep in mind that this only has about 150 mm^2 of area touching the build platform and if you have a printer where the build platform moves for the x-axis or y-axis 10 hours of moving back and forth can quickly knock it loose. So, if you have issues with prints adhering I would use a raft, and to be safe maybe even print the thread separate from the rest of the assembly.
threadEndKnob.stl
This part can do under a ton of stress when tightening the vice so a high number of perimeter layers is definitely recommended.
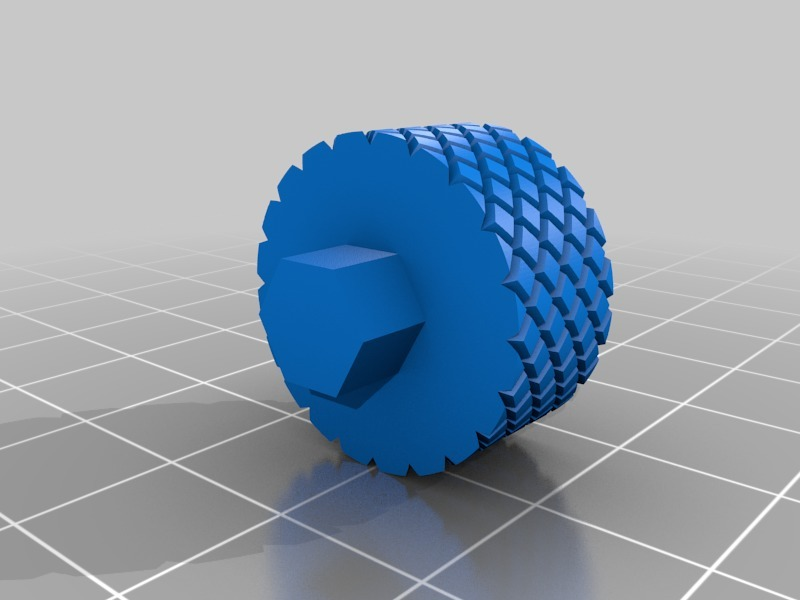
threadEndRound.stl
This part can do under a ton of stress when tightening the vice so a high number of perimeter layers is definitely recommended. The knurling also comes out really well on layer heights less than .20 mm, but should turn out with any layer height.
Entire Assembly at Once, Single Setting
Build time: 7 hours 28 minutes
Plastic weight: 66 g
Layer Height: .15
External Fill Pattern: Concentric
Infill: 30%
These are the settings to use for printing the entire assembly in under 8 hours. This produced a completely functional vice.
Download
Find this Model on my Thingiverse (https://www.thingiverse.com/thing:3448268)
Check out this Project on my GitLab
Check out this Project on my Blog
Images


:format(webp)/https://fbi.cults3d.com/uploaders/13625460/illustration-file/a70138f0-f512-4d09-827e-9824ab8f887e/Oldie_Vice_V2.png)


/https://preview3d-images.cults3d.com/variants/8r3193sezxo54y21ejo8khiooph9/740653c6971db8cfdca21475487b95b09ce19114e42428007af25545a7f8a383)
/https://preview3d-images.cults3d.com/variants/gofr4y3gx1sxpx5mckc3vnrqhefa/740653c6971db8cfdca21475487b95b09ce19114e42428007af25545a7f8a383)
/https://preview3d-images.cults3d.com/variants/7783tv8pnq1vf8hwqnf0cvcfea9q/740653c6971db8cfdca21475487b95b09ce19114e42428007af25545a7f8a383)
/https://preview3d-images.cults3d.com/variants/zzm3hph1b7lusp2voozp2mp3x48r/740653c6971db8cfdca21475487b95b09ce19114e42428007af25545a7f8a383)
/https://preview3d-images.cults3d.com/variants/grdkof4o4ppglwlxxlirgspu8krn/740653c6971db8cfdca21475487b95b09ce19114e42428007af25545a7f8a383)
/https://preview3d-images.cults3d.com/variants/2h76qlppfigepxjbghtavfadcmhy/740653c6971db8cfdca21475487b95b09ce19114e42428007af25545a7f8a383)
/https://preview3d-images.cults3d.com/variants/wklyxjbb9q6gpv3glu3ckjh4565v/740653c6971db8cfdca21475487b95b09ce19114e42428007af25545a7f8a383)


