Skip to content

Fan shroud for Micro-Swiss direct drive (Ender 5)

Advertising
Advertising
?
Creation quality: 5.0/5 (4 votes)
Evaluation of members on the printability, utility, level of detail, etc.

  • 17k views
  • 27 likes
  • 154 downloads
  • 4 comments
  • 2 makes

License
3D design format
STL Folder details Close
  • MLP Fan Shroud V4.stl
  • MLP Fan Shroud.stl
  • MLP Fan cover square.stl
  • MLP Shroud mount V4.stl
  • MLP Shroud mount.stl
  • MLP cable manegement.stl
  • MLP fan cover round.stl
  • MLP hotend fan mount.stl

Learn more about the formats

Last update 2022-08-01 at 00:00
Publication date 2021-05-16 at 01:03
Design number 428048

3D printer file info

3D model description

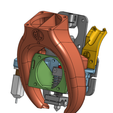
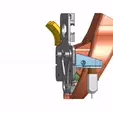
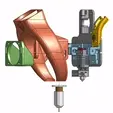
This is a fan shroud l´ve made for my 3D-printer. I own a Creality Ender 5 Pro, modified with a Micro-Swiss direct drive and all metal hotend.I´ve tried several fan shrouds and all of them have had drawbacks that I couldn´t live with. The criteria for me has been.

  1. FOW, I want to see my nozzle and what I am printing.
  2. Good cooling capabilities.
  3. Adjustable in Z.
  4. Easy to print, no supports needed.
  5. Keep it as standard as possible (hotend mounted securly and not in printed parts.
  6. BLTouch mount
  7. Not too heavy.

The fang is adjustable in Z for different nozzles and the hotend fan can also be adjusted in Z.

The offset for the BLTouch is -48, -10.5, -1.500 (be aware and check your Z-offset).
I´ve used PETG for the shroud and mount for the hotend fan. The mount for the part cooling fan shroud iteslf and cable manegement works with PLA.

I am using an axial 40x40x20 fan for both part cooling and hotend, I am aware that the output for an axial fan can be limited compared to centifugal fan but this shroud has a very good throughput of air and has infact outperformed my other shrouds.

I´ve included some fan covers/guards as well.

You gonna need some M3 bolts along with nuts. You also need to thread for M3 screws for the BLT. And some M4 25 mm for the fans (if 40x40x20).

Disclamier, you print and use this at your own risk. I´ve used this for quite some time with no issues what so ever.

3D printing settings

No supports needed, print with the flat sides down. The big shroud should be printed upside down, e.g. the side where you put the 40x40 fan shoud be on your bed. Depending on how good adhesion you got you may need a brim.

0.1 mm layers looks better but 0.2 mm works just as good. I´ve used 15% infill.

The fan guards might need some supports.

Advertising


Issue with this design? Report a problem.

Would you like to support Cults?

You like Cults and you want to help us continue the adventure independently? Please note that we are a small team of 3 people, therefore it is very simple to support us to maintain the activity and create future developments. Here are 4 solutions accessible to all:

  • ADVERTISING: Disable your banner blocker (AdBlock, …) and click on our banner ads.

  • AFFILIATION: Make your purchases online by clicking on our affiliate links here Amazon.

  • DONATE: If you want, you can make a donation via Ko-Fi 💜.

  • WORD OF MOUTH: Invite your friends to come, discover the platform and the magnificent 3D files shared by the community!


Sharing and downloading on Cults3D guarantees that designs remain in makers community hands! And not in the hands of the 3D printing or software giants who own the competing platforms and exploit the designs for their own commercial interests.

Cults3D is an independent, self-financed site that is not accountable to any investor or brand. Almost all of the site's revenues are paid back to the platform's makers. The content published on the site serves only the interests of its authors and not those of 3D printer brands who also wish to control the 3D modeling market.

100% secure payment by credit card, PayPal, Apple Pay, Google Pay, etc.
View all payment options.