Skip to content

MyRCCar Typical Pickup Body 2. Multi-Wheelbase and Multi-Style RC Truck body

Advertising
Advertising
?
Creation quality: 5.0/5 (2 votes)
Evaluation of members on the printability, utility, level of detail, etc.

  • 8.5k views
  • 20 likes
  • 9 downloads
  • 3 collections

License
3D design format
ZIP Folder details Close
  • MRCC__TPB2_2Styles_STLs.zip
    • OLD TPB1 Original Parts/Details/MyRCCar_TPB_Details_Anti-Rolls.stl
    • OLD TPB1 Original Parts/Details/MyRCCar_TPB_Details_FrontProtectionBars.STL
    • OLD TPB1 Original Parts/Details/MyRCCar_TPB_Details_Handles.stl
    • OLD TPB1 Original Parts/Details/MyRCCar_TPB_Details_Lights_Front.STL
    • OLD TPB1 Original Parts/Details/MyRCCar_TPB_Details_Lights_Front_Covers.STL
    • OLD TPB1 Original Parts/Details/MyRCCar_TPB_Details_Lights_Rear.STL
    • OLD TPB1 Original Parts/Details/MyRCCar_TPB_Details_Lights_Rear_Covers.STL
    • OLD TPB1 Original Parts/Details/MyRCCar_TPB_Details_Mirrors.stl
    • OLD TPB1 Original Parts/Details/MyRCCar_TPB_Details_Radiator.stl
    • OLD TPB1 Original Parts/Details/MyRCCar_TPB_Details_SidePlatf_Bars.stl
    • OLD TPB1 Original Parts/Details/MyRCCar_TPB_Details_SidePlatf_Plane.stl
    • OLD TPB1 Original Parts/Details/MyRCCar_TPB_Details_Stickers_Front.stl
    • OLD TPB1 Original Parts/Details/MyRCCar_TPB_Details_Stickers_RearBump.stl
    • OLD TPB1 Original Parts/Details/MyRCCar_TPB_Details_SunCover_Front.stl
    • OLD TPB1 Original Parts/Details/MyRCCar_TPB_Details_SunCover_Sides.stl
    • OLD TPB1 Original Parts/Details/MyRCCar_TPB_Details_Trunk_Normal.STL
    • OLD TPB1 Original Parts/Details/MyRCCar_TPB_Details_Trunk_Stretched.STL
    • OLD TPB1 Original Parts/Details/MyRCCar_TPB_Details_TYP_logo.STL
    • OLD TPB1 Original Parts/MAIN/MyRCCar_TPB_Main_Bed290.STL
    • OLD TPB1 Original Parts/MAIN/MyRCCar_TPB_Main_Bed310.STL
    • OLD TPB1 Original Parts/MAIN/MyRCCar_TPB_Main_BumperFront.STL
    • OLD TPB1 Original Parts/MAIN/MyRCCar_TPB_Main_BumperRear.STL
    • OLD TPB1 Original Parts/MAIN/MyRCCar_TPB_Main_Cab.STL
    • OLD TPB1 Original Parts/MAIN/MyRCCar_TPB_Main_Cab_withSupports.STL
    • OLD TPB1 Original Parts/MAIN/MyRCCar_TPB_Main_Front.STL
    • OLD TPB1 Original Parts/MAIN/MyRCCar_TPB_Main_Front_withSupports.STL
    • MRCC_TPB2_BEDS.rar
    • MRCC_TPB2_CABS.rar
    • MRCC_TPB2_DETAILS.rar
    • MRCC_TPB2_FRONTS.rar
    • OLD Links and Holders/MyRCCar_TPB_Links_Body_FrontBumper.stl
    • OLD Links and Holders/MyRCCar_TPB_Links_Body_Rear.STL
    • OLD Links and Holders/MyRCCar_TPB_Links_Chassis_FrontBumper_23dot5mmLift_MTC_ISversion.stl
    • OLD Links and Holders/MyRCCar_TPB_Links_Chassis_FrontBumper_23dot5mmLift_MTC_RAversion.stl
    • OLD Links and Holders/MyRCCar_TPB_Links_Chassis_FrontBumper_Standard_MTC_ISversion.stl
    • OLD Links and Holders/MyRCCar_TPB_Links_Chassis_Rear_23dot5mmLift_MTC_Bothversions.stl
    • OLD Links and Holders/MyRCCar_TPB_Links_Chassis_Rear_Standard_MTC_ISversion.STL

Learn more about the formats

Publication date 2021-05-18 at 13:33
Design number 429990

3D printer file info

3D model description

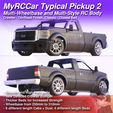
This time I bring you a very much more complete version of the Typical Pickup Body.

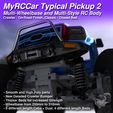
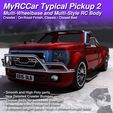
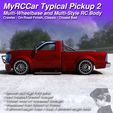
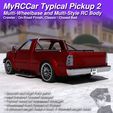
I have created variations for various of the parts, including the front and front bumper, the cabin or the bed. With them, you will be able to build many different wheelbase "Typicals", ranging from 250mm wheelbase to 310mm for On-Road, Truggy, Crawler or Monster builds.

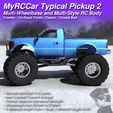
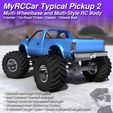
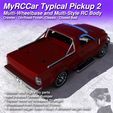
You can see a 3D scan of a Typical Pickup with Crawler Front and Bumper, 260 short Cab, and Closed On-Road Style Bed, over a MyRCCar KIDS Chassis

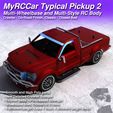
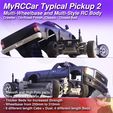
Take a look to the Classic Typical Pickup, with its dual Cab, The Classic front and Classic Open Bed, also included

FEATURES

Multi-Wheelbase:

Choosing different cabin and bed lengths you will be able to achieve your desired wheelbase, in steps of 5mm. That means 250, 255, 257, 260, 262, 265, 267, 270, 272, 275, 277, 280, 282, 285, 290, 295, 300, 305 and 310mm wheelbases.
How you choose the right parts?ΒΏ? The Cabin files are named with the wheelbase you get if you use the "short" bed, the standard one. So you will find cabins from 250 to 265mm and the "old" dual cab for 290mm weheelbase. Once you have the cabin, you will be able to increase the wheelbase 5, 10, 15 or 20mm using larger beds.
As an example, you can choose a 260mm cabin and use the +20mm bed to have 280mm total wheelbase, but also with a 265mm cab and +15mm bed.

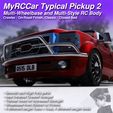
On-Road / Crawler styles:

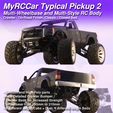
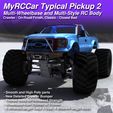
But that "multi-wheelbase" feature is not the only thing you can choose. The body should adapt to "On-Road" or "Crawler" Styles choosing the right front and bed parts. The space for the wheels will be much more bigger in the "crawler" style parts. The same way, a special "crawler bumper" can be mounted within the "crawler front".

Closed / Classic beds:

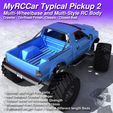
The elections doesn't finish there... you can now also choose for "closed" or "classic" beds... The first ones will let you mount your body in a lower position because there is much more space "inside the bed" for your chassis. The classic style bed will be better for "high positions" of the body over the chassis, normally in a crawler or monster setup.

Pro Smooth:

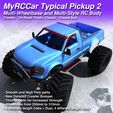
After learning how to correctly smooth from low-poly I have invested quite an amount of time smoothing the parts so you can now have the best desired finish for the outer of the car body.

Better thickness:

Specially for the bed part, I have increased the thickness from 1mm to 1.6mm. That way, now you can print it with 2 perimeters of 0.4mm. Now the bed part is only one mesh, pre "booled" so you don't have to do nothing to correctly print it.
The same way, in all the "short" cabs, not the dual-cab one, I have thinned a little the part in some places to make it a little lighter.

Compatibility:

In my last chassis designs I have added the "Universal Body Holding System". Basically two PLA screwing body posts which screws in a TPU part, which is holded by another PLA part, attached to the chassis. The result is a holding system very similar to what you find commercially, but with the plus of the TPU part which will absorb a lot of stress between chassis and body. You will be able to use longer or shorter screwing body posts and regulate the height, but also put the holders to the front or back of the body a few mm to better adapt the final build, just using some "spacers".
This will require making the holes to the body after printing in the position you want for your build. But doing this, you will be able to use sourced chassis as well.

OTHER CONSIDERATIONS:
- Not always aligning correctly the chassis axles with the body space for axles is the best fit. For example for big wheels like monster / crawler ones, I have longer chassis wheelbase than body wheelbase. In fact, a 260mm body over 275mm chassis let the front wheels to be displaced forward. That way they don't hit the "crawler bumper" when steering in and when steering out the inner wheel better uses the space for the wheel in the body.
- If you want to use big wheels I recommend the Crawler config, but also if you are going to build a MTC Chassis for it, use the longest CVDs, the HSP 188015 ones for the best clearance when steering and using suspension system same time.
- Please, if you like my work, consider uploading photos of your 3D printed design as a very good way to help me.

3D printing settings

  • All the parts can be printed in a 200x200x200 building volume 3D printer but for the two longer beds.
  • The big parts has been tested in 0.2mm layer heights. I use smaller layer heights between 0.08 and 0.16mm for some of the smaller parts.
  • Recommended little higher extruder temps than normally to improve / ensure a good inter-layer adhesion for stronger parts
  • Recommended TPU material for parts like mirrors, protection bars, side stepper structures or front bumper bar parts for better durability
  • Try to keep all loops/perimeters start/end points in the inshell of the big body parts. If you need it, indicate a start/end XY point in your slicer to achieve this. Will lead in some more travels but you won't have retractions in the outer-shell
  • The big parts will be specially long prints. Ensure a good first layer, maybe over-squeezing a little the first layer, rising your bed temp and/or using special tapes or sprays

Supports:
I always try to reduce the supports needed in my designs, specially for the big parts, which depending of printing position would need a lot of supports, a little or none at all.
The bed parts can be printed without supports. Just put over the table the surface that will contact the cabin. It is plain and it has been designed to be printed like that.
For the cabin and the front I supply both the "pre-supported" versions with a solid where supports should be, and the un-supported version so you can add your own supports.
The supports I made are separated in Z from the part 0.2mm... If you can, ensure reviewing the preview that the support and the part are never "connected" and use a different printing process for that support part, maybe with 1 wall, 15% infill and 2 top layers. But if you trust your slicer supports, just try to add them in the same place than the ones I created

Advertising


Issue with this design? Report a problem.

Would you like to support Cults?

You like Cults and you want to help us continue the adventure independently? Please note that we are a small team of 3 people, therefore it is very simple to support us to maintain the activity and create future developments. Here are 4 solutions accessible to all:

  • ADVERTISING: Disable your banner blocker (AdBlock, …) and click on our banner ads.

  • AFFILIATION: Make your purchases online by clicking on our affiliate links here Amazon.

  • DONATE: If you want, you can make a donation via Ko-Fi πŸ’œ.

  • WORD OF MOUTH: Invite your friends to come, discover the platform and the magnificent 3D files shared by the community!


Sharing and downloading on Cults3D guarantees that designs remain in makers community hands! And not in the hands of the 3D printing or software giants who own the competing platforms and exploit the designs for their own commercial interests.

Cults3D is an independent, self-financed site that is not accountable to any investor or brand. Almost all of the site's revenues are paid back to the platform's makers. The content published on the site serves only the interests of its authors and not those of 3D printer brands who also wish to control the 3D modeling market.

100% secure payment by credit card, PayPal, Apple Pay, Google Pay, etc.
View all payment options.