Skip to content

Leapfrog Creatr - Reorient the Capacitive Z End Stop Sensor

Advertising
Advertising
?
Creation quality: 0.0/5 (0 votes)
Evaluation of members on the printability, utility, level of detail, etc.

  • 341 views
  • 1 download

License
3D design format
SKP and STL Folder details Close
  • Creatr_Sensor_C.skp
  • Creatr_Sensor_C.stl

Learn more about the formats

Publication date 2021-06-02 at 23:01
?
Published to Thingiverse on: 2013-06-18 at 20:50
Design number 442558

3D printer file info

3D model description

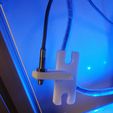
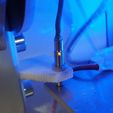
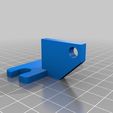
The original holder for the z end stop capacitive end stop sensor on the Leapfrog Creatr is aligned on the side, which has the bed approach at a side glance. This modification reorients the sensor to have the bed properly approach it directly, eliminating the chance of the sensor failing to register the bed, and improving the repeatability and accuracy of Z homing.

3D printing settings

Print without supports. I made mine with 100% infill for better strength.

Remove the side panel of the Creatr with a 2mm allen wrench (4 bolts) and set aside.

Turn the printer off (or send M84 command) and lower the build plate to about half way down by moving the belt.

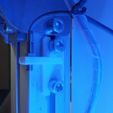
Remove the z-sensor by removing the two bolts that hold it in place with a 6mm allen wrench. If you are careful, you can re-insert the bolts into their nuts as you go, preventing them from falling out.

Loosen the z-sensor with a 7mm open end wrench and twist it out of the aluminum bracket it is in. Screw the sensor into the new plastic bracket, noting that the end of the sensor should face down when installed. Do not tighten the sensor yet, just snug.

Partially thread the bolts back into the nuts so they are loosely attached. Slip the bolts into the plastic bracket, they should almost "click" into place. Slide the bracket and bolts all the way to the top, and snug down the bolts.

Turn the machine back on and raise the build plate until it is in the proper location. Loosen the bolts and slide the bracket to where it lights the sensor at the correct height.

Tighten the bolts in the bracket and the nut on the sensor. Lower the build plate, and send the z-home command (G28 Z).

It may take a few tries to get it exactly correct, but once it is you should not have to mess with it any more!

Sketchup source file included, note that I needed to clean it up (holes) after exporting to STL, so be careful using it.

Advertising


Issue with this design? Report a problem.

Would you like to support Cults?

You like Cults and you want to help us continue the adventure independently? Please note that we are a small team of 3 people, therefore it is very simple to support us to maintain the activity and create future developments. Here are 4 solutions accessible to all:

  • ADVERTISING: Disable your banner blocker (AdBlock, …) and click on our banner ads.

  • AFFILIATION: Make your purchases online by clicking on our affiliate links here Amazon.

  • DONATE: If you want, you can make a donation via Ko-Fi πŸ’œ.

  • WORD OF MOUTH: Invite your friends to come, discover the platform and the magnificent 3D files shared by the community!


Sharing and downloading on Cults3D guarantees that designs remain in makers community hands! And not in the hands of the 3D printing or software giants who own the competing platforms and exploit the designs for their own commercial interests.

Cults3D is an independent, self-financed site that is not accountable to any investor or brand. Almost all of the site's revenues are paid back to the platform's makers. The content published on the site serves only the interests of its authors and not those of 3D printer brands who also wish to control the 3D modeling market.

100% secure payment by credit card, PayPal, Apple Pay, Google Pay, etc.
View all payment options.