Skip to content

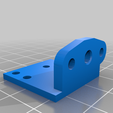
BL Touch Anet ET Series ET5x, ET5 Pro, ET4, ET4 Pro

Advertising
Advertising
?
Creation quality: 5.0/5 (1 vote)
Evaluation of members on the printability, utility, level of detail, etc.

  • 10.2k views
  • 80 downloads

License
3D design format
STL and TXT Folder details Close
  • BL_Touch_ET5x.stl
  • CODE.txt

Learn more about the formats

Publication date 2021-06-27 at 00:14
?
Published to Thingiverse on: 2021-06-26 at 02:53
Design number 459724

3D printer file info

3D model description

Support on print table only!

As I couldn't find any Design to put BLTouch on my printer I simply decided to create it myself.

I made it for my Anet ET5x but I believe that every one with a level sensor supports this design. As I don't have much knowledge of modeling I did it in Tinkercad.


First of all, read this project and understand how it works: https://github.com/davidtgbe/Marlin/blob/bugfix-2.0.x/docs/Tutorials/bltouch-en.md

Don't forget to leave the piece I created already printed before starting to make it if you don't have another accessible 3D printer, which was my case. Just in case print twice.

After reading and understanding how it works and what it should do, I will say in my words how I did it.


Remember that your printer must have the Bootloader 'unlocked' and you must have a minimum knowledge of the Marlin firmware, follow the link to all documentation: https://github.com/davidtgbe/openblt
This should help: https://youtu.be/qPDBNBgdW6o

Bearing in mind that you have already done this and your firmware is already configured correctly for your Anet ETx model, let's get down to business.


  1. First, I removed the two components from the motherboard that the documentation specifies and closed the printer:
    https://raw.githubusercontent.com/davidtgbe/Marlin/bugfix-2.0.x/docs/Tutorials/media/mb-with-cr.jpg

  2. I solder a new connector (JST connector on S-Z) that doesn't come because it isn't used, as the printer comes with a level sensor.
    https://raw.githubusercontent.com/davidtgbe/Marlin/bugfix-2.0.x/docs/Tutorials/media/adapter-board-et5.jpg

  3. As you've already seen in the project, you need to use a Step-Down to transform 24v to 5v, I used pins 4/16 and 2/14 of the connectors board directly in Step-Down and Step-Down for GND and VCC from BLTouch and pin 3 straight to BLTouch, I didn't use the Y cable that the project mentions, I didn't think it was necessary. Basically I made a cable with Step-Down in the wiring. The pinout documentation is in the mentioned project. https://raw.githubusercontent.com/davidtgbe/Marlin/bugfix-2.0.x/docs/Tutorials/media/adapter-board-et5.jpg

  4. I fixed my Step-Down with a plastic clamp using a case I got here at Thingiverse, you can see how it looks in the pictures below, the model was this: https://www.thingiverse.com/thing:1625233

  5. After making the 3-pin connector cable part, solder a JST 2-pin connector to connect the BLTouch to the S-Z connection following the documentation

  6. Now install the BLTouch with the 3D model I created, use the springs that come with the BLTouch to be able to adjust if it is too far from the bed. When installing the bracket, the screw will probably not screw at first, as it has no thread, to screw it I heated the tip of the screw with a lighter and slowly screwed it in, without deforming the hole, just making the thread, do it carefully and slowly so as not to spoil the piece, if you do this, everything will be fine.

  7. After installing everything, connecting the cables, checking the connections so as not to damage anything and using the Step-Down case not to touch any iron and damage your printer, it's time to edit the Firmware.

  8. In the BLTouch documentation it asks to edit certain things that are actually not well specified, there are things missing. I'll let the code follow everything I edited for BL Touch to work correctly. The code is at the end of the description page.

  9. After writing the firmware, raise the Z and do the homing, use your finger on the BLTouch to test, as we don't want to have any problems.

  10. Calibrate the Z Offset like any other sensor.

  11. Now take a picture and post how it looks! <3

CODE: I put the code in the .TXT file

Source:

https://github.com/davidtgbe/Marlin/blob/bugfix-2.0.x/docs/Tutorials/bltouch-en.md
https://www.mundoanet.es/search/label/BlTouch

3D printing settings

-

Advertising


Issue with this design? Report a problem.

Would you like to support Cults?

You like Cults and you want to help us continue the adventure independently? Please note that we are a small team of 3 people, therefore it is very simple to support us to maintain the activity and create future developments. Here are 4 solutions accessible to all:

  • ADVERTISING: Disable your banner blocker (AdBlock, …) and click on our banner ads.

  • AFFILIATION: Make your purchases online by clicking on our affiliate links here Amazon.

  • DONATE: If you want, you can make a donation via Ko-Fi πŸ’œ.

  • WORD OF MOUTH: Invite your friends to come, discover the platform and the magnificent 3D files shared by the community!


Sharing and downloading on Cults3D guarantees that designs remain in makers community hands! And not in the hands of the 3D printing or software giants who own the competing platforms and exploit the designs for their own commercial interests.

Cults3D is an independent, self-financed site that is not accountable to any investor or brand. Almost all of the site's revenues are paid back to the platform's makers. The content published on the site serves only the interests of its authors and not those of 3D printer brands who also wish to control the 3D modeling market.

100% secure payment by credit card, PayPal, Apple Pay, Google Pay, etc.
View all payment options.