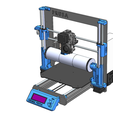
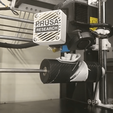
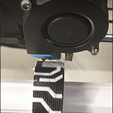
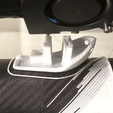
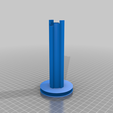
A Mod to print on the face of a cylinder. Made for a Prusa.
No changes needed to the existing printer or firmware.
Roll can be taken of by removing a few bolts.
This is pure experimental, might be helpful for some parts.
(Like multicolor, the exterior face)
I still need to make some clips to mount the belt to the bed (I do it with glass bed clips atm)
#Pros:#
- Roller is mounted parallel to the X axis, so no leveling is needed.
- Printing on a 3D printed roll, so no heat bed needed.
- Able to print in another orientation, might be interesting to eliminate support.
- If used ironing feature, the exterior might get buttery smooth.
#Cons:#
- Unable to home in Z with the probe, Have to move manually to Z0 and tell it with G92 Z0 (for now)
- Y dimension gets stretched the higher Z gets, which causes under extrusion in Y, not in X
- Bridging is difficult as it is a curve now instead of a line.
- Generating an unwrapped model of what our final product might be, is difficult.
#Hardware
needed:#
1x 8mm Rod +- 30cm
5 x Ball bearing 22mm OD, 8mm ID , 7mm
2x (or 4x) Smooth pulley OD 13mm ,ID 3mm
8x M3 bolt +-15mm
4x M3 hex nut
4x GT2 belts +- 400mm
#How
to print...#
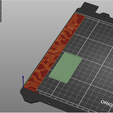
You can use a normal slicer, it will print the XY area wrapped around the roll. But some changes are needed, so perhaps it's smart to make a duplicate configuration.
We can't use the Z end stop, So we have to remove the mesh bed leveling and homing in the start g code in the slicer.
We then have to move the nozzle manually in z, so the nozzle just touches the roll. Furthermore, we insert a G92 Z0 command in the start script to tell the printer that the current height is at 0.
X and Y homing might work, but I've also moved the bed and extruder to 0 and added it to the G92 code (G92 X0 Y0 Z0) for testing.
(but beware if crash detection is enabled it will rehome on a crash and the manual XY 0-position will be lost.)
We lose some length in Z, So beware the printer doesn't know what it's doing, so it will try to go where it can't go :p
If we want to print a fully continuous cylinder, we have to match the Y dimension of our model, with the length the bed has to travel to rotate the roll 360°. Simply scale Y to the desired length (this depends on the diameter of the roll we print on and the gear on the roll.) I've chosen the diameter of the gear, so 360° will be almost the full length of the bed.
!Move the bed to 0 and draw a line somewhere on the gear, Manually move the bed via the LCD until the gear rotated 360° and the screen will tell you the Traveled Y length !
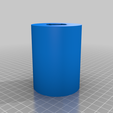
We disable bed heating (value 0) in the slicer because our printed plastic will bond to the printed roll. It will be very hard to remove the print from the roll, so perhaps some painters tape or difference in material, so it will stick, but not to hard. You can also use support and break it off. (That's why there are cylinders you can take of because those might need a change) Make sure you bridge on the support in the X direction (those are still straight extrusions while Y extrusion will be curved and won't go well)
I'd say, Try it, see what you can do with it, If you have questions I'll hear it from you guys ;)
Happy Printing!

/https://fbi.cults3d.com/uploaders/13808144/illustration-file/81cd6803-69f9-4394-829e-a2846613aede/223239639_1210110869505247_6598020043964140080_n.png)
