My entry for the
#ANYCUBICGARDEN
contest. Like this design if you want to see it win and see more on this project in the future!
I had been considering a cnc based gardening machine ever since I saw the FarmBot. There were two reasons that this design didn't work for me out of the box though. My first constraint was that I really wanted something slightly smaller that would work indoors. Problem number two is the cost. I suspect that with the FarmBot you are paying for a more tailored experience, but the reality is that most of necessary components are really quite cheap and, if it's running indoors, any sort of added cost around waterproofing components becomes a rather moot point.
So where does that lead us? I'm presenting a variation here called the GardenBot.
The GardenBot relies on more off the shelf components and 3d printed parts to reduce the cost and make it more flexible so the machine can be sized to fit what size you have available. It is also designed to be compatible with software from the FarmBot so it can leverage their open source code.
This is still a work in progress, but you can see the designs, parts lists (which may be incomplete or updated in future iterations), the current development iterations of the models (which may or may not all be correct so feel free to use at your own risk), and the progress on my build.
Parts
2 - Closet door hardware
1 - Boroscope camera (https://www.amazon.com/dp/B071HYRPND/ref=cm_sw_r_apan_glt_fabc_N0M3MJPRH2NBZRRFNEY8?_encoding=UTF8&psc=1)
2 - Soil moisture sensor (https://www.amazon.com/dp/B07QXZC8TQ/ref=cm_sw_r_apan_glt_fabc_HAPE5WQSQD00HHSS47HE?_encoding=UTF8&psc=1)
1 - Motor for auger (https://www.amazon.com/dp/B01LZYWFE4/ref=cm_sw_r_apan_glt_fabc_AJ9K2GRYCTZPMD2QGG20?_encoding=UTF8&psc=1)
1 - Motor for weed whacker (https://www.amazon.com/dp/B08662QSZL/ref=cm_sw_r_apan_glt_fabc_XYHZZWH6T0W1ARF9DHCT?_encoding=UTF8&psc=1)
1 - Vacuum pump (https://www.amazon.com/dp/B08ZBFK8SS/ref=cm_sw_r_apan_glt_fabc_18CPTPGK173WVD139HD7?_encoding=UTF8&psc=1)
1 - Solenoid valve (https://www.amazon.com/dp/B07X287BSX/ref=cm_sw_r_apan_glt_fabc_DB5CA4Q5275TTF9V355A?_encoding=UTF8&psc=1)
4 - NEMA17 60mm stepper motors (https://www.amazon.com/dp/B00QGBUO1C/ref=cm_sw_r_apan_glt_fabc_NSMZT2RB2J2W7KE02J9Z?_encoding=UTF8&psc=1)
1 - Power supply (https://www.amazon.com/dp/B09B8PT4WN/ref=cm_sw_r_apan_glt_fabc_4P6ZF1W1RVVB08KA68SF?_encoding=UTF8&psc=1)
1 - Rpi 3b+ (https://www.amazon.com/dp/B07BDR5PDW/ref=cm_sw_r_apan_glt_fabc_N80BXRH802R4NXPBSW0W?_encoding=UTF8&psc=1)
Push buttons (https://www.amazon.com/dp/B07F24Y1TB/ref=cm_sw_r_apan_glt_fabc_X95X9KJ6MTCA4BJJANJX?_encoding=UTF8&psc=1)
Tubing for vacuum and solenoid (https://www.amazon.com/dp/B07V3N7K85/ref=cm_sw_r_apan_glt_fabc_GPG9AJX2JX68WBVWJ965?_encoding=UTF8&psc=1)
Plant grow light strips (https://www.amazon.com/dp/B0876VPW23/ref=cm_sw_r_apan_glt_fabc_60WMVQMWZR6ZPP5Q1R5F?_encoding=UTF8&psc=1)
Light strip (https://www.amazon.com/dp/B07JDGR4K6/ref=cm_sw_r_apan_glt_fabc_NE9AVVNSEAJB7BQ8C1SS?_encoding=UTF8&psc=1)
Arduino Mega and RAMPS (RAMPS: https://www.amazon.com/dp/B06XZ46PDJ/ref=cm_sw_r_apan_glt_fabc_67HMZP66N0MZHGMRXGDQ?_encoding=UTF8&psc=1)
Stepper motor drivers (https://www.amazon.com/dp/B082LSQWZF/ref=cm_sw_r_apan_glt_fabc_9KH1408SA7ZXNV8VJCNP?_encoding=UTF8&psc=1)
Screw/nut mounting hardware
GT2 timing belts
3D printed parts list
Coming soon
Information on my build
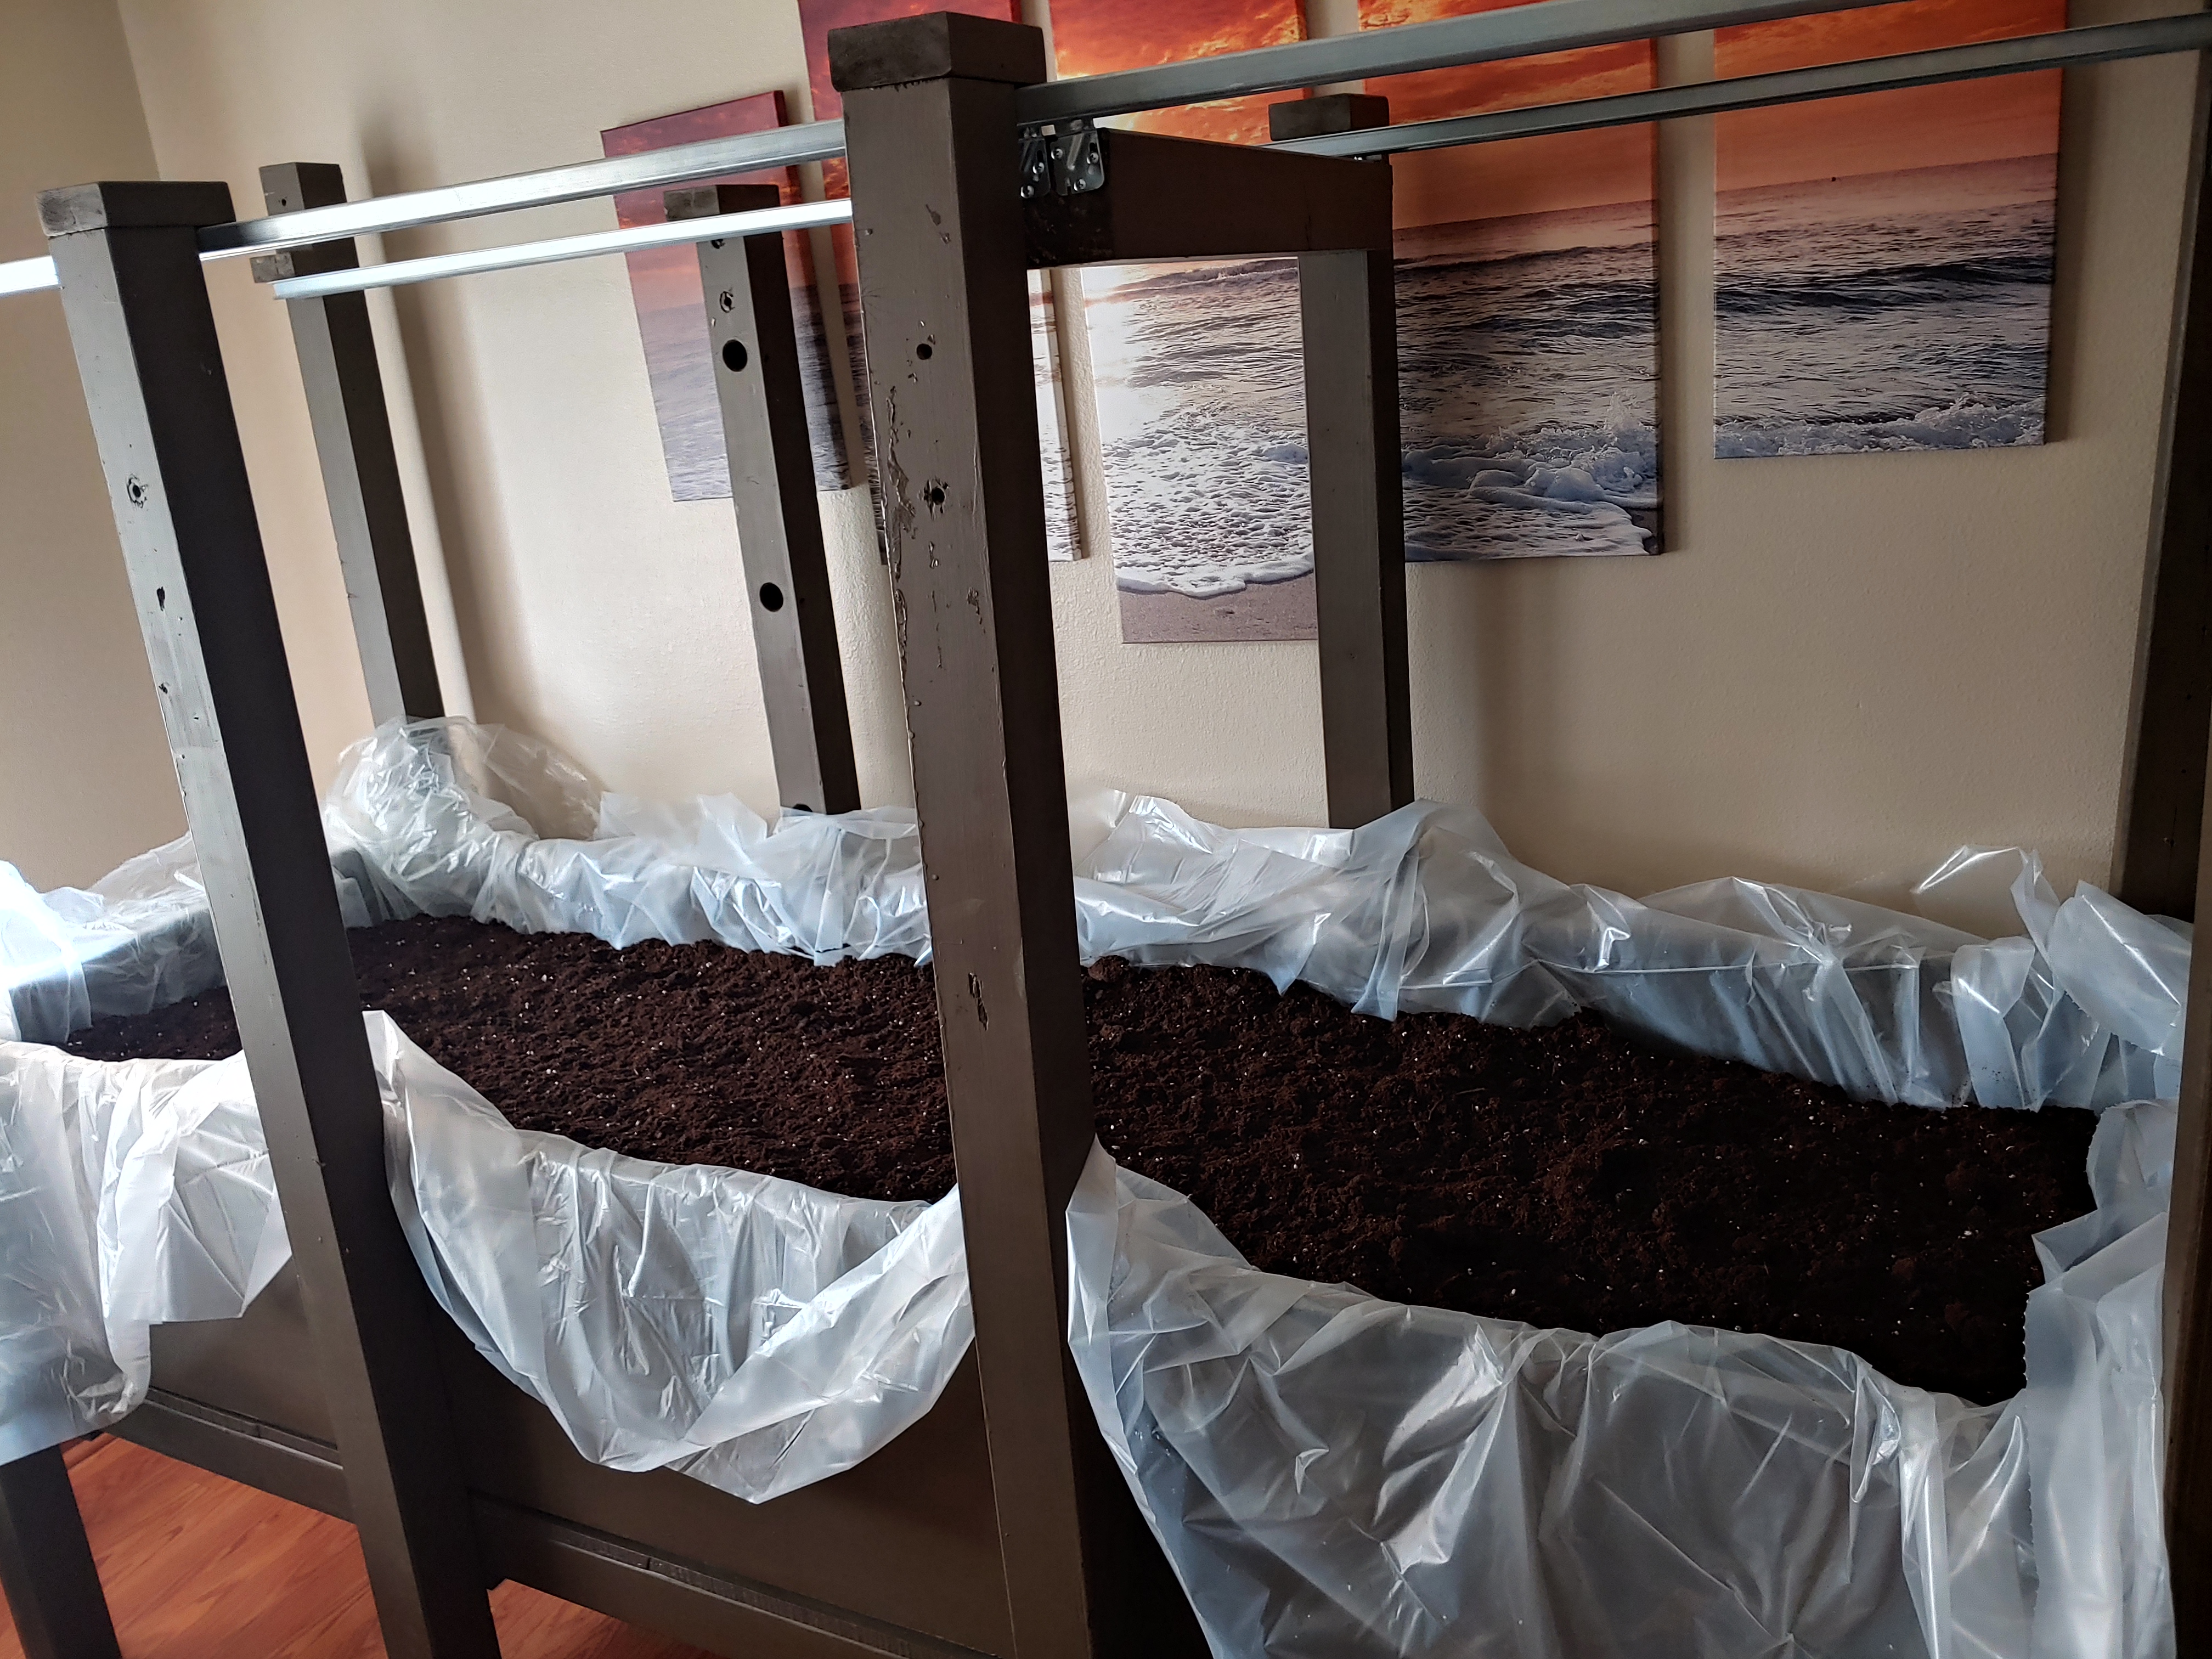
I have opted for a 2 1/2 by 8 foot bed. This gives me enough space to grow a decent amount and experiment with various garden cnc functionality, but still fits along a wall in my house.
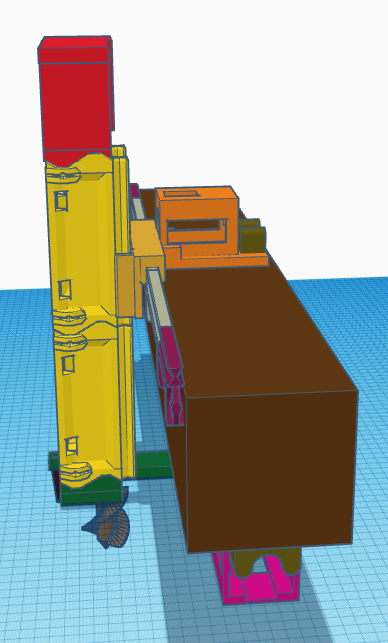
Design
I wanted to first give a shout out to Revarbat for his work on the RepRap Snappy. A decent amount of the parts are based on or incorporate pieces from models he originally designed. This allowed me to iterate on my design much more quickly. I have had experience with the Snappy in the past and have actually devised my own version of that for another project called the FrankenSnappy (https://www.thingiverse.com/thing:4571980).
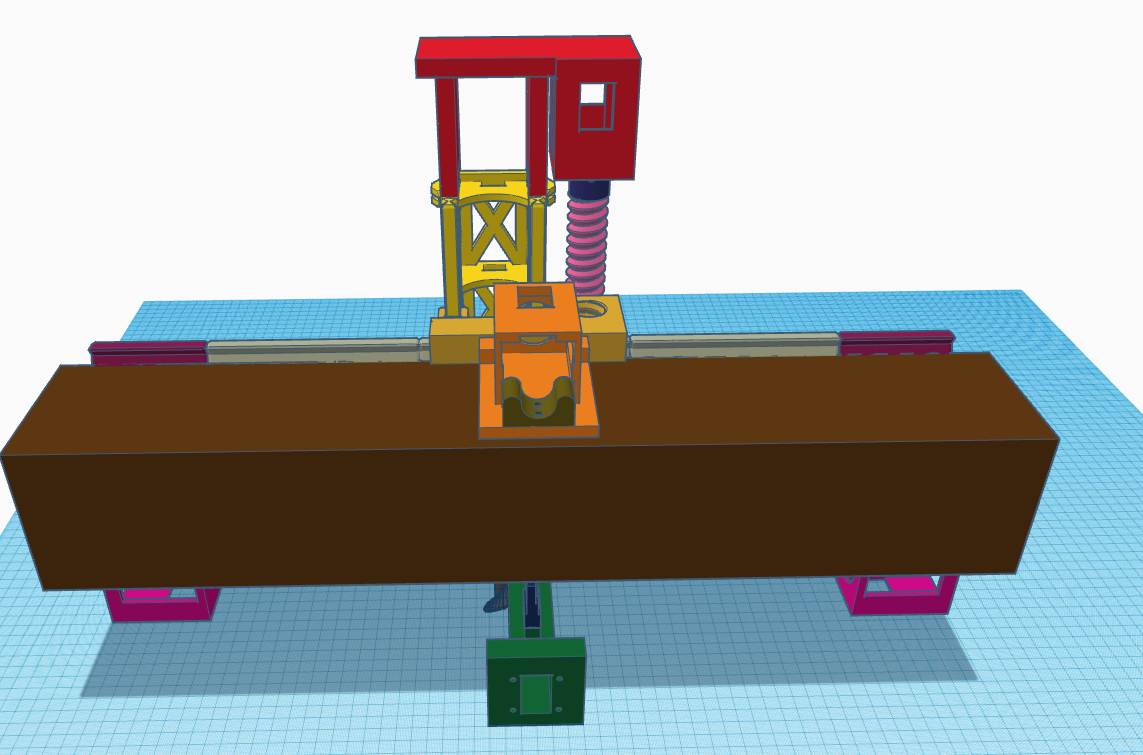
The tool head, X axis, and Z axis are all 3d printed. The fact that the X and Z axes are printed means that you can snap together as many parts as you want to create the axis size you are looking for. There are a few supplemental parts that are 3d printed as well such as motor mounts, pulley tensioners, seed holders, etc. These parts are fairly simple and cheap to print and shouldn't require any supports. Everything was printed at a 20% infill except the print head and the auger, which are 75% infill.
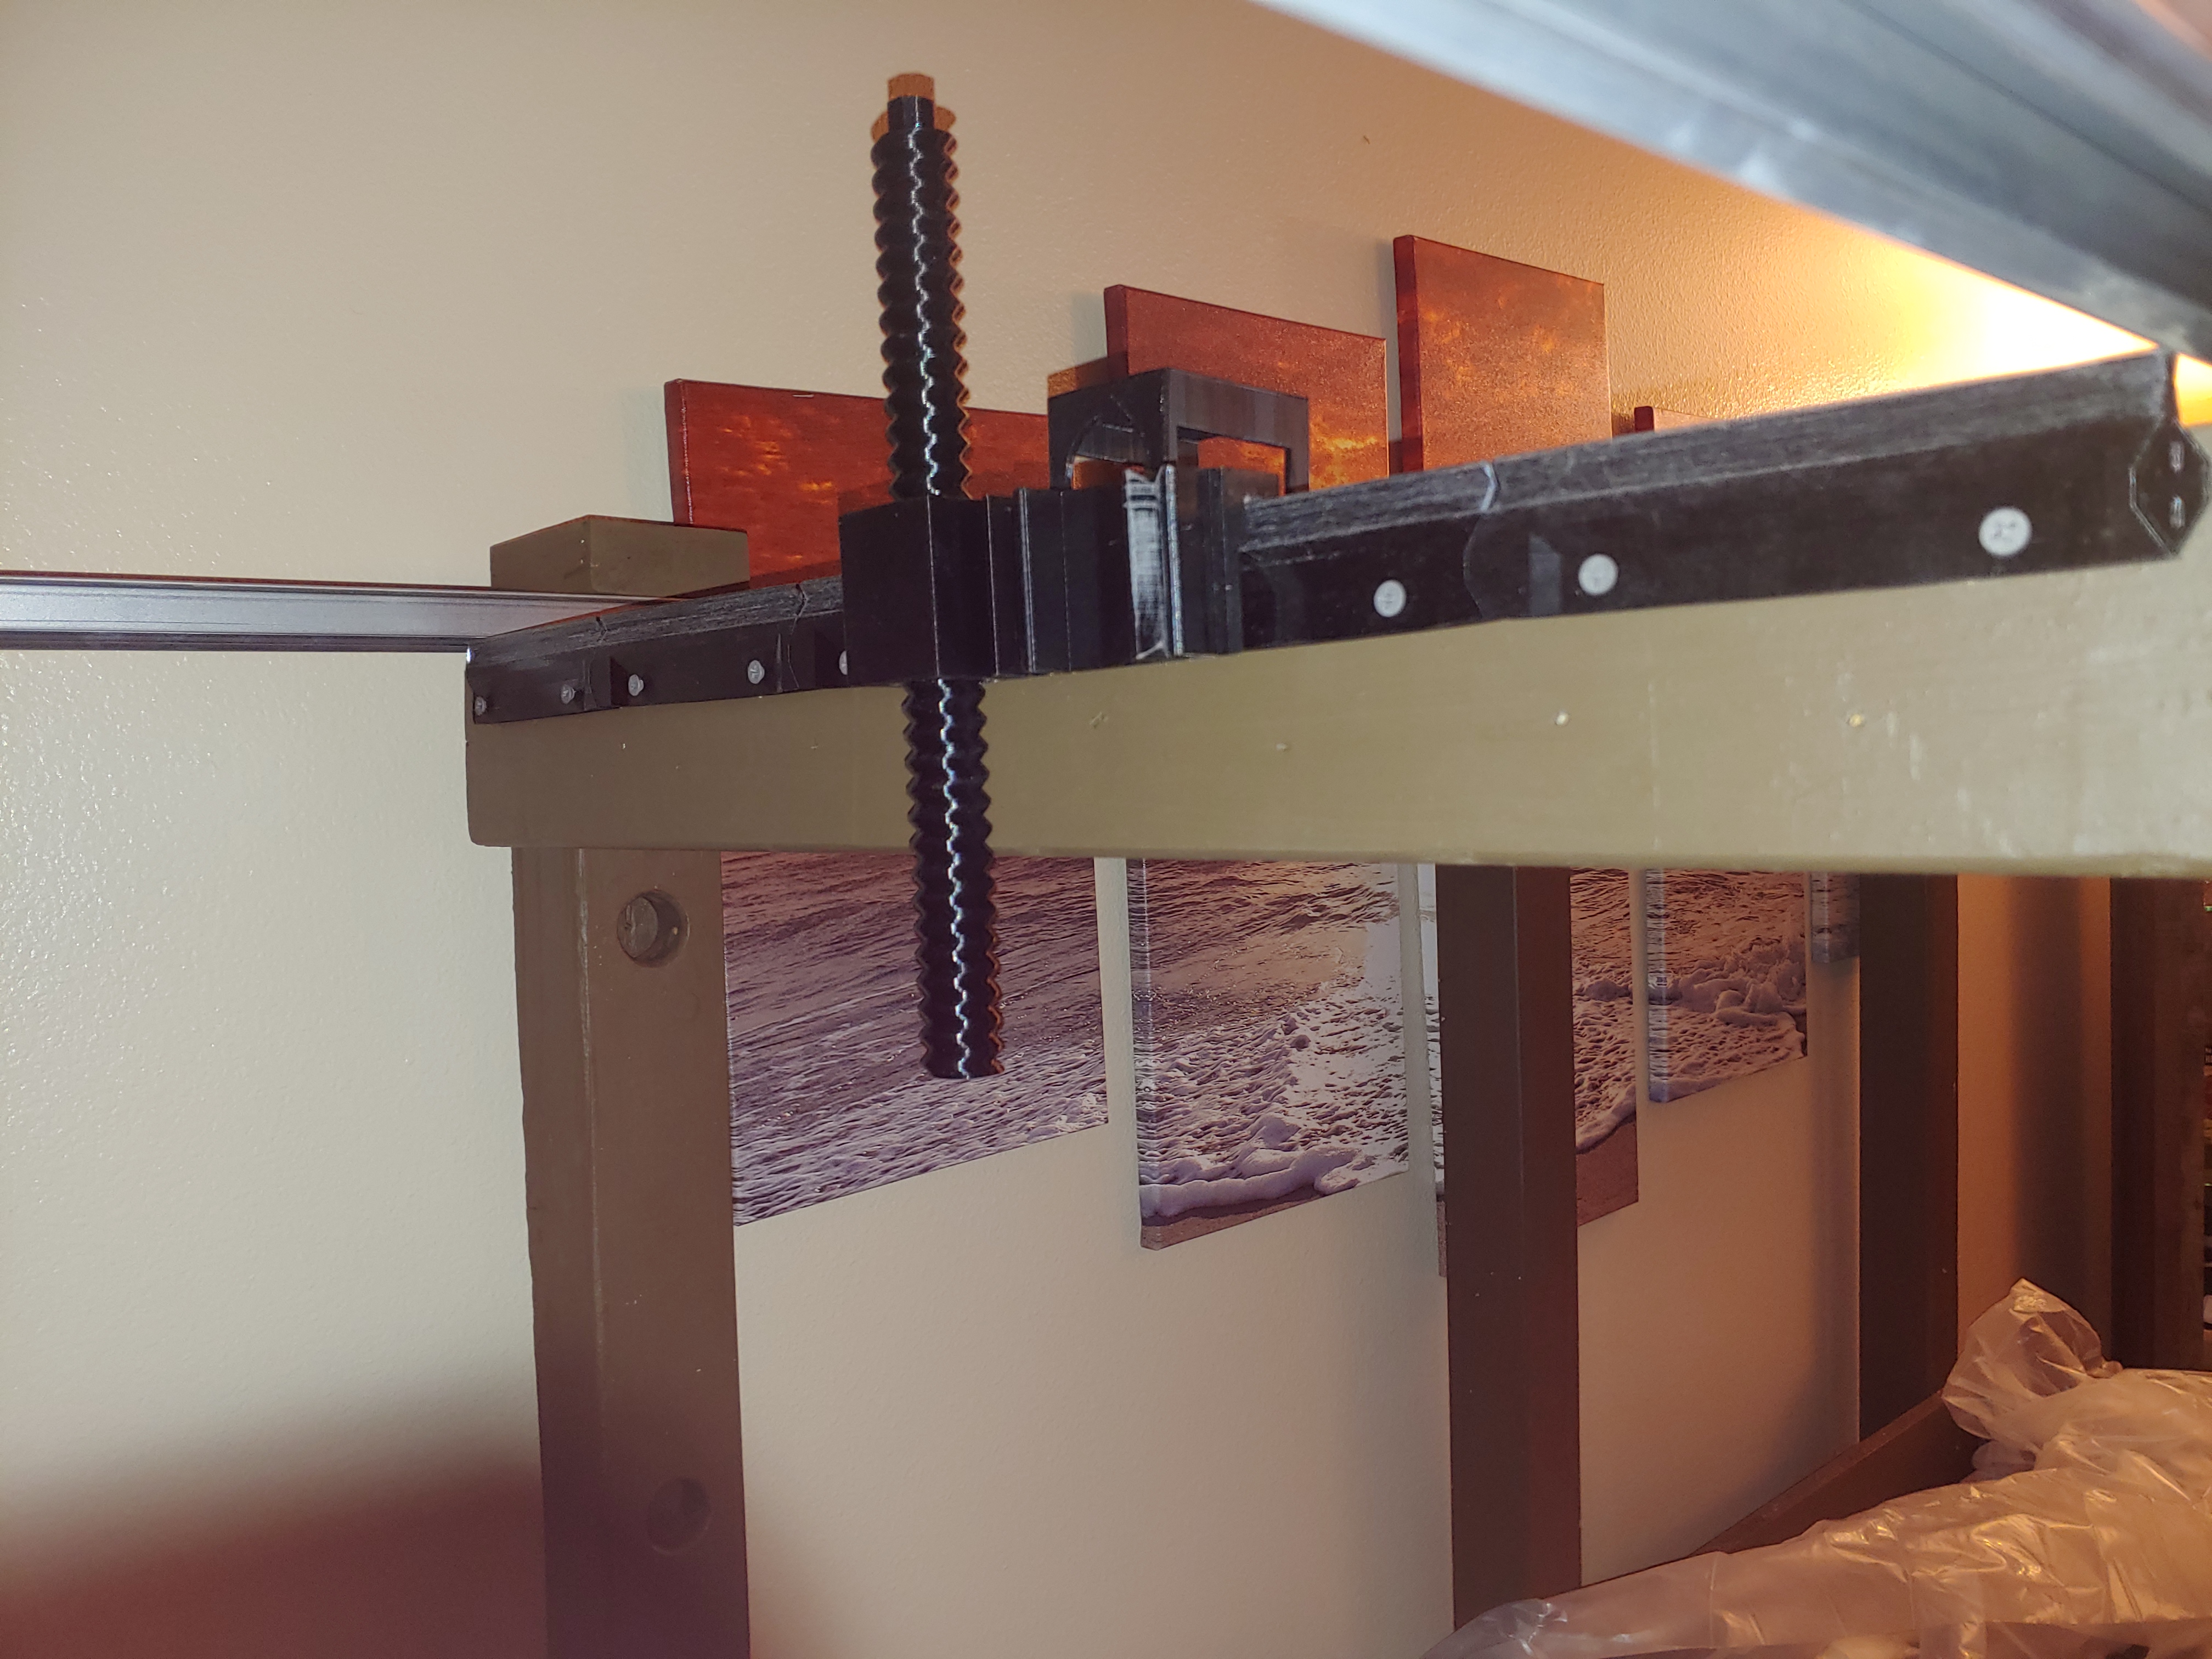
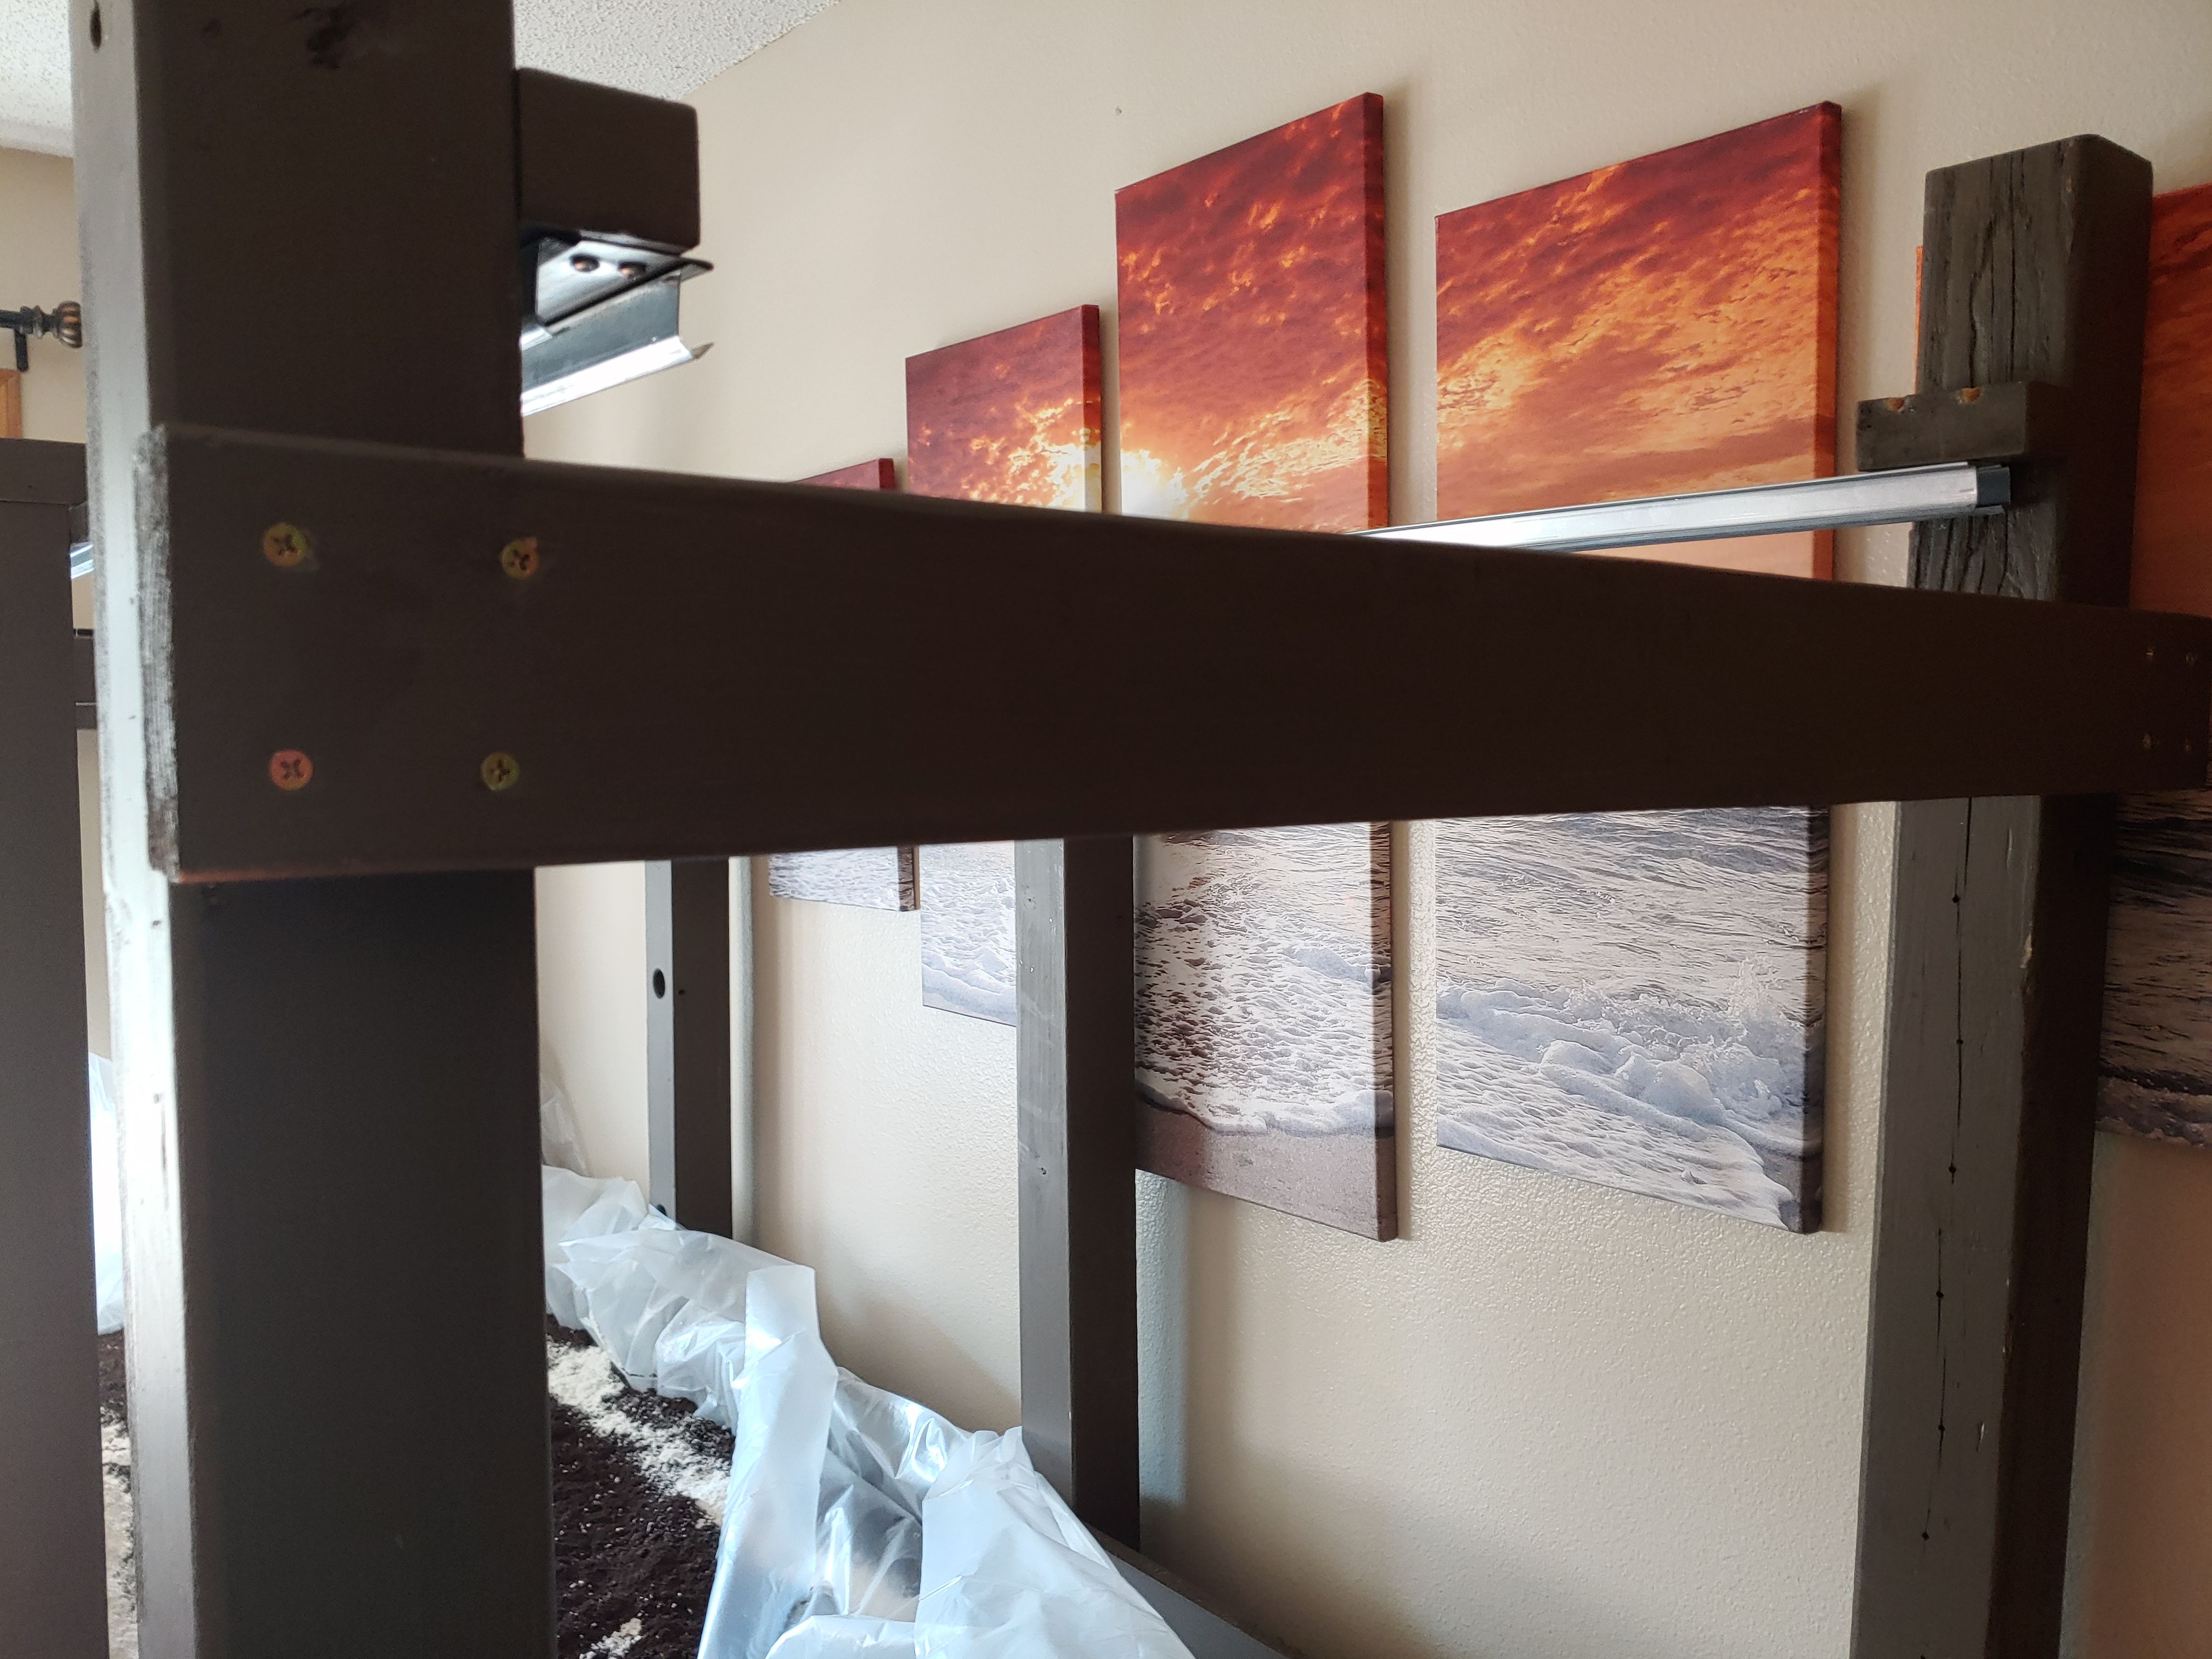
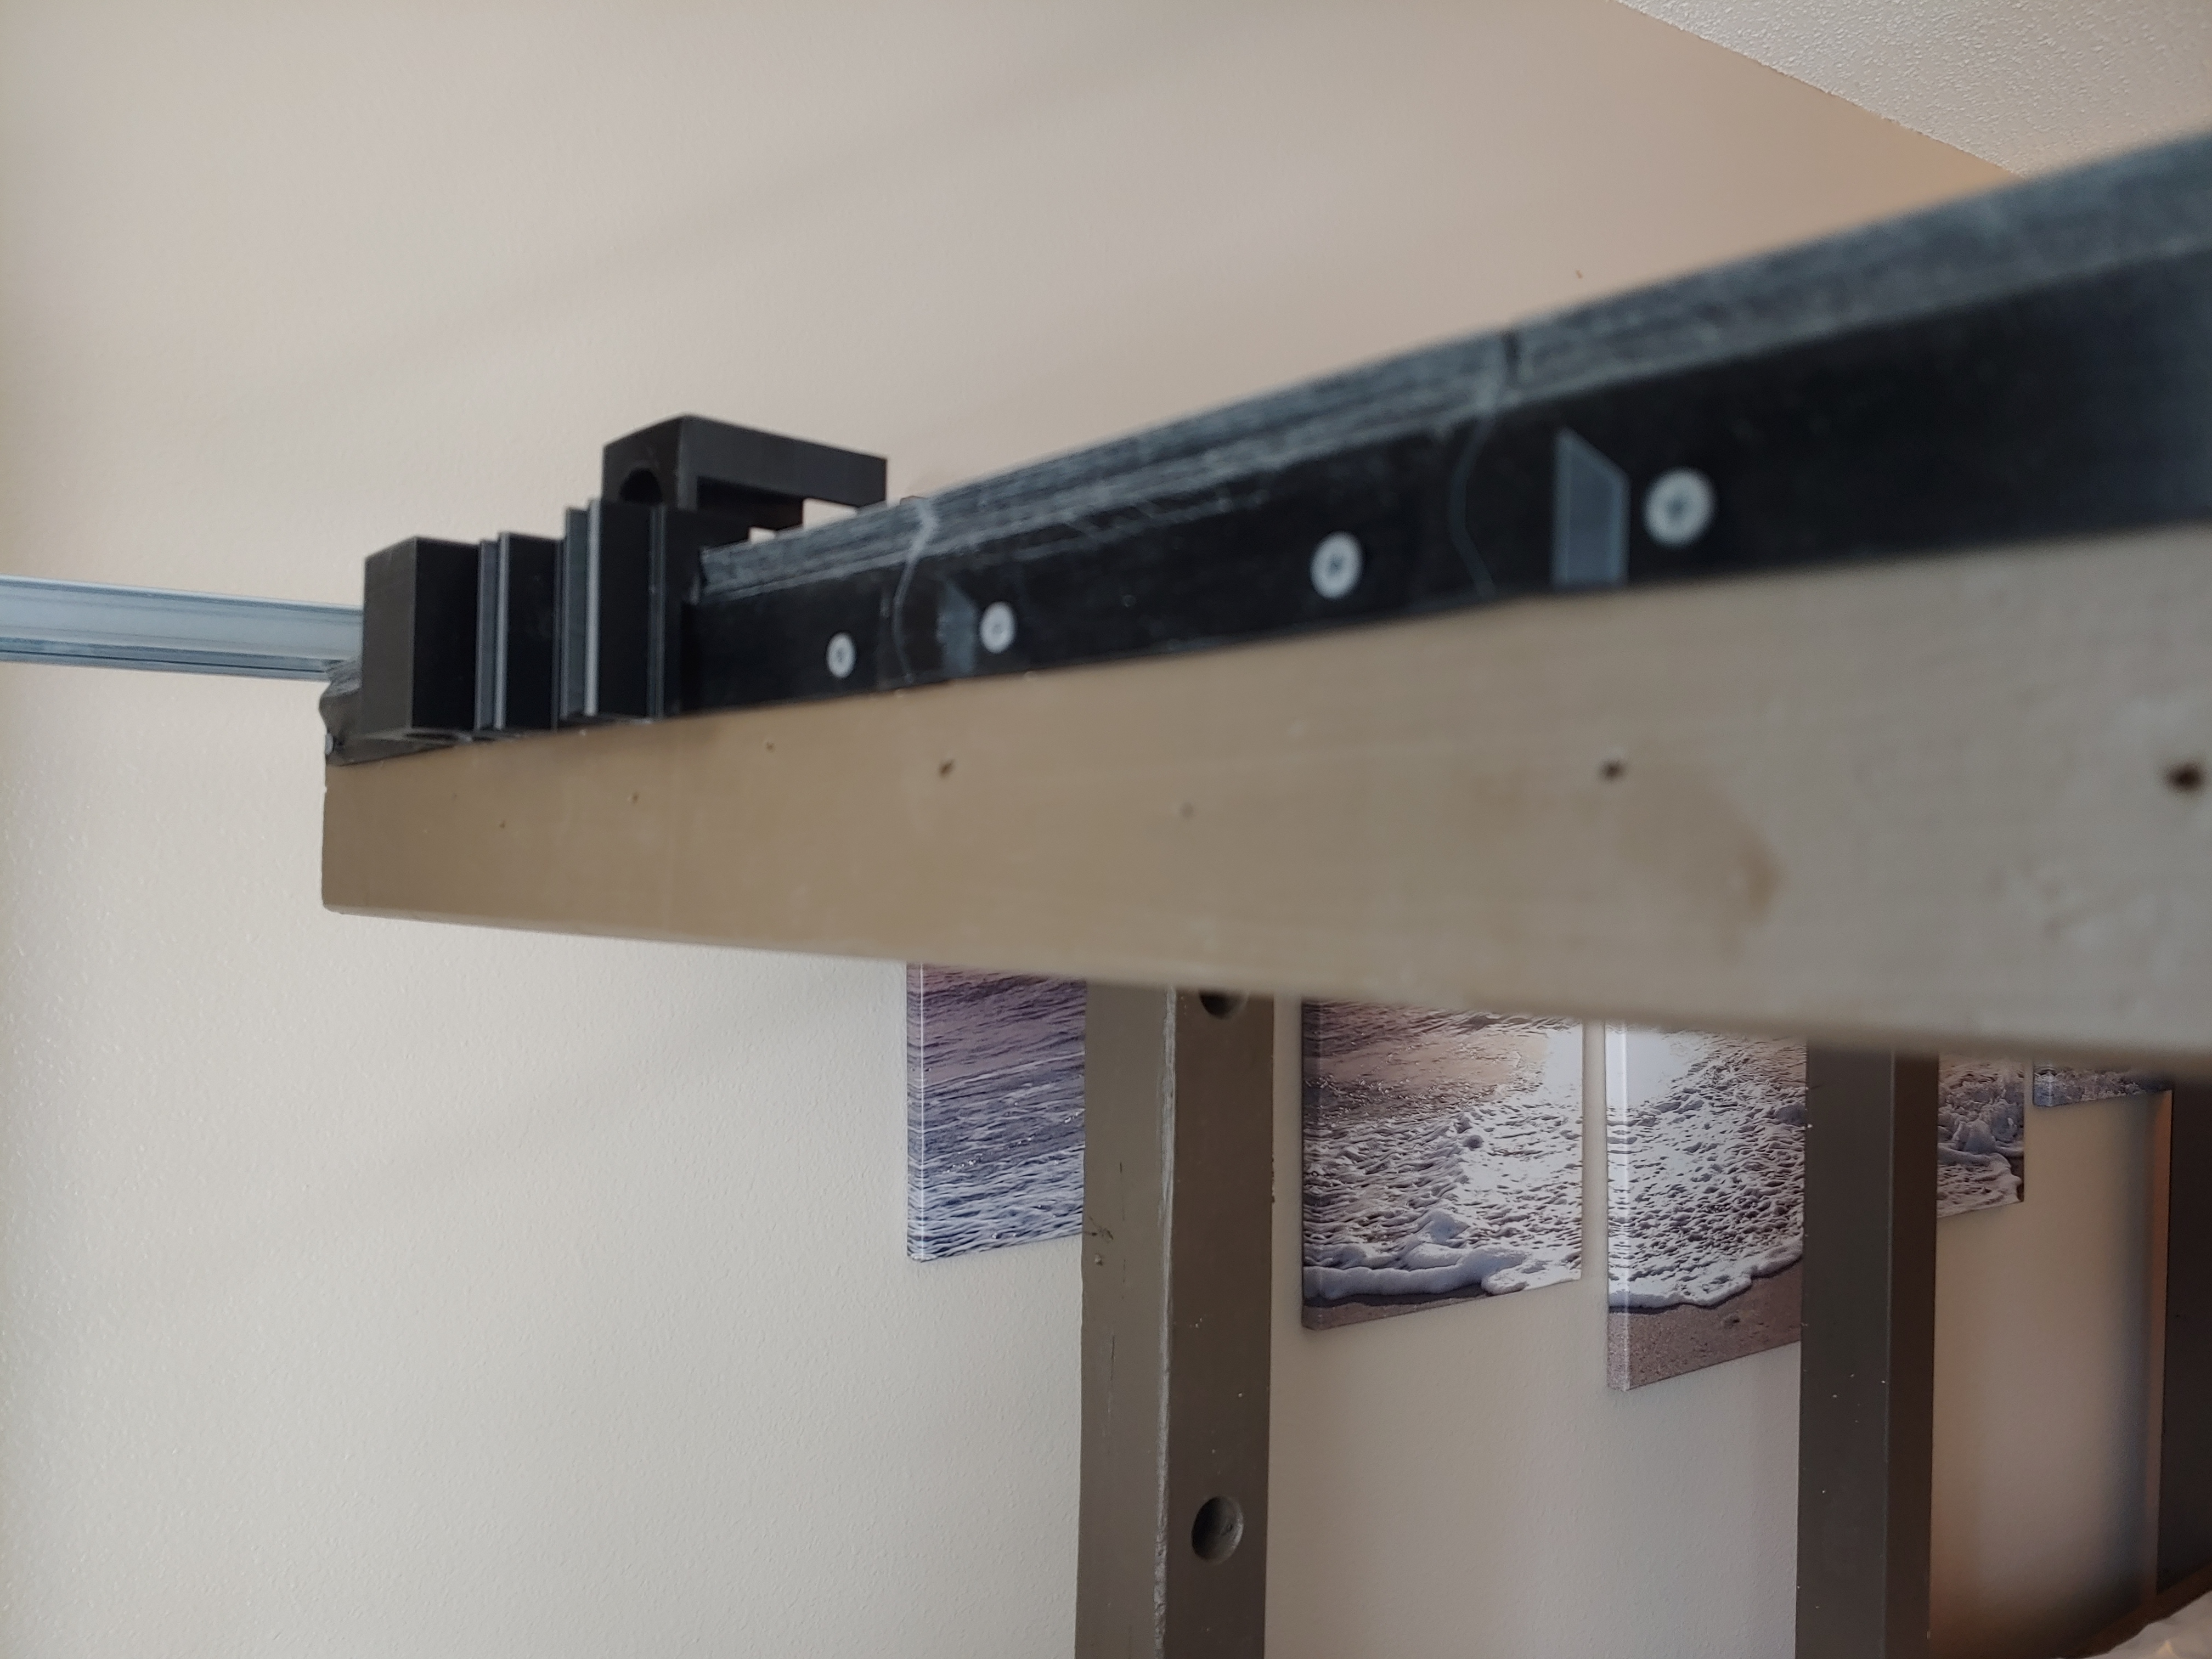
The Y axis is where I had to get creative. I was trying to think of alternatives to aluminum extrusion. My reasoning for avoiding it is based on where I was going to place it. In the FarmBot design they place the Y aluminum extrusion along the base of the frame. This makes some aspects of the design easier, but carries one particularly glaring flaw, plants can grow into it and stop normal functionality. FarmBot suggests circumventing this by simply not planting anything viny. I didn't think that should really be a restriction for a practical gardening machine, however, and thus floating gantry. Floating gantries then become a tricky proposition with aluminum extrusion because of potential sag. It needs to be supported down the length or the aluminum will begin to fall down. It also would start to become expensive at the lengths needed. So my next thought was a dual barndoor hardware rig, one on each side of the floating gantry. This seemed fairly costly though. And then it hit me, closet sliding door hardware is basically the same, but is much cheaper and comes in a decent assortment of lengths up to 8 feet (which should be long enough for any reasonable indoor garden box). The caveat of course is that this would not be appropriate for outdoor use, and if you wanted to use this design outside I would fall back to barndoors (although there are plenty of other considerations if you are looking to use these designs outside).
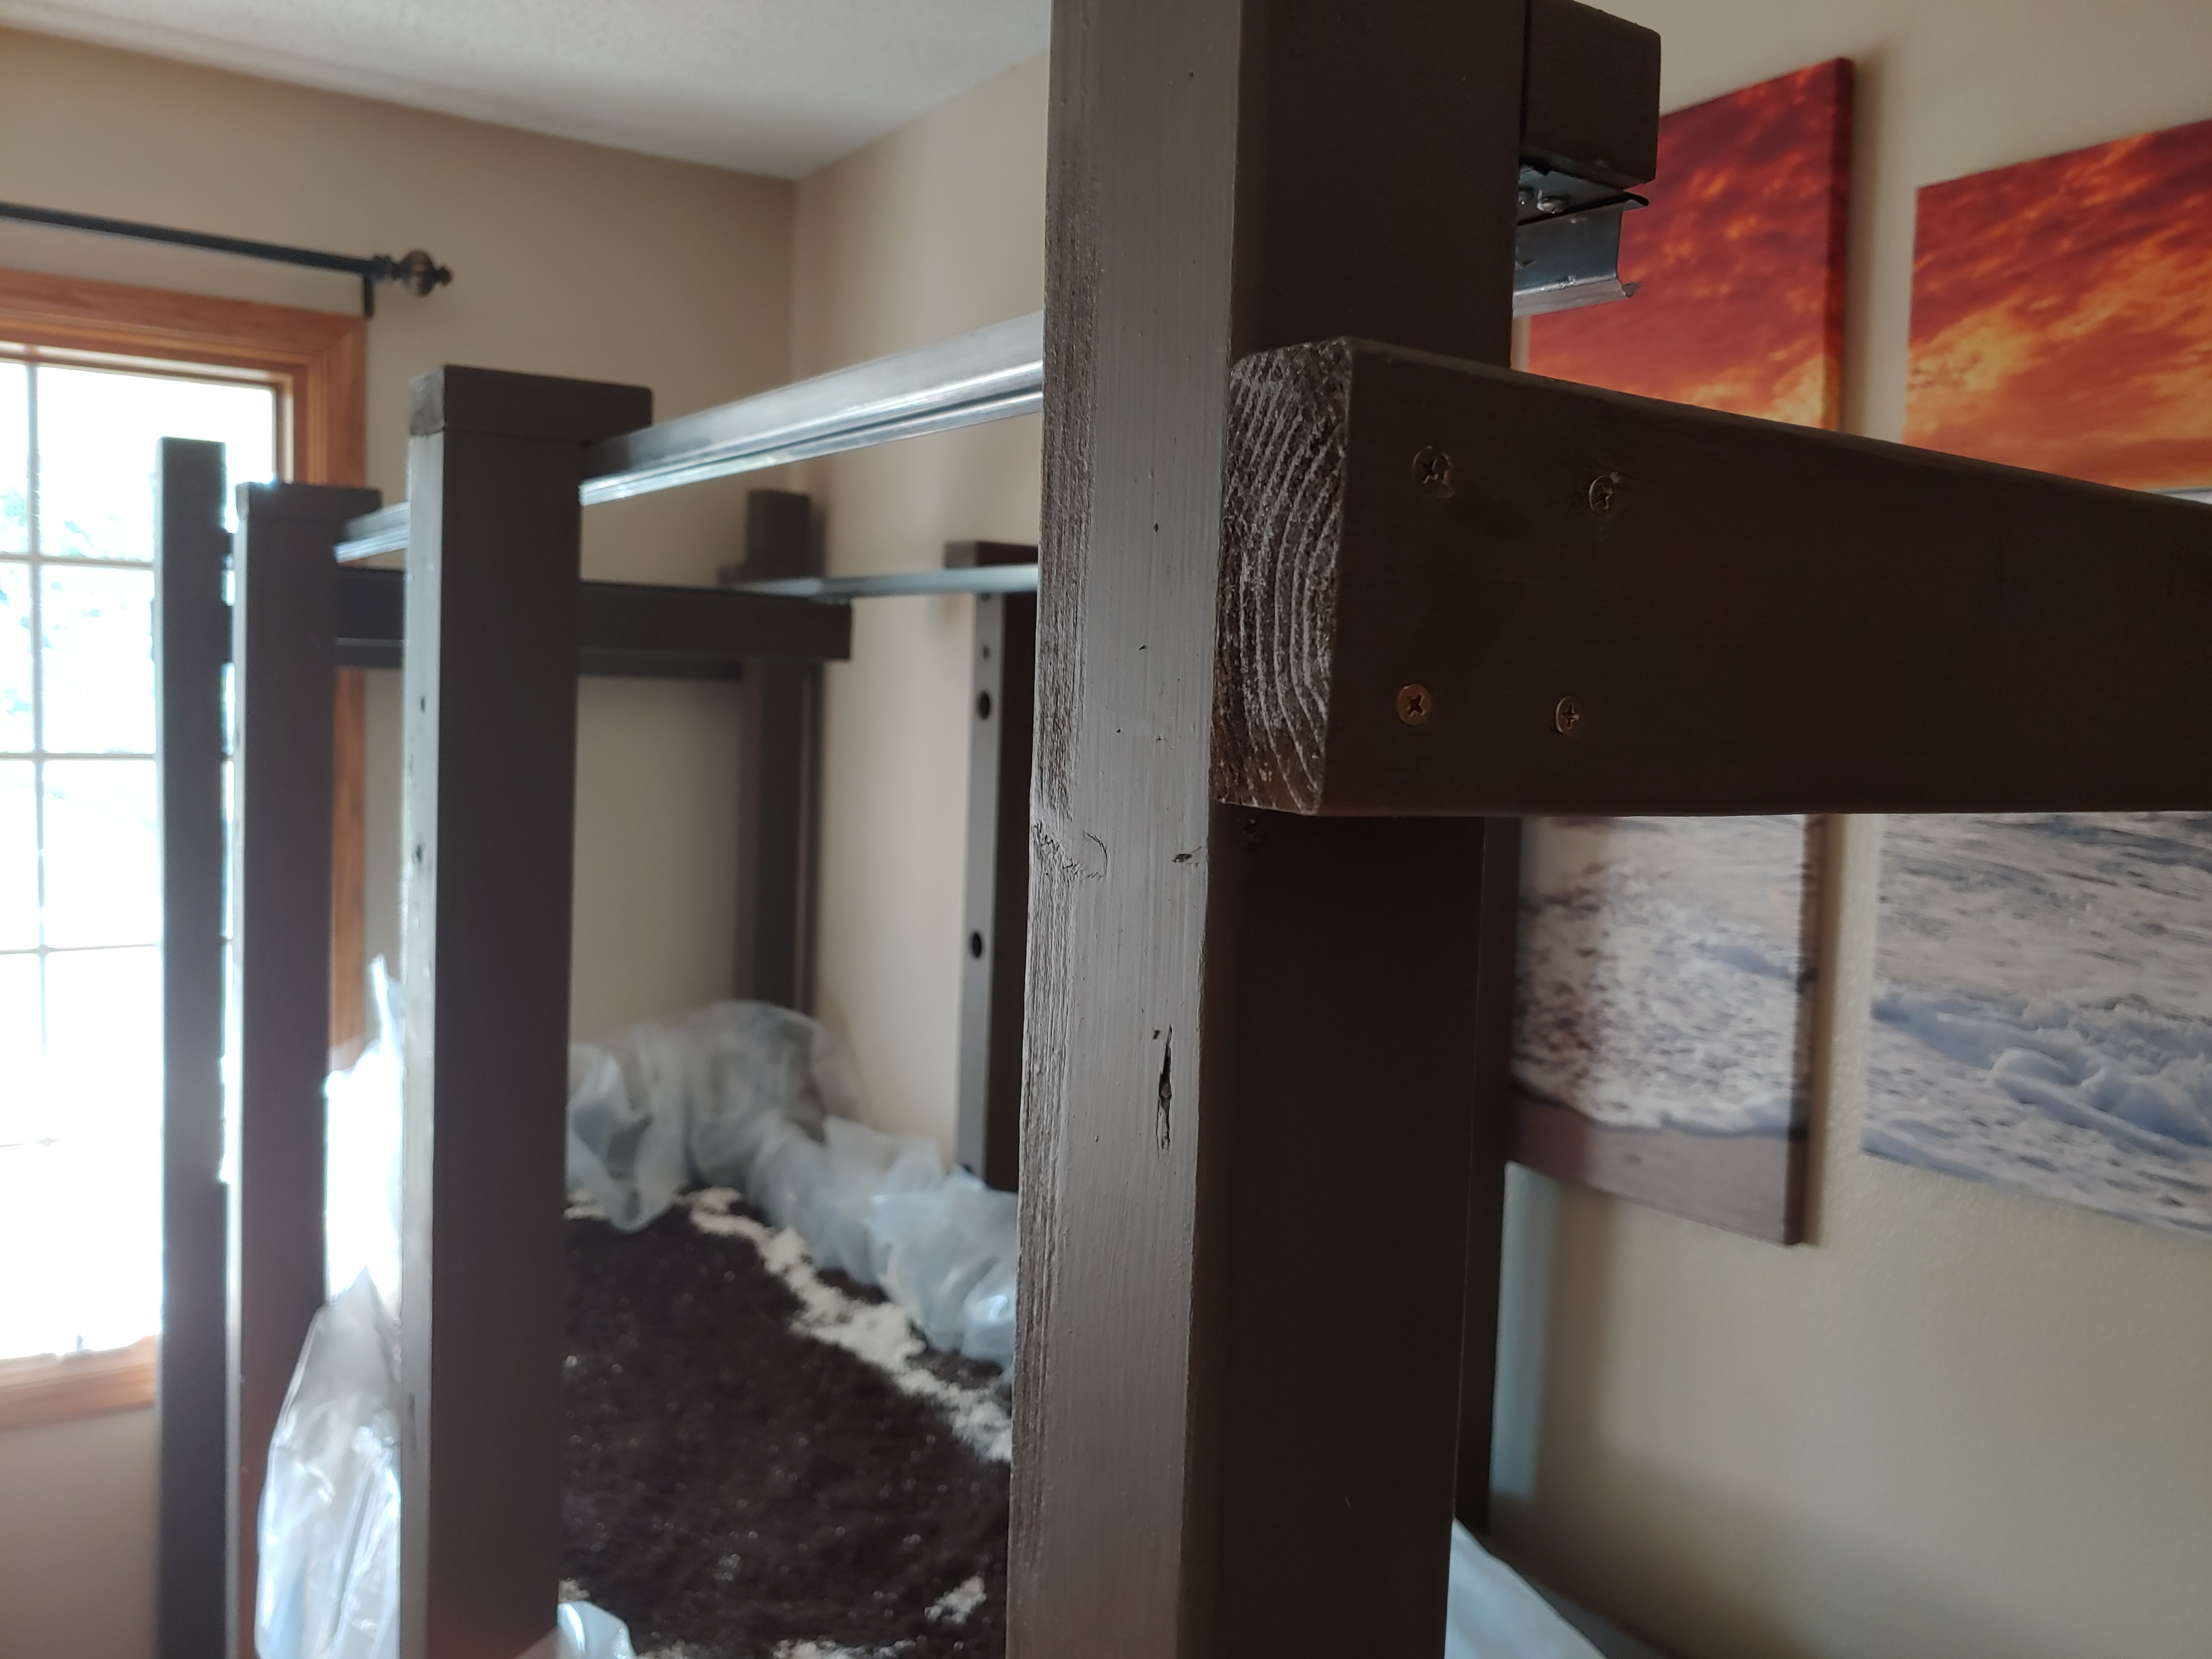
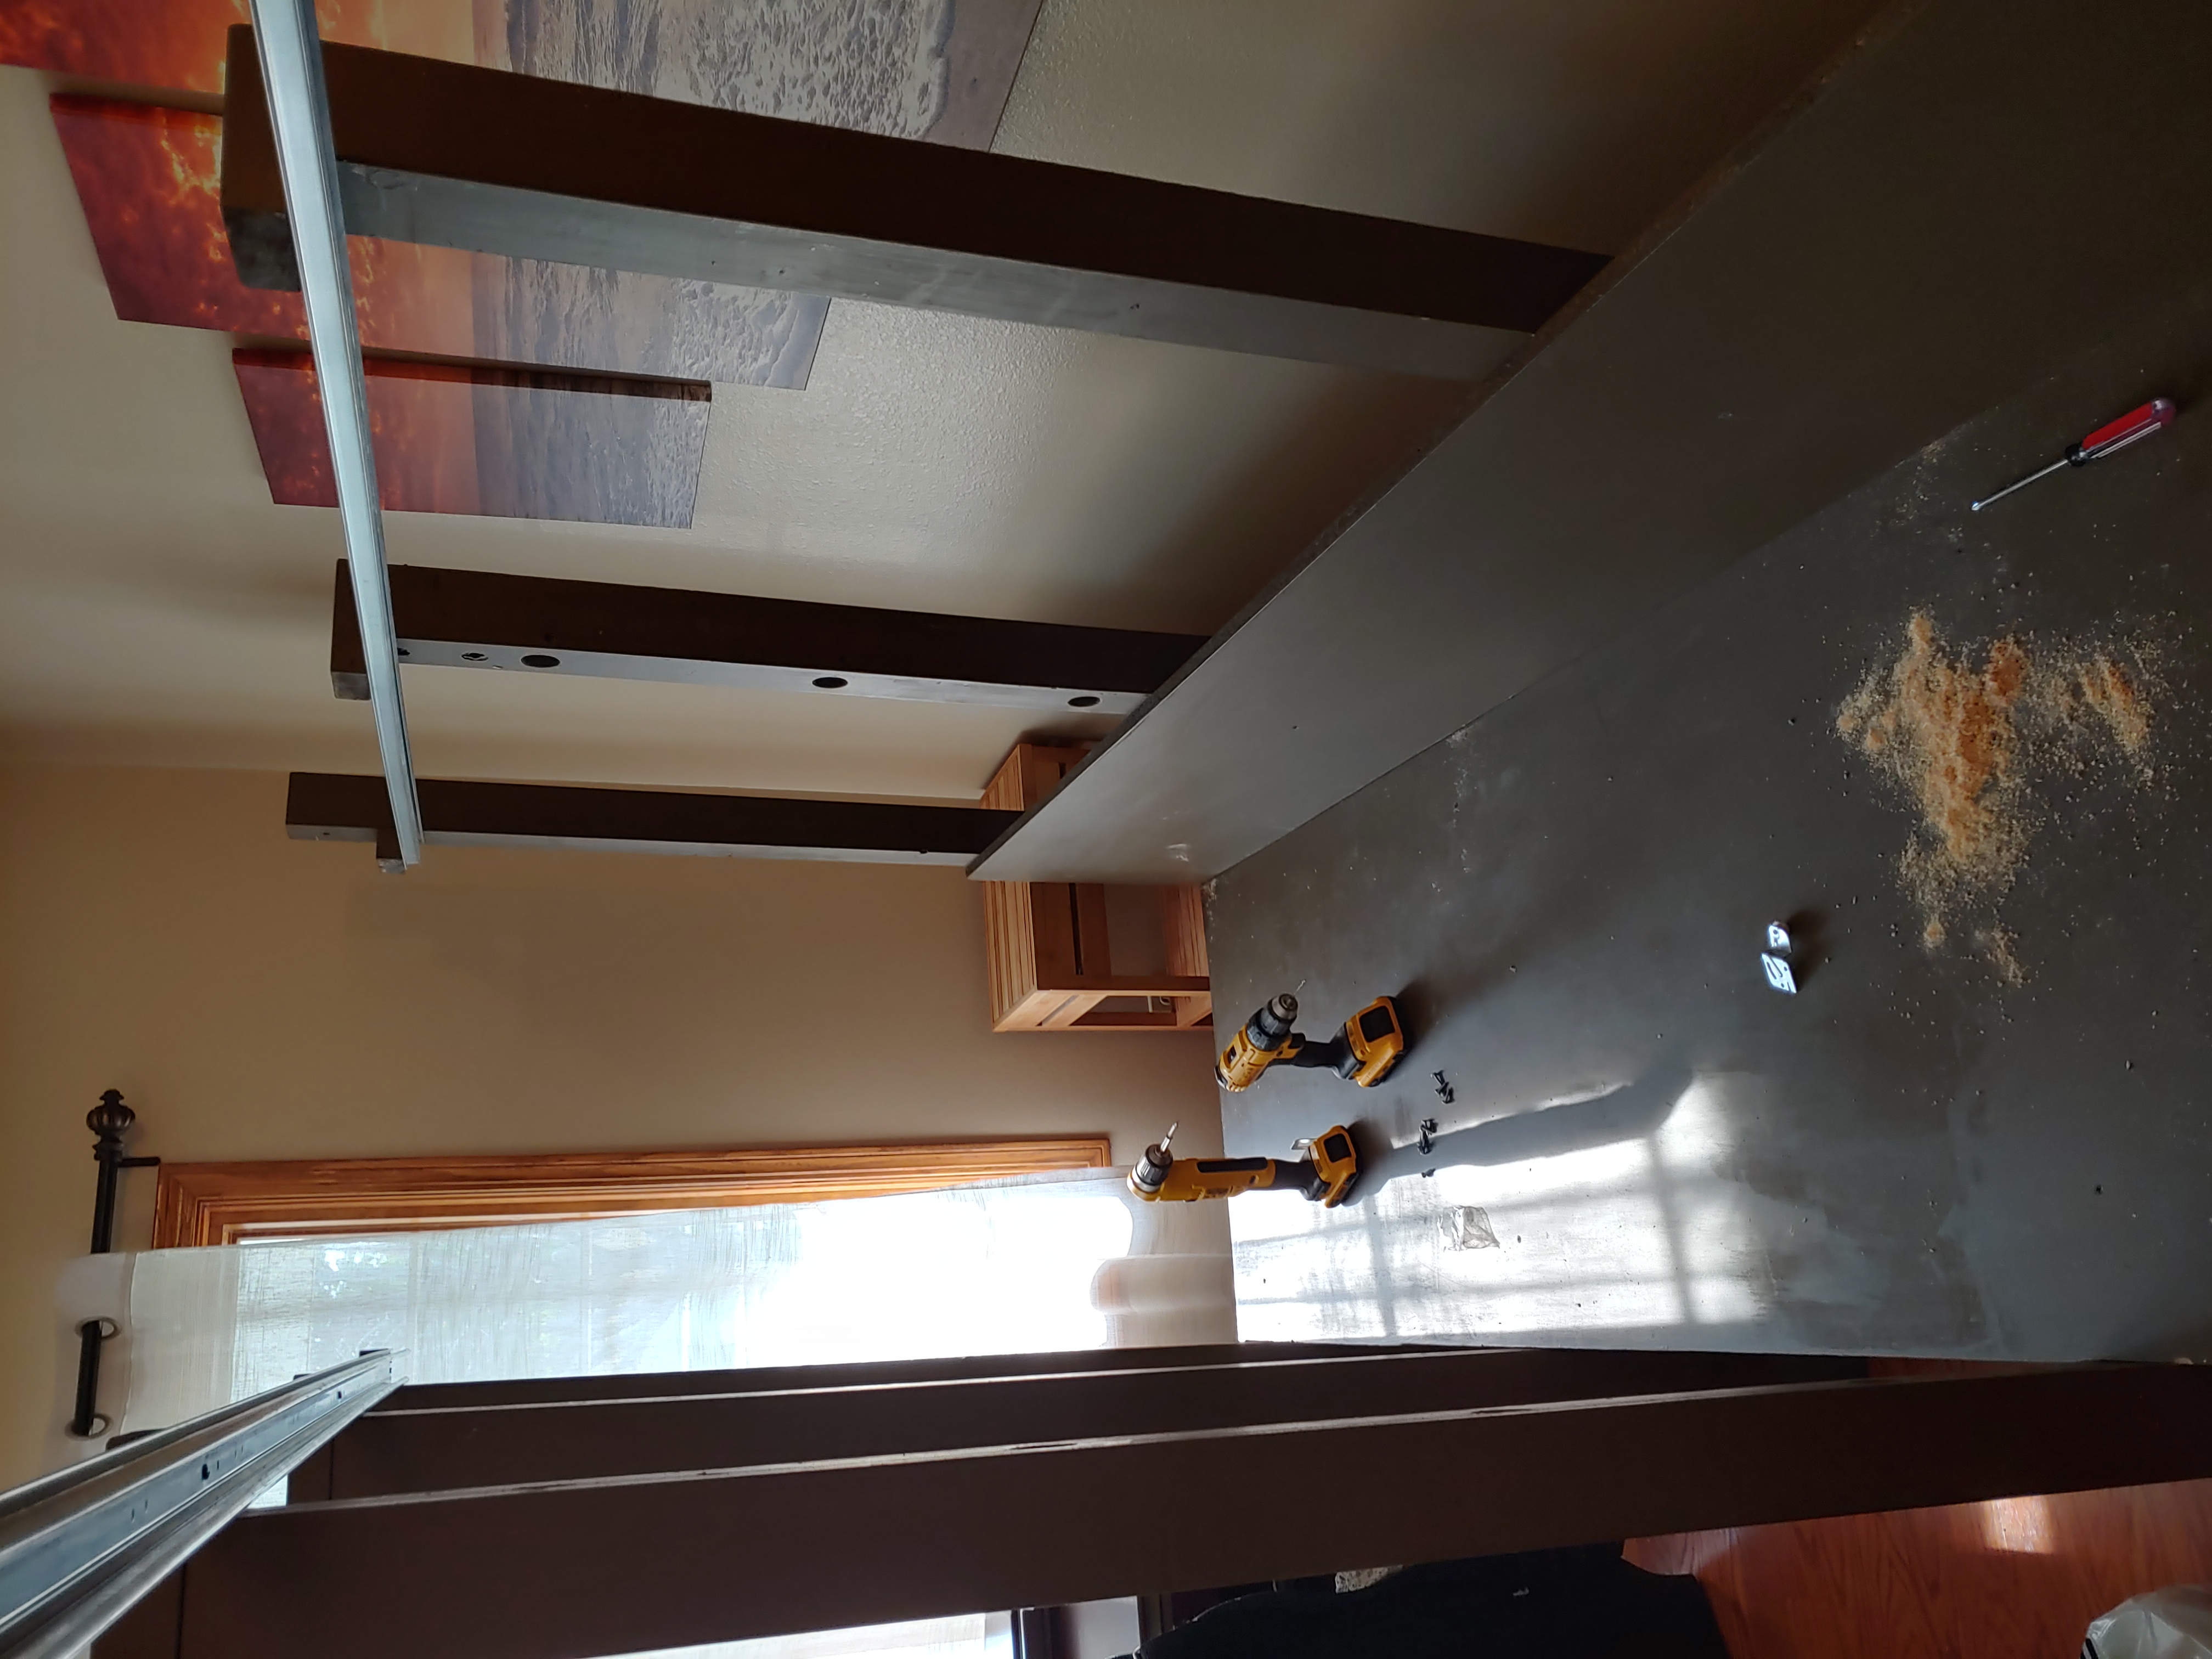
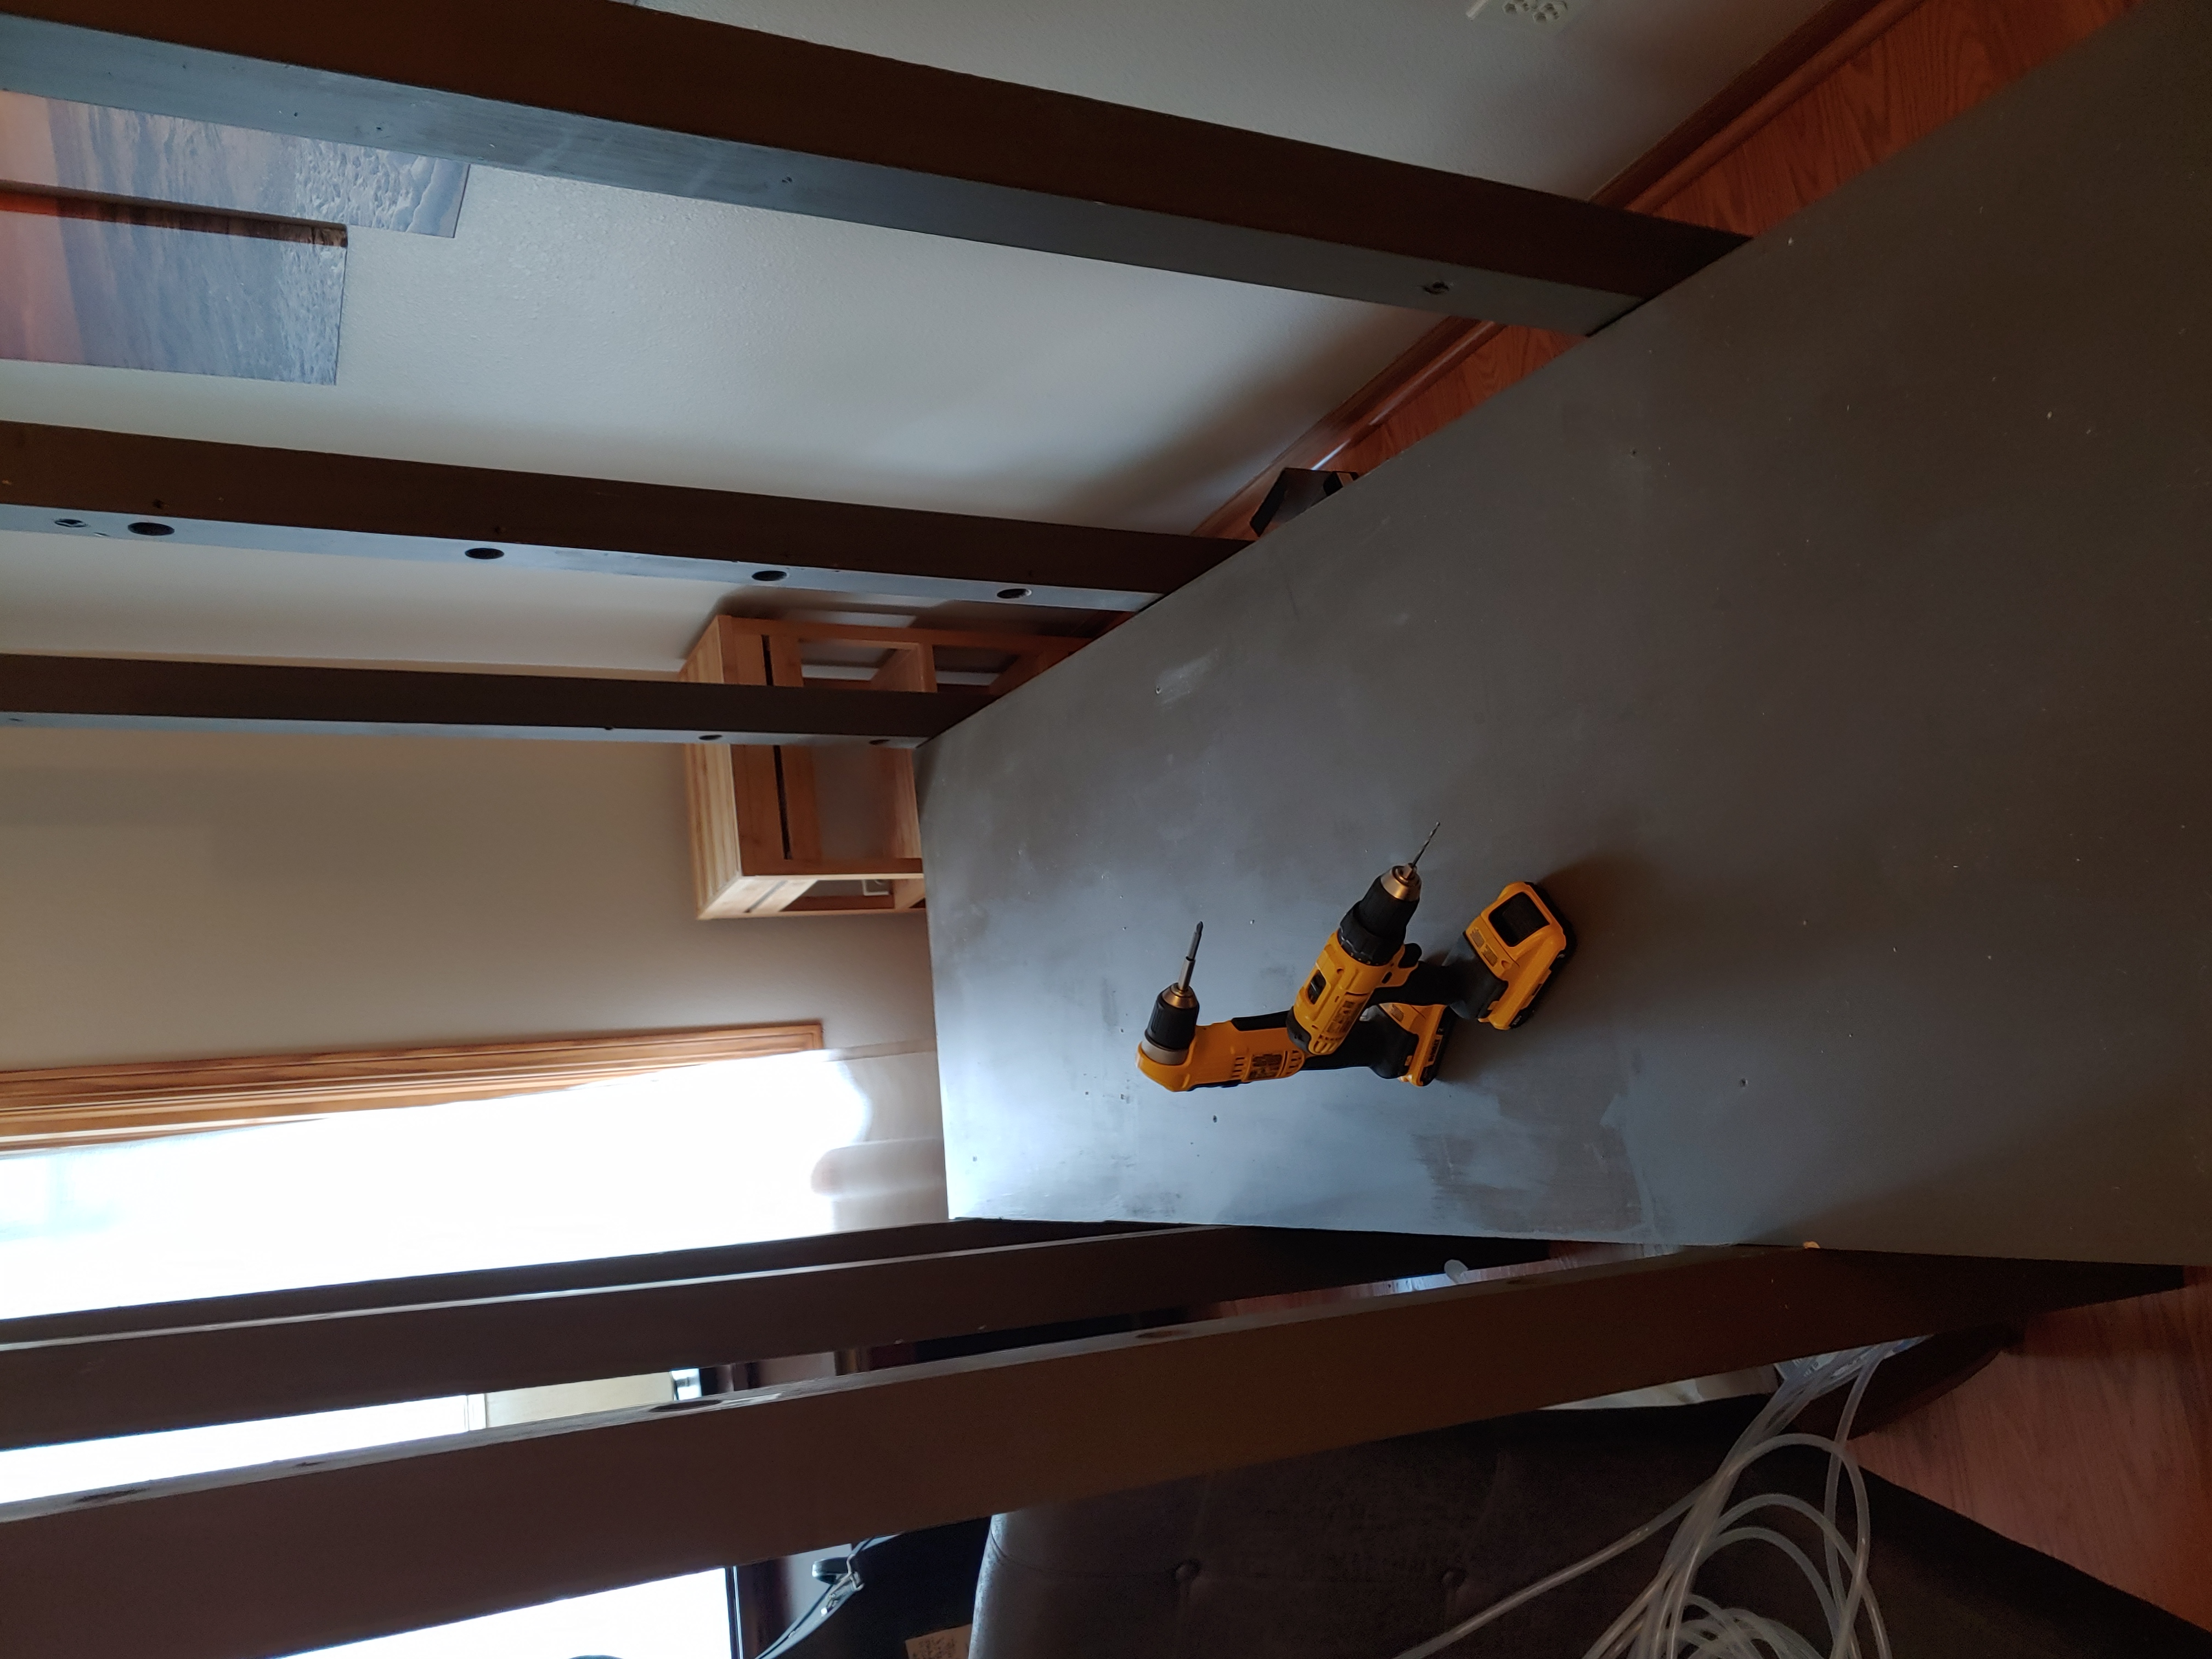
With that knowledge in tow, I assembled a frame that was tall enough to support the gantry and had a garden box built in. I've included some rough designs in a 3d model for the framing, but you would need to figure out specifics on the frame structure yourself since it's highly dependent on soil weight (how deep you make it) and garden box dimensions.
I mounted a 4 inch x 4 inch board and mounted the closet door mounts on the end and placed it on the rails. This seems to work well because it can't get out of the tracks by going straight up and having railing mounts on both sides means it can't angle to jump the tracks.
I've provided pictures showing where my build is at. I'm mostly confirming models behave as expected and then I'll be on to the electronics. Stay tuned for more info on that!
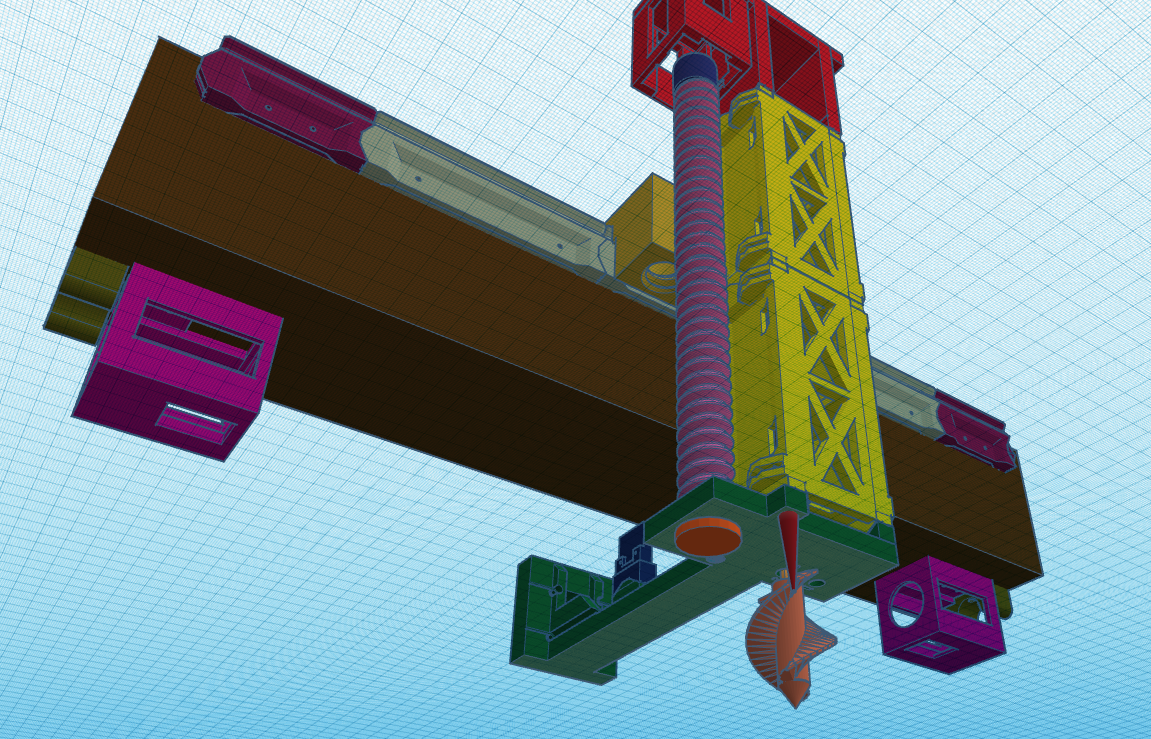
Auger bit
The auger bit provides two pieces of functionality. The first is that it lets you bore small holes for seeding. The second is that it can be used for weeding. Weeding utilizes the boroscope camera to identify potential weeds in the plot which the auger can then attempt to dig out or at least smash.
Seeding
Seeding uses a vacuum pump to grab a seed from a seed holder and place it in the appropriate location.
Limiting crop height
Some crops will inevitably grow too tall and get into the gantry. This is why I added a weed whacker attachment to this build. Growing taller plants is possible as long as it can be kept trimmed to a shorter height. So the weed whacker attachment can be programmed to make a path through the garden box at a height slightly lower than the gantry to ensure that no plants cause mechanical failures.
Information on water input (mount vs low pressure flow)
Watering has two solutions. The first option is that you can figure out how to mount a water container two one of the posts on your box so it is gravity fed. The second option is branching water from a faucet in your home. Note that you need to reduce the water pressure or you will find yourself in some trouble. And as usual, please don't consider this advice to go work on your home's water unless you are sure you know what you are doing.
Leveling
I'm used to 3d printers where leveling is a relatively simple concept. Here it's not quite so simple. This will be a bit of trial and error, but I'm basically down to two possibilities. The first is using the camera combined with computer vision to give an approximation of depth difference across the box, using a baseline provided height value to dial everything in. The second option is configuring the tool head to use a sensor, Lidar/IR/ultrasonic, to measure depth at points across the box. This would probably be less capable at determining gradients and topography as a whole than the camera option but would be better at handling height measurements at specific, pin point locations. More to come on this!
:format(webp)/https://fbi.cults3d.com/uploaders/19201464/illustration-file/3aa8a898-1f2c-4edb-9a42-68ce16bcf214/20210725_011545.jpg)


/https://preview3d-images.cults3d.com/wl61grefs4t2ouz1yxw587r5ytqv)
/https://preview3d-images.cults3d.com/variants/6kba7qjbwi78i6hwk55rv0cz2hmw/cbbb7afd8a0ec9560f7f7940881f98c31dcb04582a03efcc135070de65821be8)
/https://preview3d-images.cults3d.com/variants/3avm1lo6ql7zpyvx318urfbv0msa/cbbb7afd8a0ec9560f7f7940881f98c31dcb04582a03efcc135070de65821be8)
/https://preview3d-images.cults3d.com/variants/uoy94dkh9mv78vwh87cad7gyk30f/cbbb7afd8a0ec9560f7f7940881f98c31dcb04582a03efcc135070de65821be8)
/https://preview3d-images.cults3d.com/variants/1rifl8eujy54r9lyzz2e2qprg1xm/cbbb7afd8a0ec9560f7f7940881f98c31dcb04582a03efcc135070de65821be8)
/https://preview3d-images.cults3d.com/variants/04vsr6o4z71leyktam5ffvacuncy/cbbb7afd8a0ec9560f7f7940881f98c31dcb04582a03efcc135070de65821be8)
/https://preview3d-images.cults3d.com/variants/d6hrv8sksysah76s1889q8qjrzyo/cbbb7afd8a0ec9560f7f7940881f98c31dcb04582a03efcc135070de65821be8)
/https://preview3d-images.cults3d.com/variants/cz1hqfu8u7ztbl17axfd7jo08oi7/cbbb7afd8a0ec9560f7f7940881f98c31dcb04582a03efcc135070de65821be8)
/https://preview3d-images.cults3d.com/variants/rbwluz1zlqps8kc4m2nxveq3oghw/cbbb7afd8a0ec9560f7f7940881f98c31dcb04582a03efcc135070de65821be8)
/https://preview3d-images.cults3d.com/variants/s26h2dxrwaorm2gkaslzm7ugxoh7/cbbb7afd8a0ec9560f7f7940881f98c31dcb04582a03efcc135070de65821be8)
/https://preview3d-images.cults3d.com/variants/h2uyzj3be6nuj5j88afy61iw3lka/cbbb7afd8a0ec9560f7f7940881f98c31dcb04582a03efcc135070de65821be8)
/https://preview3d-images.cults3d.com/variants/xkpduc4an82ctyc59cbrosapakzn/cbbb7afd8a0ec9560f7f7940881f98c31dcb04582a03efcc135070de65821be8)
/https://preview3d-images.cults3d.com/variants/qpyknqqg218p043i4zjcf9nkvuuc/cbbb7afd8a0ec9560f7f7940881f98c31dcb04582a03efcc135070de65821be8)
/https://preview3d-images.cults3d.com/variants/q0s06k21d4rgz6c1u1avk94g0023/cbbb7afd8a0ec9560f7f7940881f98c31dcb04582a03efcc135070de65821be8)
/https://preview3d-images.cults3d.com/variants/6tfr9csrbquscg7mklgao0pe4cs1/cbbb7afd8a0ec9560f7f7940881f98c31dcb04582a03efcc135070de65821be8)
/https://preview3d-images.cults3d.com/doqvm1d7u1gkfgxyujoceq61qbft)
/https://preview3d-images.cults3d.com/variants/idr81nizvmk2cux5qgc5go8vzb6s/cbbb7afd8a0ec9560f7f7940881f98c31dcb04582a03efcc135070de65821be8)
/https://preview3d-images.cults3d.com/d3x931ye8ymtf7a1x0mipm3987yp)
/https://preview3d-images.cults3d.com/variants/y8tbvh2gsqq40cr5drersqbxj942/cbbb7afd8a0ec9560f7f7940881f98c31dcb04582a03efcc135070de65821be8)
/https://preview3d-images.cults3d.com/variants/r5szu4lhaszidm5dc25sods6kza4/cbbb7afd8a0ec9560f7f7940881f98c31dcb04582a03efcc135070de65821be8)
/https://preview3d-images.cults3d.com/variants/gl89em0mze2dauf31ipl0op4xhpk/cbbb7afd8a0ec9560f7f7940881f98c31dcb04582a03efcc135070de65821be8)
/https://preview3d-images.cults3d.com/variants/0ld2mexq0fv4whdhibqdci6bppl7/cbbb7afd8a0ec9560f7f7940881f98c31dcb04582a03efcc135070de65821be8)
/https://preview3d-images.cults3d.com/variants/fjlfc3okcluyd8ihpd0uud0bgzpo/cbbb7afd8a0ec9560f7f7940881f98c31dcb04582a03efcc135070de65821be8)
/https://preview3d-images.cults3d.com/variants/wi7srpzkhokprm3qz678gxvwijr1/cbbb7afd8a0ec9560f7f7940881f98c31dcb04582a03efcc135070de65821be8)
/https://preview3d-images.cults3d.com/variants/yafjmco3dc91xyy96m8yy2u2k0su/cbbb7afd8a0ec9560f7f7940881f98c31dcb04582a03efcc135070de65821be8)
/https://preview3d-images.cults3d.com/variants/z3nlqu65owm9wwv6o3j8loyjpol1/cbbb7afd8a0ec9560f7f7940881f98c31dcb04582a03efcc135070de65821be8)
/https://preview3d-images.cults3d.com/variants/11sp4iws38vh27y4dae1jupbxbbi/cbbb7afd8a0ec9560f7f7940881f98c31dcb04582a03efcc135070de65821be8)
/https://preview3d-images.cults3d.com/variants/8f32m4r6ery8a1i7zffdfavpga7n/cbbb7afd8a0ec9560f7f7940881f98c31dcb04582a03efcc135070de65821be8)
/https://preview3d-images.cults3d.com/variants/igb5gd0uuh4jyf696hj92szlpo2l/cbbb7afd8a0ec9560f7f7940881f98c31dcb04582a03efcc135070de65821be8)
/https://preview3d-images.cults3d.com/variants/m2mrgmq589p4jaianhmj74jdkvm1/cbbb7afd8a0ec9560f7f7940881f98c31dcb04582a03efcc135070de65821be8)

