Skip to content

Mod-t Cooling Duct Magnet and improved airflow

Advertising
Advertising
?
Creation quality: 0.0/5 (0 votes)
Evaluation of members on the printability, utility, level of detail, etc.

  • 764 views
  • 1 download

License
3D design format
STL Folder details Close
  • Basic_Main_body.stl
  • Duct_improved_air_flow.stl
  • Main_Housing_improved_air_flow.stl
  • basic_duct.stl

Learn more about the formats

Publication date 2021-08-07 at 23:24
?
Published to Thingiverse on: 2018-11-28 at 14:56
Design number 490058

3D printer file info

3D model description

This is very minor remix of the "MOD-t Cooling Duct" by Lobo CNC: https://www.thingiverse.com/thing:1529972

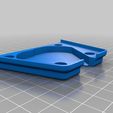
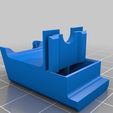
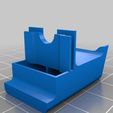
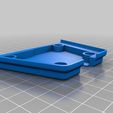
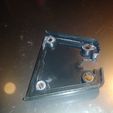
The original calls for a rubber band or glue to be used to hold it in place, this version uses four 8mm diameter by 2mm tall neodymium magnets instead. The magnets are placed over the Mod-T screws to avoid blocking any airflow.

I have included 2 versions, one is a basic upgrade with just the magnet spots added for those that have found success with the original Lobo CNC design and I have also included one option of the main body and duct the should improve airflow (in theory) as it has less dead corners and flat 90 degree edges to slow down the air flow.

Magnets that fit can be found at Harbor Freight, most hobby stores, or here:
https://www.amazon.com/Magnets-Refrigerator-Decoration-Kitchen-Whiteboard/dp/B07D9RXPHP

The magnet holes are intentionally a little big to allow for glue, they are recessed just enough (.4mm) to prevent direct contact to avoid any heat transfer but still close enough to give a good hold. the original design did all the hard work (thank you Lobo CNC!) and it fits well and looks great this just makes attaching and detaching a little cleaner and easier.

After gluing your magnets simply slide the notched area over the heat break and carefully rotate under the wires, you should not need to disconnect the extruder wires. Once it is in place slide the duct in place making sure the slot lines up and be gentle as to not break the thin duct attach point. Push up to get a clean fit and you should be ready to print!

11/28/18
Worth noting, I noticed after I made this that a maker by the name of Deaxe attempted something similar by directly gluing his magnets to the original. https://www.thingiverse.com/make:493432 Just wanted to make sure to give notice for the similar idea that came first.

3D printing settings

-

Advertising


Issue with this design? Report a problem.

Would you like to support Cults?

You like Cults and you want to help us continue the adventure independently? Please note that we are a small team of 3 people, therefore it is very simple to support us to maintain the activity and create future developments. Here are 4 solutions accessible to all:

  • ADVERTISING: Disable your banner blocker (AdBlock, …) and click on our banner ads.

  • AFFILIATION: Make your purchases online by clicking on our affiliate links here Amazon.

  • DONATE: If you want, you can make a donation via Ko-Fi πŸ’œ.

  • WORD OF MOUTH: Invite your friends to come, discover the platform and the magnificent 3D files shared by the community!


Sharing and downloading on Cults3D guarantees that designs remain in makers community hands! And not in the hands of the 3D printing or software giants who own the competing platforms and exploit the designs for their own commercial interests.

Cults3D is an independent, self-financed site that is not accountable to any investor or brand. Almost all of the site's revenues are paid back to the platform's makers. The content published on the site serves only the interests of its authors and not those of 3D printer brands who also wish to control the 3D modeling market.

100% secure payment by credit card, PayPal, Apple Pay, Google Pay, etc.
View all payment options.