History
Everyone having children starting to use a bobby car knows that it is a back pain promising venture to push you kid until it can move the bobby car on its own. So you want to get something to push or pull your bobby car in an upright position. So you would normally go for the original push bar provided by Big….
…unless you got yourself a special edition of a bobby car like a Porsche, Mercedes or the older Audi, VW or BMW models like I got. At most of the special edition you can’t fit the original push bar.
I found the design of Klein-laui on thingiverse and tested it… It was fun and worked… for about 5 minutes until the broom adapter snapped clear off the clip….
So I used the quick basic concept of the quick release and added some more stiffness into the design.
What you get now is the 5th iteration of the design (the kids in my street running 5 bobby cars are a very good test group). The design will live through most of the stress you can apply, but doing the math on what torque you can apply with an average 1,5m long broomstick on a 50mm wide plastic part is clearly showing some limitations.
But sill I am confident that for the time until your kids can ride the booby car on their own, this design will help you prevent some back pain and give the kids a lot of fun.
Design
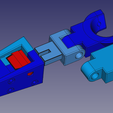
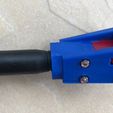
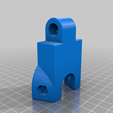
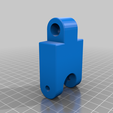
The design consists of the section which goes on the broom stick:
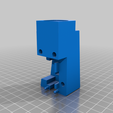
- A left part (also available for a little big bigger cone, so chose the one which fits your broom stick)
- A right part
- A release part
And the section which goes on the steering wheel:
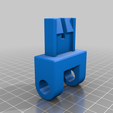
- Clippart
- Wheelpart (for classic or for modern / sound wheels, choose the one fitting to your steering wheel)
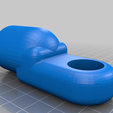
- Universal hook (add on, not required for the initial design)
###Additional parts
For the assembly you also those additional parts:
- 1x M5x50 screw with cylinder head
- 1x M5 nut (self locking if possible)
- 2x M4x45 screw with cylinder head
- 1x M4x50 screw with cylinder head
- 3x M4 nut
- 1x M10x50-55 screw
- 1x M10 nut self locking
- 1x spring DIN2095 5.7mm diameter 35m length (you have to cut the spring in half, you might also be able to use the 25mm length but this is not tested)
- Alternative for the spring: 2 ballpoint pens, exactly the springs inside the pens which should work also if you not have the chance to get a hold of the DIN springs.
###Assembly instructions
####Wheel section:
Just bolt the wheel part to the clipart with the M10 screw and nut (take care of the orientation if you are using the modern wheelpart, the classic wheel part is symmetric). Disassemble original screw of the wheel at the bobby car, fit the wheel section around the wheel and use the M5x50 screw and the M5 nut to assemble everything again.
####Broom stick section:
First test the printing tolerances by assembling only the left, right and release part. Insert the clippart of the wheel section. You might have to grind/cut a little bit on the parts for a smooth fit.
Push in the Insert both springs into the holes. You have to bend them form the side. Make sure you can compress the springs completely into the whole. If the spring is to long you have to shorten it! Use a thing part of metal e.g. a scalpel to compress the spring and move the release part into the opening. Take out the metal and the spring should snap into place at the release part, holding it into position. Now repeat the process on the other side and while inserting the release part, fit the left and the right part together. Apply the M4 screws to press the left and the right part towards each other. Insert the wheel section and test if the springs apply enough force to securely lock the release part. Now just screw a broom into the cone thread and ready you are.
#####Disassembly
If you have to disassemble the broom part, you might need two thin metal parts to step by step push the spring into the hole at the side parts to be able to pull out the release part. I used 2 watchmaker screwdrivers to get it done in 10 seconds.
###Universal broom hook:
I included this design to be able to hook up the booby car to a pedal car with a trailer hitch. You can also use this to hook up other stuff to a bobby car with a trailer hitch or even build a multi bobby car train.
#Disclaimer:
This design is not tested by any official organization regarding children safety!
Using this design is at your own risk. Always apply common sense and never leave your children play unattended!
Always remove damaged parts immediately!
Please let me know if you find any problems with the design or the description, I can rule out the problem and make the design safer

/https://fbi.cults3d.com/uploaders/19389538/illustration-file/b7cefb94-1fbf-4606-a2e0-d9ca65923a9d/IMG_1053.jpg)

