Skip to content

TomPouce 8-head screwdriver with magnetic retention

Advertising
Advertising
?
Creation quality: 5.0/5 (1 vote)
Evaluation of members on the printability, utility, level of detail, etc.

  • 834 views
  • 2 likes
  • 26 downloads

License
3D design format
STL Folder details Close
  • tp.stl

Learn more about the formats

3D model size X 42 Γ— Y 27.4 Γ— Z 55.7 mm
Publication date 2021-09-10 at 23:17
?
Published to Thingiverse on: 2021-04-16 at 18:28
Design number 516214

3D printer file info

3D model description

EN

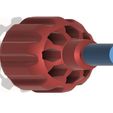
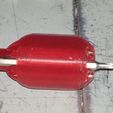
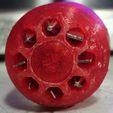
Compact screwdriver with 8-head magazine with magnetic retention.

1 cylindrical magnet (1 cm x 1 cm) is required to operate the storage system integrated into the handle.

the magnet is in contact with the base of the head blade, enabling three functions

1 magnetizing the blade

2 head retention (even when wear has widened the slots)

3 screwdriver attachment to any magnetic surface (see photos)

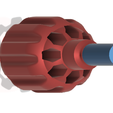
change of head is made by chasing one head with the other ( see photo )

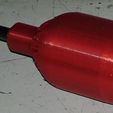
the photos are taken with the V1 version, the STL are those of the V2 version ( the handle is ribbed to improve grip )

MOUNTING

1- The installation of the head blade is deliberately made easier for the first few cm and must then be forced in as far as the magnet to ensure a firm hold.

2- Positioning and gluing the magnet with glue

3- Gluing the plug

If the head slots are too narrow, move the head blade back and forth a few times to create a little clearance and eliminate small plastic drips.

EN Translated with www.DeepL.com/Translator (free version)

Compact screwdriver with 8-head magazine with magnetic retention.

1 cylindrical magnet of 1 cm x 1 cm is essential for the operation of the storage integrated in the handle

the magnet is in contact with the base of the head holder blade which allows three functions

1 the magnetization of the blade

2 the retention of the heads (even when the wear will have widened the places)

3 the attachment of the screwdriver to any magnetic surface (see photos)

the change of head is done by chasing one head with the other ( see photo )

the photos are made with the V1 version, the STL are those of the V2 version (the handle is ribbed to improve the grip)

ASSEMBLY

1- The installation of the head blade is voluntarily facilitated on the first cm and must then be entered in force until the magnet to ensure the solidity of the fixing

2- Placement and gluing of the magnet with glue

3- Gluing the cap

If the head locations are too narrow, make a few trips with the head blade to create a little play and eliminate the small plastic drips

3D printing settings

-

Advertising


Page translated by automatic translation. See the original version.
Issue with this design? Report a problem.

Would you like to support Cults?

You like Cults and you want to help us continue the adventure independently? Please note that we are a small team of 3 people, therefore it is very simple to support us to maintain the activity and create future developments. Here are 4 solutions accessible to all:

  • ADVERTISING: Disable your banner blocker (AdBlock, …) and click on our banner ads.

  • AFFILIATION: Make your purchases online by clicking on our affiliate links here Amazon.

  • DONATE: If you want, you can make a donation via Ko-Fi πŸ’œ.

  • WORD OF MOUTH: Invite your friends to come, discover the platform and the magnificent 3D files shared by the community!


Sharing and downloading on Cults3D guarantees that designs remain in makers community hands! And not in the hands of the 3D printing or software giants who own the competing platforms and exploit the designs for their own commercial interests.

Cults3D is an independent, self-financed site that is not accountable to any investor or brand. Almost all of the site's revenues are paid back to the platform's makers. The content published on the site serves only the interests of its authors and not those of 3D printer brands who also wish to control the 3D modeling market.

100% secure payment by credit card, PayPal, Apple Pay, Google Pay, etc.
View all payment options.