FR
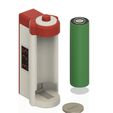
Testeur de piles bouton et de batteries 18650 de 2.5 à 30 volts
Composant et matériel nécessaire ;
Étant dans la réparation informatique, j'ai rencontré un problème avec les piles bouton de carte mère (CR-2032) ne pouvant être mis en évidence avec un multimètre classique, car sa résistance d'entrée étant très forte il ne permet pas de déceler certaines piles défaillantes indiquant un voltage correct, mais incapable de fournir une intensité de plus de quelques milliampères.
Ce montage utilise donc un petit module testeur chinois (moins de 3 €) alimenté par la pile testée ce qui permet de faire une mesure en charge et donc de visualiser les piles mythomane
Ce petit module n'est pas aussi précis qu'un vrai multimètre, mais pour trier rapidement les piles et batteries, c'est l'idéal
Montage,
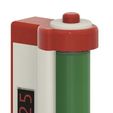
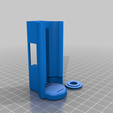
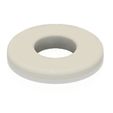
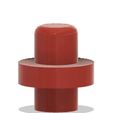
Assembler la tête et vérifier le fonctionnement, le bouton doit coulisser librement seul la rondelle blanche doit rentrer en force dans la tête, mais ne doit pas freiner le bouton un petit coup de papier de verre et un peu de graisse silicone peut être nécessaire.
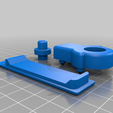
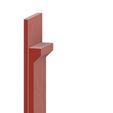
"Lame +"
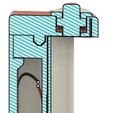
La glisser dans le corps en passant par le haut jusqu’à la fente supérieure.
Avec un petit tournevis plat pousser le bout de la "lame +" à l’intérieur (1 mm ou deux seront suffisant).
Placer une seconde lame sous la première, elle servira de guide pour réduire le frottement.
Pousser la "lame +" en s'aidant du pouce pour lui faire passer l'angle
Placer un bout de gaine rétractable de 2 cm
Souder le câble plus du module voltmètre
Chauffer le bout de gaine pour le rétracter
"Lame -"
Pousser la lame dans la fente de blocage et ensuite la passer dans la fente inférieure.
Placer un bout de gaine rétractable de 2 cm
Souder le câble moins du module voltmètre
Chauffer le bout de gaine pour le rétracter
Suite
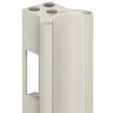
les deux lames en position, soudées et isolées, assembler la tête et le corps (assemblage en force)
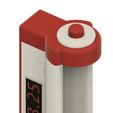
Placer la "lame +" dans la fente de coulisse en bout de tête et vérifier qu'elle glisse sans contrainte si ce n'est pas le cas un petit coup de papier de verre pour en arrondir les angles et un peu de graisse silicone devrait régler le problème
Placer le couvercle du corps.
À savoir :
À force de manipulation les lames peuvent se "froisser" et perdre leur aspect lisse, les frotter en force avec un manche de tournevis ou autre en plastique dur peut netement en améliorer l'aspect
EN Translated with www.DeepL.com/Translator (free version)
Button cell and 18650 battery tester from 2.5 to 30 volts
Required components and equipment ;
Being in the computer repair business, I encountered a problem with the motherboard button cells (CR-2032) that could not be highlighted with a classical multimeter, because its input resistance is very high, so it does not allow to detect some failing cells indicating a correct voltage, but unable to provide a current of more than a few milliamps.
This assembly uses a small Chinese tester module (less than 3 €) powered by the tested battery which allows to make a measurement in charge and thus to visualize the mythomaniac batteries
This small module is not as accurate as a real multimeter, but to quickly sort batteries, it is ideal
Assembly,
Assemble the head and check the operation, the button must slide freely only the white washer must force into the head, but should not brake the button a small stroke of sandpaper and a little silicone grease may be necessary.
"Blade +"
Slide it into the body through the top to the top slot.
With a small flat screwdriver, push the tip of the "blade +" inside (1 mm or two will be sufficient).
Place a second blade under the first one, it will serve as a guide to reduce friction.
Push the "+ blade" using your thumb to make it pass the angle
Place a piece of shrink sleeve of 2 cm
Solder the cable plus the voltmeter module
Heat the end of the sheath to shrink it
"Blade -"
Push the blade into the locking slot and then pass it through the lower slot.
Place a 2 cm piece of shrink sleeve
Solder the cable less the voltmeter module
Heat the sheath end to shrink it
Continued
With the two blades in position, soldered and insulated, assemble the head and the body (force fit)
Place the "+ blade" in the slot at the end of the head and check that it slides without constraint. If it is not the case, a small stroke of sandpaper to round off the angles and a little silicone grease should solve the problem
Place the body cover.
To know :
With repeated handling, the blades may "crease" and lose their smooth appearance, rubbing them with a screwdriver handle or other hard plastic may actually improve their appearance

/https://fbi.cults3d.com/uploaders/19667099/illustration-file/e6fe295e-5806-4057-a3ee-420ab20d7002/10.jpg)

