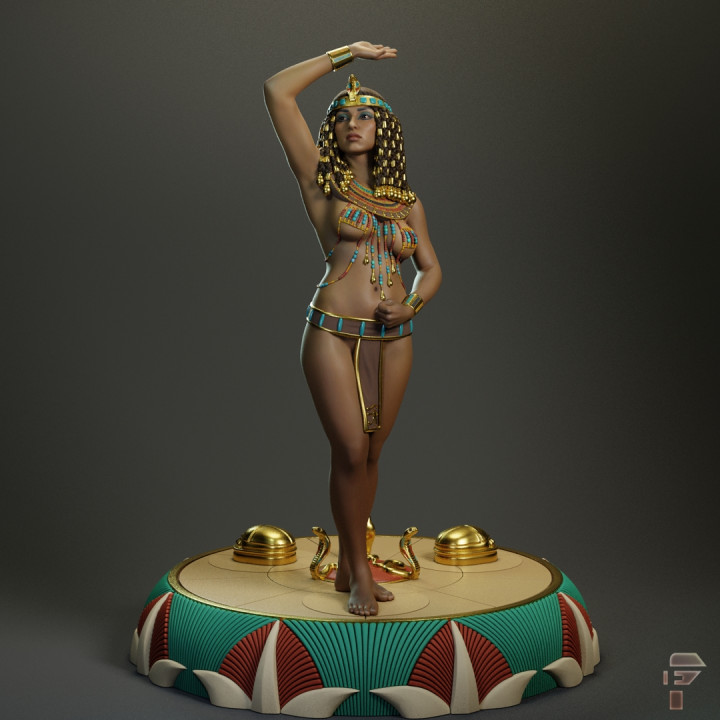
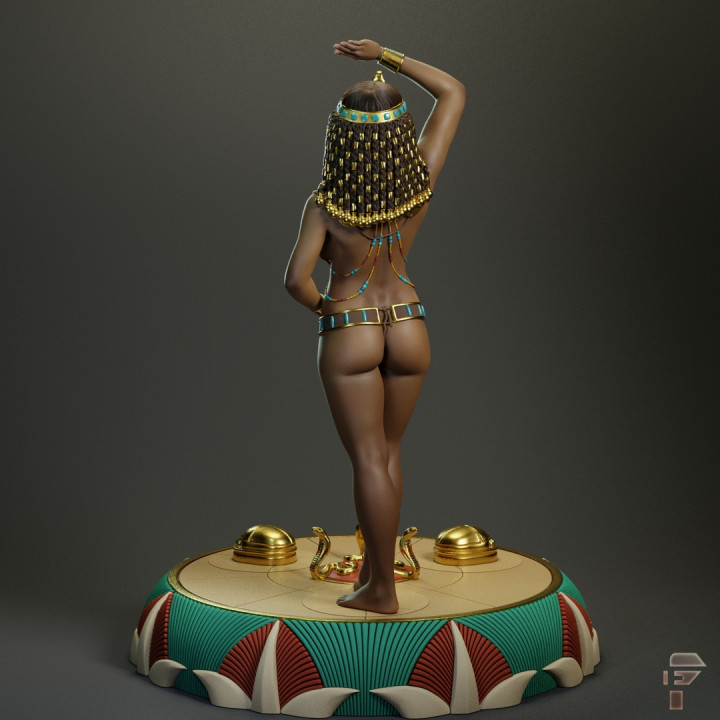
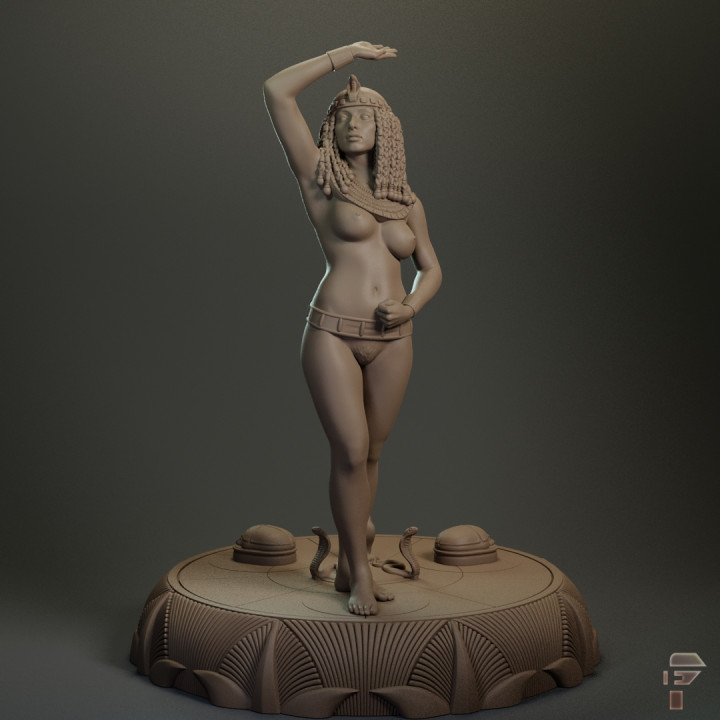
Egyptian Dancer: Shade Pose


$7.00 Egyptian Dancer: Shade Pose
Published 2022-02-22T09:41:21+00:00
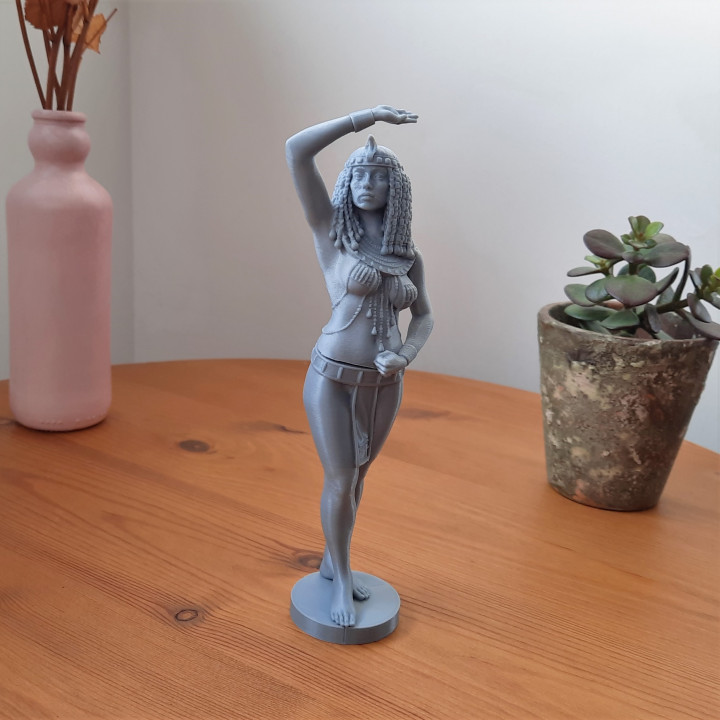
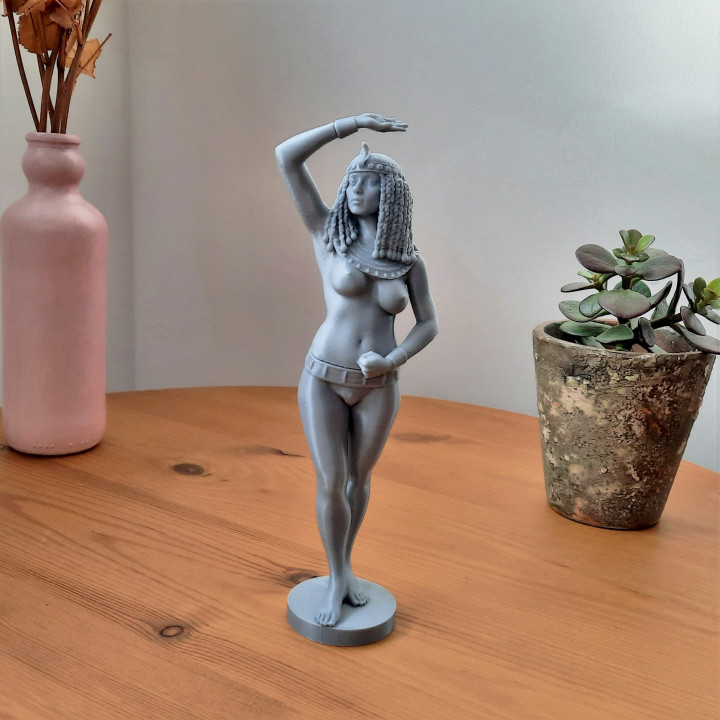
Full body 1:10 scale loosely historical, ancient Egypt-inspired character figurine, in the "Shade" pose.
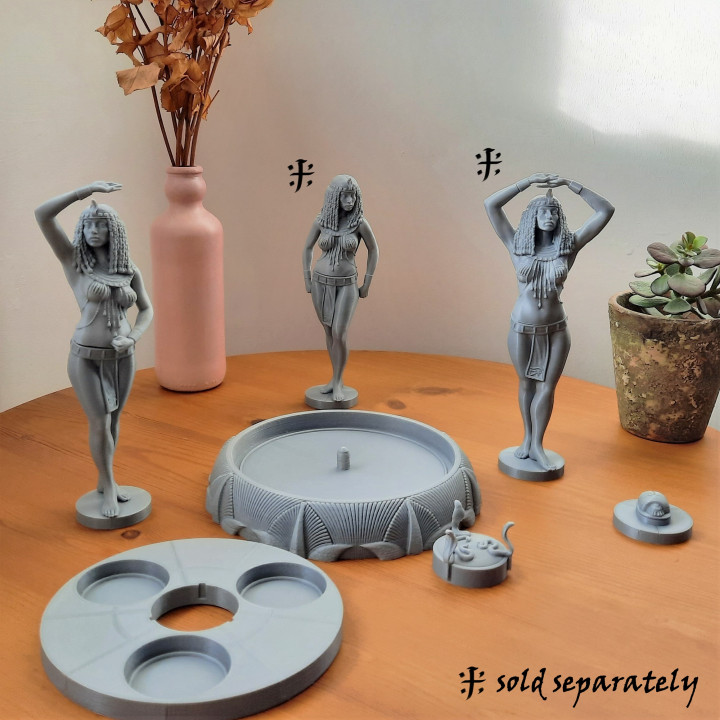
All three poses in one available here!
With this version you will get the Shade Pose model, as well as the (more historically accurate) nude version.
The model is divided into upper body and lower body (keyed and ready to print), so you can choose the state of dress for each as you prefer.
Includes the free-rotating display base. Choose the orientation that best suits your mood at any time.
Also includes a scarab beetle filler base. You can print filler bases to keep the main display looking beautiful while you're building your collection of these figurines.
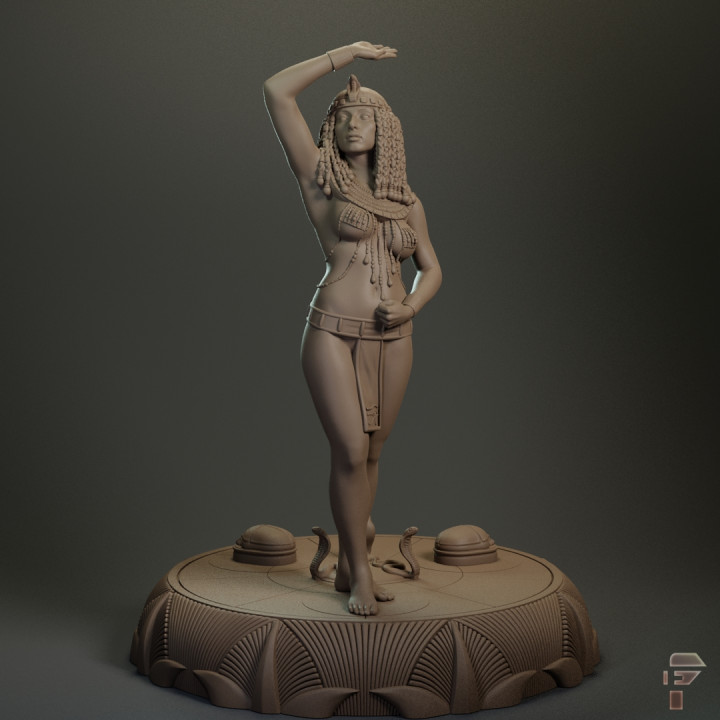
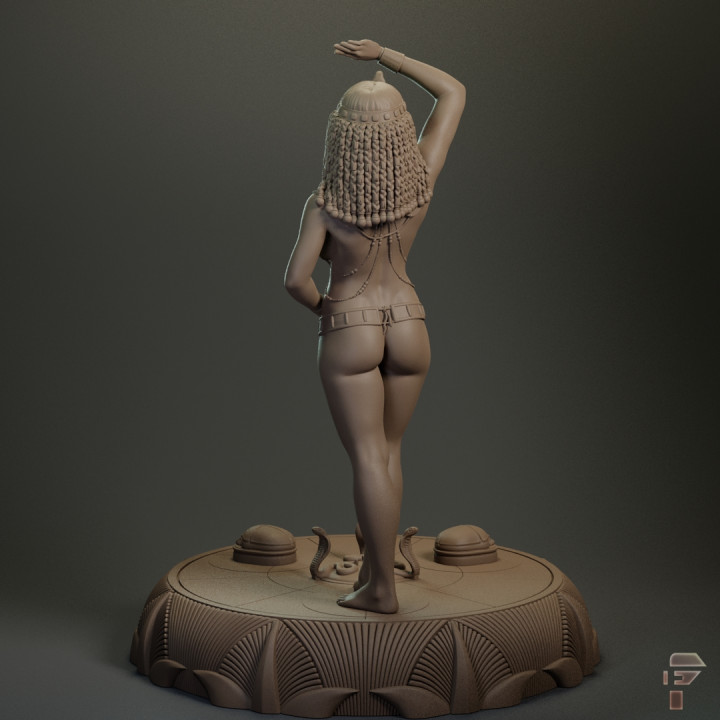
The STL files are provided in the orientations I used for my successful test prints.
All of my test prints were sliced in Cura and printed on my FDM printer at 0.1mm layer height, except for the display base which I printed at 0.2mm layer height to save time.
I used tree supports with the following basic settings, but you will probably need to adjust for your particular printer and set up:
Tree Support Branch Angle: 35 degrees
Tree Support Branch Distance: 2mm
Tree Support Branch Diameter: 2mm
Tree Support Branch Diameter Angle: 3 degrees
Support Placement: Everywhere
Support Overhang Angle: 70 degrees
Support Z Distance: 0.2mm
Support X/Y Distance: 0.3mm
Support Interface disabled
Some of the models have alternatives with custom support structures provided, which I recommend using for FDM printing. They provide extra stability and improve dimensional accuracy. See * at the bottom of this for instructions of how to use them in Cura. They must be used together with automatic supports in most cases. Please also note that the custom supports intersect with the model. Cura automatically adds the gap between the support and the model as per your support settings, but other slicers may or may not, so please be aware.
General Info:
Bead top
For the non-nude version(s) of the upper body, the bead top she is wearing was often given automatic supports. I used support blockers on the beads on the front of the body, which worked fine. I left them alone on the back because there were a few parts I thought might need the support, but the overhangs are so tiny that if you really want to save filament, you could try blocking them there too.
Wig
The wig needs support at the back, under the spheres at the end of each braid. I didn't find that supports were necessary higher up on the braids.
Crown/Circlet
Cura kept wanting to support the stones set in the circlet, but I found it to be unnecessary.
Hands
I recommend using the provided custom support*. Use it with tree supports, and set the Support Overhang Angle to 90 degrees, to prevent any other supports being generated.
Shade Pose:
Upperbody
I recommend using the custom supports* in addition to automatic supports.
Lowerbody (non-nude)
The bottom of the apron at the front is basically the only part that needs support. The belt and the Eye of Ra pattern on the apron should print fine without any support.
Lowerbody (nude)
Should print without supports.
Base:
Central Boss
I recommend using the version with custom supports*. When I printed this, I allowed the cutout for the key to also have a support, but after printing I didn't think it was really necessary.
Model Holder
Print without supports.
Display Base
Shouldn't need any supports. The print time I got initially was quite long, so I increased layer height to 0.2mm, and I also increased the speed of printing for the top and bottom layers (from 30mm/s to 50mm/s for my printer). You might notice in my photos that my print had some issues: some gaps in layers, and I got more stringing than I'd like. I don't think those problems were caused by the above changes though. I think my filament had got damp, and that caused inconsistent extrusion. I don't think there's any reason you would encounter the same problems, but if you can invest the time, using the same layer height as the other models will certainly get the best result.
*How to use custom supports in Cura:
You need to download the "Mesh Tools" plugin from the Cura Marketplace.
Import the STL file, right click the model and go to Mesh Tools > Split model into parts. Select each custom support, click on "Per Model Settings" on the left of the screen, and then choose "Print as support".
| Date published | 22/02/2022 |
| Price | $7.00 |
| Dimensions | 151.2mm x 151.2mm x 192mm |