Skip to content

Bed Leveling Gauge

Advertising
Advertising
?
Creation quality: 5.0/5 (1 vote)
Evaluation of members on the printability, utility, level of detail, etc.

  • 2.6k views
  • 6 likes
  • 6 downloads

License
3D design format
STL and ZIP Folder details Close
  • Bed Leveling Gauge.zip
    • 0.1xx Resolution/Front Cover.stl
    • 0.1xx Resolution/Gear 3.stl
    • 0.1xx Resolution/Gear 4.stl
    • 0.1xx Resolution/Gear 5.stl
    • 1.xxx Resolution/Front Cover.stl
    • 1.xxx Resolution/Gear 3.stl
    • 2020 Mount.stl
    • Assembly.avi
    • Back Cover w screw rails.stl
    • Back Cover.stl
    • Gear 1.stl
    • Gear 2.stl
    • Needle.stl
    • Pin.stl
    • Prusa i3 mounts.stl
    • Spring.stl
    • Washer.stl
  • Full.stl

Learn more about the formats

Publication date 2022-04-17 at 02:09
Design number 696257

asraff

3D printer file info

3D model description

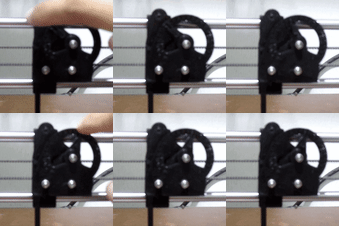
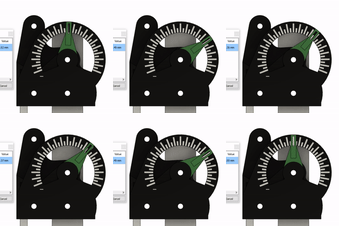
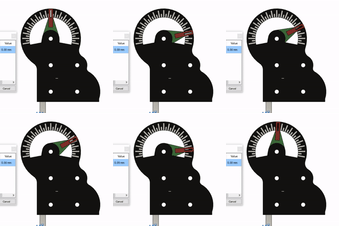
This is a bed leveling gauge that is pretty much a 3d printable depth gauge. The idea here is to level your bed with this tool while eliminating the need of using paper friction technique.

The maximum travel is 2mm

Post Printing

These parts uses M3 only, and the screw hole doesn't have any tolerance added into them so they will have very little play. Use 3mm drill or just keep spinning the screw in these holes so they became loose, but not too loose until there are plays.

Assemblies

Assemble them as shown in the assembly video included in the zip file.

Verify that all the gears can move freely and very little to no friction on the screws either. The spring part are meant to push the pin downwards as you can see in the video, there's a small channel on the cover to mount the spring.

You may need to put a bit of lube in the mechanism to reduce friction even further

Usage

  1. Raise your Z-axis.
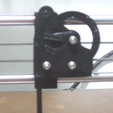
  2. Mount this gauge in the middle of your x-axis gantry systems.
  3. Slowly lower your z-axis with lowest travel distance.
  4. Make sure the tip of the pin will touch the center of your bed.
  5. Try lowering the z-axis further until the needle is in the middle of the gauge/indicator.
  6. Manually move the needle to the right side with your hand but not too far from where it rest.
  7. Release the needle and let it spring back.
  8. Repeat step 6 and 7 several times making sure the needle is consistent with its position
  9. Take note of your z-axis and your needle position.
  10. Put this gauge at other point of your bed you want to gauge and repeat the whole process

Disclaimer

I held no responsibility if any part of your machine broke in attempt to print or use of this item

About This Gauge

This perhaps another complex design that I pulled off after the last fractal vise that I did. I want this to somewhat as precise as possible on the indicator/gauge part yet trying to keep it simple as possible.

There's another version of the back cover, the one with screw railings, you need to use the screw to fix the pin in position and lesser friction.

3D printing settings

Orient any parts you may feel suitable especially the mounting parts

Advertising


Issue with this design? Report a problem.

Would you like to support Cults?

You like Cults and you want to help us continue the adventure independently? Please note that we are a small team of 3 people, therefore it is very simple to support us to maintain the activity and create future developments. Here are 4 solutions accessible to all:

  • ADVERTISING: Disable your banner blocker (AdBlock, …) and click on our banner ads.

  • AFFILIATION: Make your purchases online by clicking on our affiliate links here Amazon.

  • DONATE: If you want, you can make a donation via Ko-Fi πŸ’œ.

  • WORD OF MOUTH: Invite your friends to come, discover the platform and the magnificent 3D files shared by the community!


Sharing and downloading on Cults3D guarantees that designs remain in makers community hands! And not in the hands of the 3D printing or software giants who own the competing platforms and exploit the designs for their own commercial interests.

Cults3D is an independent, self-financed site that is not accountable to any investor or brand. Almost all of the site's revenues are paid back to the platform's makers. The content published on the site serves only the interests of its authors and not those of 3D printer brands who also wish to control the 3D modeling market.

100% secure payment by credit card, PayPal, Apple Pay, Google Pay, etc.
View all payment options.