Skip to content

Light house for toilet paper

Advertising
?
Creation quality: 5.0/5 (1 vote)
Evaluation of members on the printability, utility, level of detail, etc.

  • 2.9k views
  • 9 likes
  • 12 downloads
  • 2 collections

License
3D design format
STL and ZIP Folder details Close
  • LH_3seg_betonschale_rev6.stl
  • LH_3seg_plaform_big_rev6.stl
  • LH_3seg_plaform_little_rev6.stl
  • LH_3seg_plaformpfosten_big_rev6.stl
  • LH_3seg_plaformpfosten_little_rev6.stl
  • LH_3seg_ring2_rev6.stl
  • LH_3seg_ring4_rev6.stl
  • LH_3seg_ring6_rev6.stl
  • LH_3seg_ringpla1_rev6.stl
  • LH_3seg_ringpla3_rev6.stl
  • LH_3seg_ringpla5_rev6.stl
  • LH_3seg_roof_rev6.stl
  • LH_3seg_roofbalken_rev6.stl
  • LH_3seg_sockel_rev6.stl
  • LH_3seg_sockelstift_rev6.stl
  • LH_3seg_stiftdm6_rev6.stl
  • LH_3seg_windowring8_rev6.stl
  • LH_3seg_zentbolzen_rev6.stl
  • LH_3seg_zylring7_rev6.stl
  • leuchthaus-fuer-toilettenpapier.zip

Learn more about the formats

Last update 2024-03-08 at 21:44
Publication date 2022-04-24 at 19:57
Design number 704369

3D printer file info

3D model description

For Sonja for her birthday. She is a fan of all kinds of lighthouses.

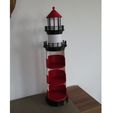
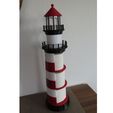
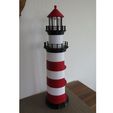
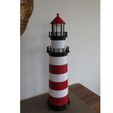
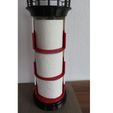
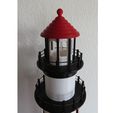
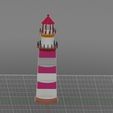
Here is a large lighthouse for the bathroom or toilet, as a holder for toilet paper, with three compartments.

All parts in the color "black" are printed in black filament. The rest of the parts in white. After finishing with a file and sandpaper, I sprayed my desired parts in color.

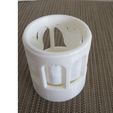
The light house ring; window cylinder ( window-ring8 ) below the roof, should definitely be printed with support.

The window bars are very long and thin. They can break off before the connection of the window arches is printed. The window arch is also printed more beautifully with support.

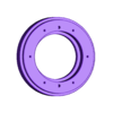
The recessed adhesive surfaces of the base ring also require support.

The base ring should be printed as stable as possible when you fill the concrete shell with metal or pour concrete into it. This increases the stability of the lighthouse and shifts the center of gravity downwards.

Assembly:

From bottom to top. As well as from the inside to the outside.

Carefully remove the straight support surfaces on the rings from the rings. These surfaces support the rings during printing.

All parts are glued together. Before doing so, check that all parts fit together properly. In other words, deburr and rework the parts if necessary.

The first retaining plate / first ring plate is screwed to the black base ring using Spax screws (Dm3 x 25 mm). Shorten the Spax screws accordingly at the tip so that they do not break through the base plate, as the screw length is very short. Do not forget the concrete slab before screwing them in. Two pins, dm6x18 mm help with alignment.

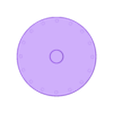
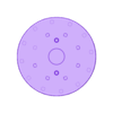
The two platform washers have central holes.

The subsequent tower rings can be centered using the centering bolts.

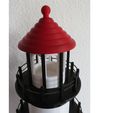
The top window ring has two pin holes (Dm6 mm) to the small platform, as well as two slotted holes in the glued edge at the top. The roof is therefore already well aligned with the platform.

The holes for the roof posts are very deep in the roof. Insert the same posts there smoothly. Now apply adhesive to the lower roof post holes and press the posts in the roof down into these holes one after the other.

Gluing on one side, at the bottom only, is completely sufficient.

A little challenge never hurts.

The railing bolts may need to be re-drilled, depending on how thick the cord, filament cord, wire or ball chain is. The start and end can then be invisibly inserted and glued into a post hole.

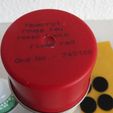
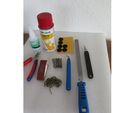
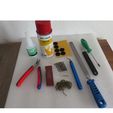
Note: Accessories and tools required, see last pictures.

You can glue felt or foam rubber into the base ring.

The reason is that PLA slips very well on stone slabs and stoneware.

Tip: Insert the concrete shell into the base. This provides more weight in the lower area.

If something does not fit or is missing, please let us know. Have fun.

3D printing settings

Support required for rings 2+4+6, base and window-ring8.

wall 1.2 mm. Total weight approx. 1,250 kg (without misprints, without the support surfaces) Total height approx. 63.0 cm

2x centering bolts and 4x pins d6x18 mm

8x roof bars

12x short balusters

16x long balusters.

Advertising


Page translated by automatic translation. See the original version.
Issue with this design? Report a problem.

Would you like to support Cults?

You like Cults and you want to help us continue the adventure independently? Please note that we are a small team of 3 people, therefore it is very simple to support us to maintain the activity and create future developments. Here are 4 solutions accessible to all:

  • ADVERTISING: Disable your banner blocker (AdBlock, …) and click on our banner ads.

  • AFFILIATION: Make your purchases online by clicking on our affiliate links here Amazon.

  • DONATE: If you want, you can make a donation via Ko-Fi πŸ’œ.

  • WORD OF MOUTH: Invite your friends to come, discover the platform and the magnificent 3D files shared by the community!


Sharing and downloading on Cults3D guarantees that designs remain in makers community hands! And not in the hands of the 3D printing or software giants who own the competing platforms and exploit the designs for their own commercial interests.

Cults3D is an independent, self-financed site that is not accountable to any investor or brand. Almost all of the site's revenues are paid back to the platform's makers. The content published on the site serves only the interests of its authors and not those of 3D printer brands who also wish to control the 3D modeling market.

100% secure payment by credit card, PayPal, Apple Pay, Google Pay, etc.
View all payment options.