Skip to content

PNV57 9v battery adapter

Advertising
Advertising
?
Creation quality: 5.0/5 (1 vote)
Evaluation of members on the printability, utility, level of detail, etc.

  • 1.3k views
  • 10 downloads

License
3D design format
ZIP Folder details Close
  • PNV57A 9v adapter.zip
    • 9VAdapter Branded.stl
    • 9VAdapter Unbranded.stl
    • PLA Contrarians/9VAdapter Branded 2nd half.stl
    • PLA Contrarians/9VAdapter Branded.stl
    • PLA Contrarians/9VAdapter Unbranded 2nd half.stl
    • PLA Contrarians/9VAdapter Unbranded.stl
    • _readme.txt
  • PNV57E branding.zip
    • 9VAdapter Branded -PLA E.stl
    • 9VAdapter Branded -PLA2 E.stl
    • 9VAdapter Branded E.stl

Learn more about the formats

Publication date 2023-07-02 at 07:22
Design number 1302003

Professorpopoff

3D printer file info

3D model description

So! You've acquired a PNV57(A) set, too? You want to use it but you DON'T want to break it apart and rewire it to be usable? I have fantastic news.

This actually SHOULD work for ANY variant of PNV57s. (A) and (E) alike. I use 57(A), but if memory serves me correctly these all use the exact same power cords and connectors.

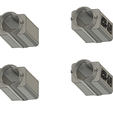
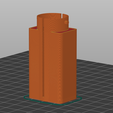
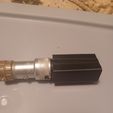
This adapter allows you to hook the original wiring DIRECTLY up to a modern 9v battery with ease. It attaches in the exact same method it hooks into the original plugs. Pull the little grabby part out and hook it straight into the protruding nubs. Doing this this way will allow you to use your device without destroying it and modernizing it. I will just pop the battery pack into my back pocket and use it like that. The cord isn't really a bother to me, I never notice it.

This is a REALLY secure design. It was made to hold an every day standard 9v battery, you can get them everywhere.

The PNV57(A) originally went off 24v power supplies. If you don't know how to get it to run on 12v (or 9v), look up a video on it. Essentially you pop open the back and there's a little thing you turn. Super simple process. It runs good off of 12v, but there's basically no difference to running it off a 9v. The main thing you'll notice is how much quieter it is!

The folder comes with SIX variants.

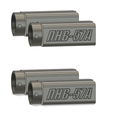
  • Branded (57A)

  • Unbranded

  • Branded (57E)

  • PLA clamshell Unbranded

  • PLA clamshell Branded (57A)

  • PLA clamshell Branded (57E)

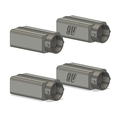
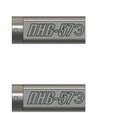
The branded versions are just for a bit of fun. Who doesn't like fun? Cyrillic looks cool on things, so it's got the Cyrillic name for what it goes to on the side, as well as "9V" marked down.

For this design to work, You'll NEED to print it in TPU for the non-clamshell design. You require that flexibility in order to hinge it open and install a battery.

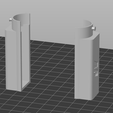
For the contrarians among us. I have a clamshell design that will work with PLA. Drop the battery in the middle and secure them together with rubber bands or string... I don't know why you'd do this. I recommend just using the TPU variants. They're much more convenient.

I can NOT vouch for the PLA variant. But if you're a reasonable person, you'll use the TPU variant. The nubs, I can attest, will only give out LONG after the planet blows up. Seriously, these things shouldn't go anywhere. If you somehow get the TPU hook nubs to rip off- I need to order a round for you. That's impressive.

If you do, for whatever reason, feel the need to use PLA or another hard type of filament, I can NOT guarantee the hook nub safety. Though it should be fine.

As stated before, clamshell variant will hook together like the other one, but for extra security i'd wrap a rubber band around it tightly or something.

(Seriously just use TPU. Once you learn it, it changes your life.)

3D printing settings

The TPU versions NEED to flexible. I use Priline TPU but pretty much any of them should work.

Standard TPU settings of course. If you don't have direct drive, you're not completely out of the equation, but turn your retraction off and just gun it, otherwise you'll have jams.

For best results you should use ~4 perimeters. ~2 Top/Bottom solid layers
~50% infill (for the bottom plate that needs to bend around
Cooling of your choice (I run it with less, 10-40% to ensure each of the layers REALLY get to know each other)
~215C, or even slightly higher. This is a thinner part, and while constant use and flexxing hasn't gotten mine to break, sometimes a little hotter doesn't hurt. You can always go hotter.
Supports is NOT recommended. In my experience the bridging is just fine enough, and you will NOT have a good time cleaning the interior supports if your interface game isn't on point. Just deal with the potentially saggy bridging. It helps a better grip anyways, surely.

For the PLA(+?) variants, Run whatever works best for you. They shouldn't be too picky. You're not needing bending or whatever, and the two halves will be held together by the plug connector and some rubber bands so it won't be experiencing any super insane stress.

Advertising


Issue with this design? Report a problem.

Would you like to support Cults?

You like Cults and you want to help us continue the adventure independently? Please note that we are a small team of 3 people, therefore it is very simple to support us to maintain the activity and create future developments. Here are 4 solutions accessible to all:

  • ADVERTISING: Disable your banner blocker (AdBlock, …) and click on our banner ads.

  • AFFILIATION: Make your purchases online by clicking on our affiliate links here Amazon.

  • DONATE: If you want, you can make a donation via Ko-Fi πŸ’œ.

  • WORD OF MOUTH: Invite your friends to come, discover the platform and the magnificent 3D files shared by the community!


Sharing and downloading on Cults3D guarantees that designs remain in makers community hands! And not in the hands of the 3D printing or software giants who own the competing platforms and exploit the designs for their own commercial interests.

Cults3D is an independent, self-financed site that is not accountable to any investor or brand. Almost all of the site's revenues are paid back to the platform's makers. The content published on the site serves only the interests of its authors and not those of 3D printer brands who also wish to control the 3D modeling market.
100% secure payment by credit card, PayPal, Apple Pay, Google Pay, etc.
View all payment options.