3D model description
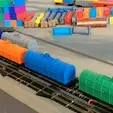
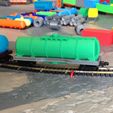
This is a N scale Model Tank Car Freight Train intended to use with Micro-Trains Medium Shank couplers for wheel sets. Designed for FDM printer and using 0.16 or smaller layers and Adaptive layers between 0.08 and 0.16mm - my preferred method. Here is a short video about the Tank Car: https://youtu.be/uO_mGfC3zZ4
These cars are designed to use Micro-Trains Medium Shank couplers. Here is a small video on how to install the couplers. https://youtu.be/iG7RecpV6t0
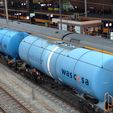
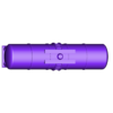
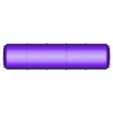
Was headed to perform Stand Up Comedy in Utrecht when I saw these Tank Cars waiting at Utrecht Centraal Station. This Tank Car was inspired by these cars, but not copied. There are three versions. One as a bare simple Tank Car without ladders, walkways or a top dome. The other two have either two side ladders, a dome and a small walkway. Or the closest to being a model of the actual car with larger walkways, a dome and an end ladder on one side.
The cars are printed in two parts with the top fitting inside the base. There are three sizes of the base and two of the tank tops. They aren't intended to be changed, but to fit tight once and stay together. Sometimes a straight screwdriver tip can help to convince the two parts to fully click together. If the top seems slightly too large, using a edge cleaning knife can remove just enough of any "Elephant foot" or a wider spreading first few layers of the print and then they should click together. Different bed leveling can also affect the fit if the first layer is extra squished.
I use multiple colors to make the models more visually interesting by using a change filament code added in the slicer. Generally I've been doing the tank and the under part of the base in the same color. Here is a short video on how to add color changes using Gcodes. https://youtu.be/5vR1_HEw6Fs
3D printing settings
Usually these get printed with Adaptive layers between 0.08 and 0.16mm. If not I use 0.16mm instead. Adaptive layers makes better curved surfaces. Using different colors can make a nice contrast and look as these are "stand-off" N scale model trains.
I use adaptive layers 0.08mm to 0.16mm with Ironing off using S3D 5.1.1 for the slicer. First layer height set to 120% Top and bottom layers set to 6 each and 3 outer perimeters.
I used a change color command to make the tank and bottom of the base both red and silver for the base where the two parts meet. Here is a short video on how to add color changes using Gcodes. https://youtu.be/5vR1_HEw6Fs
To add the color changes to the S3D slicer I use the following code added on the Scripts tab under Post Processing.
{REPLACE "\nM117 Layer XXX, Z=" "\nM300 S2000 P100\nG91\nG1 X10 Y5 Z20\nM600 S500 P100\nG1 E-6.0 F1200\nG90\nM117 Layer XXX, Z="}; pause at layer, move head, play sound, change filament
Change the XXX in BOTH places to the layer height you wish the new color to start on. Determine this by slicing the boat and picking the height for the color change and then seeing what layer that happens to be. Then change the code to that layer in BOTH places.
The added code starts with the M300 which beeps to alert you of the color change. The G91 command makes the G1 move the extruder head using relative position moving the print head aside. M600 changes the color. Then I added a G1 retract to reduce any oozing. G90 goes back to regular position movements. Make sure you switch BOTH of the TWO (2) XXXs for the correct layer where the new color begins.

/https://fbi.cults3d.com/uploaders/21062524/illustration-file/baf96aba-a857-4997-b015-3c4b56218d79/GIF_1st_Tank_Car__1_Train_2.gif)
