Skip to content

All Moving Tail For Freewing 70mm F-16

Advertising
Advertising
?
Creation quality: 5.0/5 (1 vote)
Evaluation of members on the printability, utility, level of detail, etc.

  • 1.7k views
  • 6 likes
  • 3 downloads

License
3D design format
STL Folder details Close
  • AMT01.stl
  • AMT02.stl
  • AMT03.stl
  • AMT04.stl
  • AMT05.stl
  • AMT06.stl

Learn more about the formats

Publication date 2023-08-25 at 04:33
Design number 1406850

3D printer file info

3D model description

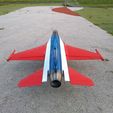
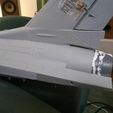
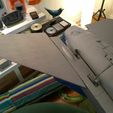
I designed an all moving tail upgrade kit for the Freewing 70 mm F-16. It's easy to install and by aligning the plates with the sides of the fuselage you achieve a strong and accurate installation.

Video of my first flight with the all moving elevators:
https://youtu.be/FF4Ky-lJOxA

The elevators and reinforcement plates should be mirrored in the slicer in order to make left and right versions.

Temporarily tape AMT05 to the rear of the fuselage side and carefully drill a hole thgrough it using it as a jig. I recommend using a sharpened 10 mm tube to drill the hole in the foam instead of a twist drill.

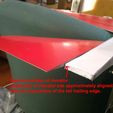
The two plates AMT01 and AMT02 fit on the outside and inside of the fuselage rear ends and align together to create a strong structure in the rear. The pointy bit on AMT02 should be inserted into a pre-cut slot in the foam with glue. I used UHU Por foam glue to install them.

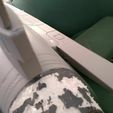
Two 5x8x2,5 mm ball bearings go on each tube to act as the hinge. Test fit the bearings before the parts are glued into the fuselage so that you know it all will fit together.

Use a 5 mm woven carbon tube or a 5mm solid carbon rod as the shaft and glue into the AMT03 elevator with CA superglue. If the carbon tube/rod isn't a perfect fit in the bearings some sanding/painting will be needed to reduce/increase the diameter slightly. Sand a flat spot on the end of the shaft for the locking grub screw in AMT04 to sit against when tightened. If a carbon tube is used, fill the end with epoxy before sanding a flat spot on the shaft. An M4x5 mm grub screw should be used in AMT04 to secure to the shaft. Do not overtighten as that can crack the carbon shaft. AMT06 is a spacer to put between the elevator and the ball bearing to prevent rubbing against the fuselage.

Control surface deflection should be the exact same as with the stock elevators. In other words set the up/down travel at the trailing edge of the elevator to the same as you like to use with the stock elevators and it will give the same elevator authority.

Use the innermost or second to innermost hole on the servo arm so that you maximize the mechanical advantage to your servo to maximize strength and resolution.

Parts needed:
200 mm 5 mm carbon rod or woven tube
4x 5x8x2,5 mm ball bearings
2x M4x5 mm grub screws

STL description:
AMT01.stl - Outside reinforcement with bearing tube
AMT02.stl - Inside reinforcement.
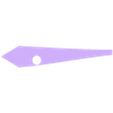
AMT03.stl - Elevator.
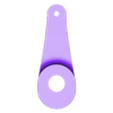
AMT04.stl - Control horn.
AMT05.stl - Drill jig.
AMT06.stl - Spacer.

3D printing settings

AMT01, 02, 04 and 06 should be printed 100% solid.

AMT03 should be printed in vase mode with 3 bottom and 5 top layers to cap opp the ends.

AMT05 is non critical but should be printed with typical print settings so it's strong enough to work as a drill jig.

Advertising


Issue with this design? Report a problem.

Would you like to support Cults?

You like Cults and you want to help us continue the adventure independently? Please note that we are a small team of 3 people, therefore it is very simple to support us to maintain the activity and create future developments. Here are 4 solutions accessible to all:

  • ADVERTISING: Disable your banner blocker (AdBlock, …) and click on our banner ads.

  • AFFILIATION: Make your purchases online by clicking on our affiliate links here Amazon.

  • DONATE: If you want, you can make a donation via Ko-Fi 💜.

  • WORD OF MOUTH: Invite your friends to come, discover the platform and the magnificent 3D files shared by the community!


Sharing and downloading on Cults3D guarantees that designs remain in makers community hands! And not in the hands of the 3D printing or software giants who own the competing platforms and exploit the designs for their own commercial interests.

Cults3D is an independent, self-financed site that is not accountable to any investor or brand. Almost all of the site's revenues are paid back to the platform's makers. The content published on the site serves only the interests of its authors and not those of 3D printer brands who also wish to control the 3D modeling market.

100% secure payment by credit card, PayPal, Apple Pay, Google Pay, etc.
View all payment options.