Skip to content

Print in Place Pom Pom Maker

Advertising
Advertising
?
Creation quality: 5.0/5 (1 vote)
Evaluation of members on the printability, utility, level of detail, etc.

  • 3.1k views
  • 17 likes
  • 32 downloads

License
3D design format
STL Folder details Close
  • 4cm.stl
  • 5cm.stl
  • 6cm.stl
  • 7cm.stl
  • Clip.stl

Learn more about the formats

Publication date 2023-09-12 at 15:21
Design number 1445648

3D printer file info

3D model description

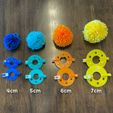
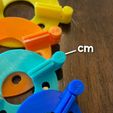
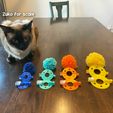
These files are for making a pom pom using yarn. There are sizes for 4cm, 5cm, 6cm, and 7cm. The sizes are debossed on the hinge. The clips print separately but the actual pom pom maker prints in place — no hardware or assembly needed. The clip is one size and works for all pom pom maker sizes.

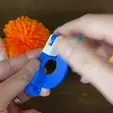
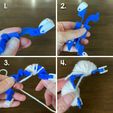
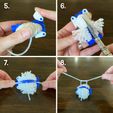
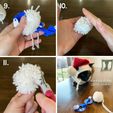
Visual instructions are in the photos.
1. Attach clips. Push quickly to minimize stress on the clip. I broke a couple by taking too much time and being too careful! No issues after starting to push them quickly!
2. Hold two pieces of pom pom maker together so the bumps on each side are against the holes on the other side.
3. Wrap yarn around one side and fill up desired amount. Less will be a looser pom pom and more will be a full and tight pom pom.
4. Flip to the other side and repeat. No need to trim yarn when switching sides, it’s easier if you don’t.
5. Close pieces and snap clips closed.
6. Fasten yarn tail from your yarn and use sharp scissors to cut around outside in the slot between the two pieces. (The bumps on the pieces are what allows this space to get your scissors in.)
7. Take a long piece of yarn (8-10” or so) and push it in slot on one side in the center of the long strand so there is an equal amount on each side. Push it hard, it will need to work its way past those bumps.
8. Flip pieces over and do a tight square knot (tight enough that you feel like you might break the yarn, otherwise your pom pom will fall apart.) Flip once more and repeat a knot on the other side. This holds the pom pom together so make sure it’s tight.
9. Unclip and open pom pom maker pieces. Remove pom pom.
10. Rub pom pom between palms and gently pinch and tug the strands a little to fluff up.
11. Leave the long tail if you plan to attach to your project! Trim around pom pom to make it round.

Fun fact: there are people on Etsy willing to buy untrimmed pom poms!
Tip: Using multiple strands at once will fill up your pom pom quicker!

3D printing settings

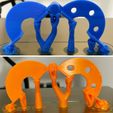
Print two clips and two pom pom maker pieces. I used tree/organic supports for the pom pom maker pieces. (See photos; I used a little more for the bigger sizes.) It prints upright (like a mountain.) I tested multiple orientations and this is the only one that works and works perfectly. I have it positioned so the smaller end is slightly lifted from the bed to allow supports under it. After you carefully remove the supports, make sure the gaps are present in the joint pieces. Some of my prints ended up closing right away and some needed some assistance. If they are fused together (likely from material support being left behind), you’ll need to work them apart with your thumbnail or other tool. Then you’ll have to carefully release it. Hold the pieces right at the joint with your hands on each side and start wiggling it. You might need a little force to release it. I did a whole bunch of test pieces and never broke the joint.
My settings:
Layer height: .12mm (I imagine a larger layer hight wouldn’t be great against the yarn because it wouldn’t be so smooth.)
Perimeters/walls: 3
Infill: 25%
Same settings for clip, no supports needed.

Advertising


Issue with this design? Report a problem.

Would you like to support Cults?

You like Cults and you want to help us continue the adventure independently? Please note that we are a small team of 3 people, therefore it is very simple to support us to maintain the activity and create future developments. Here are 4 solutions accessible to all:

  • ADVERTISING: Disable your banner blocker (AdBlock, …) and click on our banner ads.

  • AFFILIATION: Make your purchases online by clicking on our affiliate links here Amazon.

  • DONATE: If you want, you can make a donation via Ko-Fi 💜.

  • WORD OF MOUTH: Invite your friends to come, discover the platform and the magnificent 3D files shared by the community!


Sharing and downloading on Cults3D guarantees that designs remain in makers community hands! And not in the hands of the 3D printing or software giants who own the competing platforms and exploit the designs for their own commercial interests.

Cults3D is an independent, self-financed site that is not accountable to any investor or brand. Almost all of the site's revenues are paid back to the platform's makers. The content published on the site serves only the interests of its authors and not those of 3D printer brands who also wish to control the 3D modeling market.

100% secure payment by credit card, PayPal, Apple Pay, Google Pay, etc.
View all payment options.