Skip to content

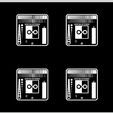
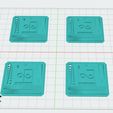
RERF R_E_R_F Ultra-Fast for Anycubic Photon M3 Max, XP2 Validation Matrix

Advertising
Advertising
?
Creation quality: 5.0/5 (1 vote)
Evaluation of members on the printability, utility, level of detail, etc.

  • 4.8k views
  • 11 likes
  • 472 downloads
  • 1 collection
  • 2 comments

License
3D design format
STL and ZIP Folder details Close
  • RERF M3 Max.zip
    • 1.5 sec resin test.pwsr
    • R_E_R_F.pm3m
  • R_E_R_F M3 Max.stl

Learn more about the formats

Last update 2023-09-28 at 01:40
Publication date 2023-09-19 at 19:28
Design number 1461308

3D printer file info

3D model description

!!Make sure to turn off "Exposure Compensation" once printing starts.!!
!!This must be done every single time you print, as it gets re-enabled automatically(thanks ANYCUBIC)!!

Only for Anycubic Photon M3 Max.
Based on "ResinXP2-ValidationMatrix"

As per the designer, here is how to check the test:

The Photonsters Validation has a couple of features to make it easy to find if the exposure is balanced.

Pins/Holes should be the same number
Teardrops in the central square should barely touch at the intersection point
The central square should mesure 20mm with 1mm edge

------Use instructions:------

Place in root directory of your USB.

-Print, pre-sliced R_E_R_F.pm3m file in ZIP takes 8 min to print.
or
-Slice R_E_R_F M3 Max.stl file and name R_E_R_F.pm3m
If re-slicing, make sure you have no more that 4 combined bottom/transition exposure layers.

EDIT9/27/23: edited file for faster printing, and part numbering visible earlier in the file.

Also included Photon Workshop 1.5second resin test profile you can import and a pre-sliced R_E_R_F that starts at 1.5 second exposure for No.1

Once it is on your USB. for various resins, you can set adjust your exposure settings in-printer once the print has started, or you can re-slice with Photon Workshop, or other slicer.


Info from Anycubic regarding RERF:

Step 1: Import the R_E_R_F file into the slicing software.
There are 8 models in the file and each of them is numbered, as a convenience for users to track and record them. The exposure time for Model No.1 is equal to "normal exposure time (s)" in the slicing settings (exclude Bottom Exposure Time), and the exposure time for other models will be increased by an increment of "0.25s" subsequently.

For example, when the normal exposure time is set to 1.5 s, and the following time increment is 0.25 s. The exposure time of Model No.1-8 is shown below.

Number Exposure Time (s)
1 1.5s
2 1.75s
3 2s
4 2.25s
5 2.5s
6 2.75s
7 3s
8 3.25s

Notice:
The default exposure time and the time increment in the test file vary by machine. You can check the specific parameter from Anycubic Machine User Manual.

The default exposure time of Model No.1 in the test file can be modified in slicer according to your demand. And this action will be valid during printing.


Note: All credit goes to the original authors of the file, and I am not claiming that I have had any input on the design, testing, or was involved with the upload of this file in its original source.

The base test model was designed originally by Photonsters, and was uploaded by X3msnake. You can find the original file on cults3d - https://cults3d.com/en/3d-model/tool/photonsters-validation-matrix-v2.

3D printing settings

Make sure to turn off "Exposure Compensation" once printing starts.

AnycubicPhotonWorkshop Basic resin profile included in zip has test exposure/speeds for Anycubic ABS-Like + Resin.

if re-slicing, make sure you have no more that 4 combined bottom/translation exposure layers.

Advertising


Issue with this design? Report a problem.

Would you like to support Cults?

You like Cults and you want to help us continue the adventure independently? Please note that we are a small team of 3 people, therefore it is very simple to support us to maintain the activity and create future developments. Here are 4 solutions accessible to all:

  • ADVERTISING: Disable your banner blocker (AdBlock, …) and click on our banner ads.

  • AFFILIATION: Make your purchases online by clicking on our affiliate links here Amazon.

  • DONATE: If you want, you can make a donation via Ko-Fi πŸ’œ.

  • WORD OF MOUTH: Invite your friends to come, discover the platform and the magnificent 3D files shared by the community!


Sharing and downloading on Cults3D guarantees that designs remain in makers community hands! And not in the hands of the 3D printing or software giants who own the competing platforms and exploit the designs for their own commercial interests.

Cults3D is an independent, self-financed site that is not accountable to any investor or brand. Almost all of the site's revenues are paid back to the platform's makers. The content published on the site serves only the interests of its authors and not those of 3D printer brands who also wish to control the 3D modeling market.

100% secure payment by credit card, PayPal, Apple Pay, Google Pay, etc.
View all payment options.