Skip to content

Raspberry Pi Articulated Camera Mount

Advertising
Advertising
?
Creation quality: 5.0/5 (1 vote)
Evaluation of members on the printability, utility, level of detail, etc.

  • 606 views
  • 6 downloads
  • 1 make

License
3D design format
Folder details Close
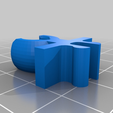
  • arm_joint.stl
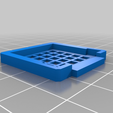
  • camera_bracket.stl
  • case_front.stl
  • case_rear.stl
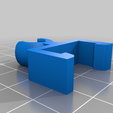
  • external_frame_clip.stl
  • frame_clip.stl

Learn more about the formats

Publication date 2023-09-22 at 01:30
?
Published to Thingiverse on: 2015-04-22 at 23:05
Design number 1466016

3D printer file info

3D model description

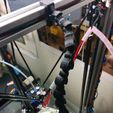
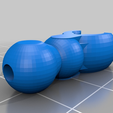
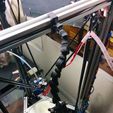
This is an articulated camera mount for the Raspberry Pi's camera. I leveraged the wonderful joints from TinkerPlay, and built a system that should allow you to put as many joints in your mount as you'd like.

This is a (spiritual) remix of thing:587765 (http://www.thingiverse.com/thing:587765); most of the parts are recreated from scratch. The only thing I reused was the case for the camera, and pieces of the camera bracket.

Updates:

  • 01/17/16: Added a through hole to frame_clip.stl so you can tie off elastic to help the arm articulate.
  • 12/31/15: Removed the Work in Progress flag, as this has been working so well, there's not much more work left to do.
  • 07/07/15: Added an improved 8020 clip that clips internally, as opposed to externally. I renamed the previous clip to external_frame_clip.stl
  • 04/23/15: I've printed this, and it works wonderfully! Please, try it, and give me some feedback!

3D printing settings

Print one of everything, except the arm_joint.stl file, which you will want several. I suggest starting with three, and printing more if you need them.

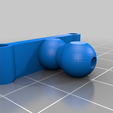
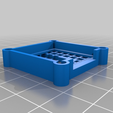
Assembly is pretty simple. The camera presses into the case_front.stl, and case_back.stl just snaps into the back. You then put two M3 screws/nuts through the holes on the side, and camera_bracket.stl.

From there, just snap in as many arm_join.stl pieces as you need, and clip it to the frame!

Note: One suggestion is to get some rubber, either from a hair tie or a rubber band, and tie a not in one end, run it through the joints, and then tie it off on the other end, after pulling it tight. This just helps the joints pull against each other and makes it easier to articulate.

Advertising


Issue with this design? Report a problem.

Would you like to support Cults?

You like Cults and you want to help us continue the adventure independently? Please note that we are a small team of 3 people, therefore it is very simple to support us to maintain the activity and create future developments. Here are 4 solutions accessible to all:

  • ADVERTISING: Disable your banner blocker (AdBlock, …) and click on our banner ads.

  • AFFILIATION: Make your purchases online by clicking on our affiliate links here Amazon.

  • DONATE: If you want, you can make a donation via Ko-Fi πŸ’œ.

  • WORD OF MOUTH: Invite your friends to come, discover the platform and the magnificent 3D files shared by the community!


Sharing and downloading on Cults3D guarantees that designs remain in makers community hands! And not in the hands of the 3D printing or software giants who own the competing platforms and exploit the designs for their own commercial interests.

Cults3D is an independent, self-financed site that is not accountable to any investor or brand. Almost all of the site's revenues are paid back to the platform's makers. The content published on the site serves only the interests of its authors and not those of 3D printer brands who also wish to control the 3D modeling market.

100% secure payment by credit card, PayPal, Apple Pay, Google Pay, etc.
View all payment options.