Skip to content

Raspberry Pi webcam

Advertising
Advertising
?
Creation quality: 0.0/5 (0 votes)
Evaluation of members on the printability, utility, level of detail, etc.

  • 488 views
  • 3 downloads

License
3D design format
Folder details Close
  • 3d-nut_v3.stl
  • 3d_bolt_v3.stl
  • Pi_2_Webcam_Complete_v1.1.zip
    • LICENSE.txt
    • README.txt
    • attribution_card.html
    • files/camera-frame_v1.1.stl
    • files/Pi_2_Webcam_v1.1.step
    • files/pi-bumper_v1.1.step
    • files/camera-frame_v1.1.step
    • files/webcam-base_v1.1.step
    • files/webcam-base_v1.1.stl
    • files/pi-bumper_v1.1.stl
    • images/a86f56bfb8e4a4cded3c3e1da736ba45_preview_featured.JPG
  • Pi_2_Webcam_Complete_v2.zip
    • 3d-nut_v2.step
    • 3d_bolt_v2.step
    • camera-frame_v2.step
    • Pi 2 Webcam Complete_v2.step
    • pi-bumper_v2.step
    • pi_holder_v2.step
    • webcam-base_v2.step
  • camera-frame_v2.stl
  • pi-bumper_v2.stl
  • pi_holder_v2.stl
  • webcam-base_v2.stl

Learn more about the formats

Publication date 2023-04-16 at 00:05
?
Published to Thingiverse on: 2017-02-19 at 15:48
Design number 1171097

jahg

3D printer file info

3D model description

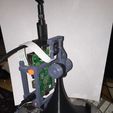
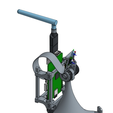
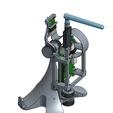
This is an adjustable webcam stand for a Raspberry Pi 2 (B+) or 3 based webcam. It has a holder for the Pi and a mount for the Pi Camera (v2).

There are three printed parts required:

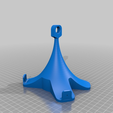
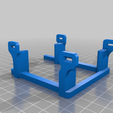
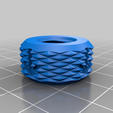
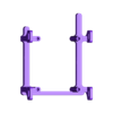
  • Webcam base: the stand and main holder

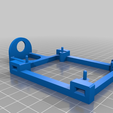
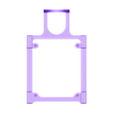
  • Camera frame: a frame that goes around the camera and attaches it to the base

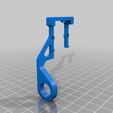
  • Pi bumper: a frame that goes around the Pi and attaches it to the base

In addition, you need two pieces of electronics (three if you want it to be accessible over a wireless network)

  • A Raspberry Pi B+, 2 or 3 - I used a B+ for this project and it was more than capable of handling the load.

https://www.raspberrypi.org/products/model-b-plus/

https://www.raspberrypi.org/products/pi-noir-camera-v2/

  • (Optional) A USB wireless receiver for the Pi. I used a PAUD6 from Panda Wireless, which is totally overkill for this project but works well.

Assembly:

Attach the Pi Cam to the camera frame using either M2 fasteners + nuts or small zip ties. Attach the Raspberry Pi to the base, securing it with the Pi bumper. Depending on the tolerances of your printer a small amount of glue may be required (if the holes are too large for a friction fit).

Secure the Pi Cam mount to the base using a short piece of 3mm filament from your printer. If you use 1.75mm filament you can wind some scotch tape around it to thicken it up appropriately.

Software:

I used the following software for this project:

  • Raspbian Jesse Lite

A lightweight, well supported distribution for the Raspberry Pi 2 and 3. Since this is a 'headless' setup (no monitor, keyboard or mouse) there is no need for the graphical interface, hence the 'Lite' version.

https://www.raspberrypi.org/downloads/raspbian/

  • RPi-Cam web interface

A set of configuration files that will guide you through the setup of webserver to display the output of the Pi Cam. Allows for essentially real-time viewing, with a variety of options on the website to take pictures, record video, enable motion-triggered events, etc.

http://elinux.org/RPi-Cam-Web-Interface

Change Log:

v1: Initial Release (all files without version numbers)

v1.1: corrected tolerances on the camera frame + pi bumper part. Added tabs to the pi bumper to make it easier to ziptie.

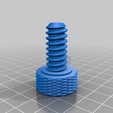
v2: significantly reduced use of zipties and size of webcam base. Added printable bolts to adjust camera angle. Split Rpi holder and base so that improvements can be made without reprinting base part.

Future work:

  • stiffer/better camera angle (with screw or some other variable friction method)

  • better pins for the PI and camera holders to eliminate the need for fasteners/zipties

Advertising


Page translated by automatic translation. See the original version.
Issue with this design? Report a problem.

Would you like to support Cults?

You like Cults and you want to help us continue the adventure independently? Please note that we are a small team of 3 people, therefore it is very simple to support us to maintain the activity and create future developments. Here are 4 solutions accessible to all:

  • ADVERTISING: Disable your banner blocker (AdBlock, …) and click on our banner ads.

  • AFFILIATION: Make your purchases online by clicking on our affiliate links here Amazon.

  • DONATE: If you want, you can make a donation via Ko-Fi πŸ’œ.

  • WORD OF MOUTH: Invite your friends to come, discover the platform and the magnificent 3D files shared by the community!


Sharing and downloading on Cults3D guarantees that designs remain in makers community hands! And not in the hands of the 3D printing or software giants who own the competing platforms and exploit the designs for their own commercial interests.

Cults3D is an independent, self-financed site that is not accountable to any investor or brand. Almost all of the site's revenues are paid back to the platform's makers. The content published on the site serves only the interests of its authors and not those of 3D printer brands who also wish to control the 3D modeling market.

100% secure payment by credit card, PayPal, Apple Pay, Google Pay, etc.
View all payment options.