Skip to content

Wind turbine model, 520mm height (HO/TT/N scale), motorized

Advertising
Advertising
?
Creation quality: 5.0/5 (1 vote)
Evaluation of members on the printability, utility, level of detail, etc.

  • 10.4k views
  • 39 likes
  • 68 downloads

License
3D design format
STL Folder details Close
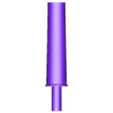
  • 1.1 Tower lower.stl
  • 1.1B Tower lower thread.stl
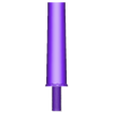
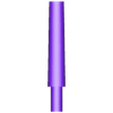
  • 1.2 Tower middle.stl
  • 1.3 Tower upper.stl
  • 2.1 Nacelle bottom.stl
  • 2.2 Nacelle top.stl
  • 3.1 Hub.stl
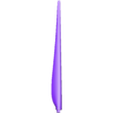
  • 3.2 Blade.stl

Learn more about the formats

Publication date 2023-04-23 at 10:10
Design number 1182432

3D printer file info

3D model description

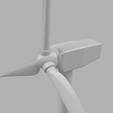
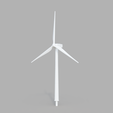
This is a model of a typical European land wind turbine. Its height from ground to blade tip is 521mm, blade length is 200mm. Since real-world wind turbines vary in side widely, the model can be used on dioramas and layouts of different scale: H0 (1/87), TT (1:120), N(1:160), probably Z (1:220).

Video in action and assembly instructions can be found here: https://youtu.be/pb3LNoZAD5o

The model is designed to be printed on typical 220mm printer bed (e.g. Ender 3 or Prusa).
The tower itself is split into 3 parts, upper parts should be glued together, the lowest part is held with friction, so that the upper part of model can be rotated or detached from the layout for transportation.

The model is designed to be motorized with a popular N20 gear motor. I've tested several gear rations and voltages, so far 60 RPM 12V motor powered with 5V produces very good results. Downvoltage to 5V makes the operation very quiet (to make it quieter, lubrication is advised). Also 5V can be easily obtained from, e.g. smart phone charger or USB power bank. My instance of motor draws around 10 mA of current (yes, 10 mA).

Part list:
* 1x N20 DC Gearmotor (12V, 60 RPM), sample link: https://www.aliexpress.com/item/33022320164.html
* 1x M3x16 countersunk screw
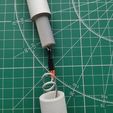
* Parts 1.1 (or 1.1B), 1.2, 1.3 for the tower. Part 1.1B has M12 thread at the bottom, so it can be screwed to the layout. Part 1.1 just has a 30mm height 12mm diameter mounting pin and needs to be glued to the layout). Glue parts 1.2 and 1.3 together, but do not glue 1.1. The upper part is designed to be friction-fitted into lower part, so that the model can be disassembled for transportation of the layout or rotated. The electric connector needs to be placed in the cavity in the lower tower part (see picture)
* Parts 2.1 and 2.2. Glue part 2.2 to the nacelle. No glue required, top slides into slot in the bottom and is secured by M3 screw.
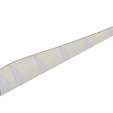
* Parts 3.1 and 3x 3.2 for the fan. Glue blades into the hub with CA, epoxy or PVA. Fan is friction-fitted to the shaft of the motor.

There is a guideway to place an LED on top of the nacelle. It is not a through-hole by default, so you need to drill the hole through the surface. I tested with 0805 SMD blinking red LED, the result looks very good (in the video). 3mm through-hole LED can be installed if you increase a hole to 3.2mm by drilling. Place the resistor near the LED, then you can power both the motor and LED by one pair of 5V wires. Flyback diode across the motor is also recommended.

3D printing settings

Layer height

  • 0.08mm layer for the blade for highest surface quality.
  • 0.2mm layer for other parts

Orientation:

  • Print blade thin long edge facing up
  • Nacelle top needs to be printed upside down
  • Other parts are obvious and are mostly printed upside up.

Supports

  • Blades need supports
  • Nacelle bottom requires supports if you print it upwards, as not all of the bottom surface touches the bed
  • Other parts don't require supports
Advertising


Issue with this design? Report a problem.

Would you like to support Cults?

You like Cults and you want to help us continue the adventure independently? Please note that we are a small team of 3 people, therefore it is very simple to support us to maintain the activity and create future developments. Here are 4 solutions accessible to all:

  • ADVERTISING: Disable your banner blocker (AdBlock, …) and click on our banner ads.

  • AFFILIATION: Make your purchases online by clicking on our affiliate links here Amazon.

  • DONATE: If you want, you can make a donation via Ko-Fi πŸ’œ.

  • WORD OF MOUTH: Invite your friends to come, discover the platform and the magnificent 3D files shared by the community!


Sharing and downloading on Cults3D guarantees that designs remain in makers community hands! And not in the hands of the 3D printing or software giants who own the competing platforms and exploit the designs for their own commercial interests.

Cults3D is an independent, self-financed site that is not accountable to any investor or brand. Almost all of the site's revenues are paid back to the platform's makers. The content published on the site serves only the interests of its authors and not those of 3D printer brands who also wish to control the 3D modeling market.

100% secure payment by credit card, PayPal, Apple Pay, Google Pay, etc.
View all payment options.