Acoustic Guitar FULL SIZE

Description
PDFPrint, glue, assemble and… play !
I think it's really a challenge to get this job done, but in the end the satisfaction should pay off the effort and passion it took to overcome all the difficulties. In fact, I believe that a manufacturing (almost lute-like) approach is needed.
I tried to faithfully redesign my YAMAHA FG400A, with the best possible accuracy; I also hope that the construction method is functional both in the printing phase and in the assembly phase. For it will be necessary to use some easily available tools (sandpaper, glue,elastic bands adhesive tape, clamps, threaded rod, etc.)
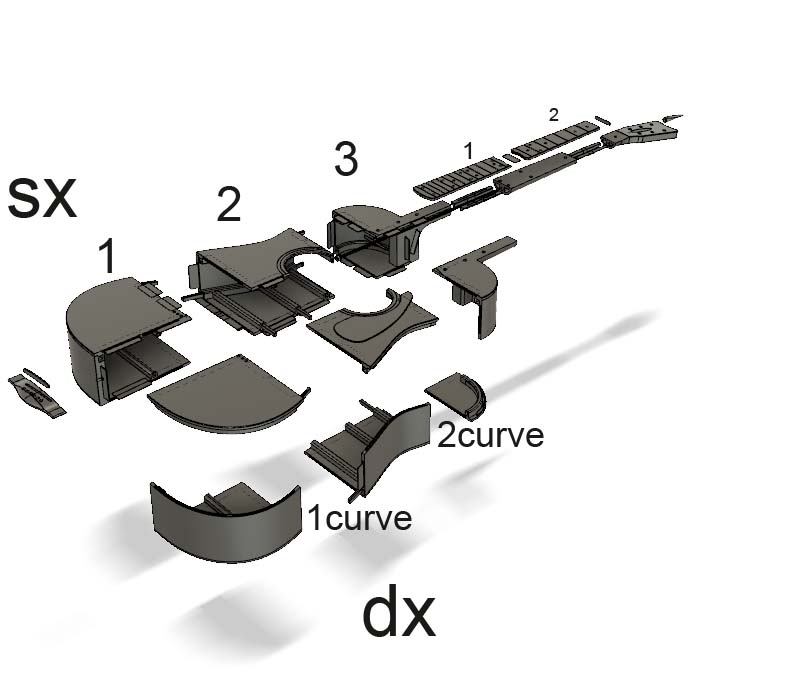
ASSEMBLY SEQUENCE: I advice to first assemble the two symmetrical parts of the body separately and then join the two half-bodies into a single body.
Before gluing, test the insertion of the threaded rod and make sure everything fits together perfectly
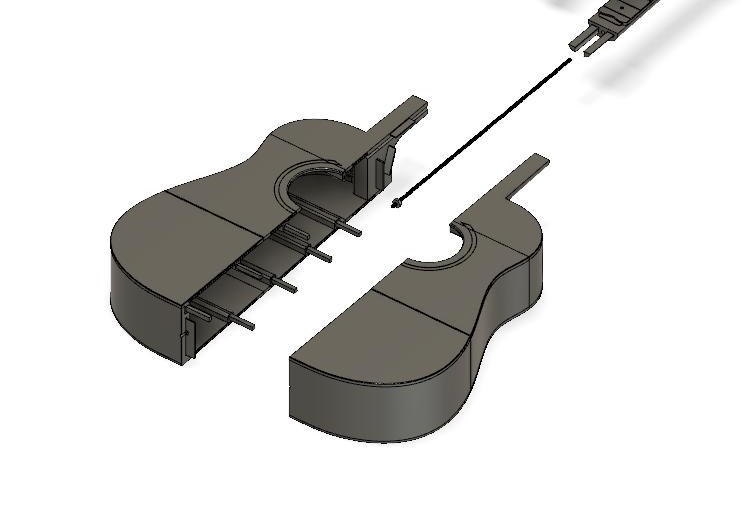
For a perfect connection, the thickness and dimensions of plugs can be scaled during the slicing phase. I tried to imagine an ideal tolerance, anyway you can also create connection plugs by yourself, but remember to round off the corners like the samples : slot inner corners are rounded.

Regarding connection plugs ( those with a flat or slightly wavy shape) , in order to have the most precise thickness possible, it could be useful to first print a portion of them, as test, (1/2 or 1/3 of the longest side), in order to calibrate the thickness and avoiding wasting time and filament. The same portions, possibly, can then be reused, added together lengthwise without losing strength when into the slot, thanks to the glue.
It may probably be necessary to use sandpaper to make the tolerance of the joints perfect.
Make sure that no excess extrusion parts remain inside the slots (especially in the corners), I would recommend gently rasping internally with a cutter or thin screwdriver.
Any gaps in joint and between slot and plug, will be filled with glue or silicone.
During the gluing phase, be sure to tighten the parts together with long rubber bands (or tape), so that, after the glue dries, there is the sensation of a single body, with the final improvement of resistance and sound acoustics.
Important: to strengthen and help keep stright the handle, insert a 6mm threaded rod (approx ≥450mm long), and adjust bolts (provided of washer), also according to the tension of the strings, to make the handle solid and straight. Make sure, before gluing, that the threaded rod passes easily into the through hole (ease with sandpaper, if needed).
I recommend not overtightening the threaded rod nuts before the glue has hardened. Just try to tighten all joints perfectly and get a straight and solid neck along with the body. Only when mounting the strings, tighten a little more (when necessary), to balance the tension of the strings.
Once you've assembled everything, I'd recommend gently tightening the strings.
You will probably have to tune the strings a note lower ( releasing, in this way, the tension that could cause the neck to arch ) since the stiffness (referring to the neck) is not ensured as in real guitars made by solid wood, although, however, the threaded rod can help with this problem. First time might help to choose a set of strings with diameter for beginners.
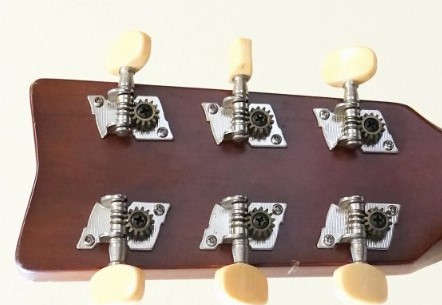
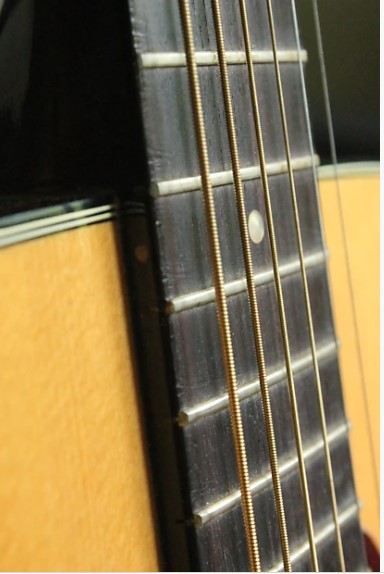
Probably top nut, saddle and saddle pins would be better if they were bought. Tuning keys, machine head and frets certainly must be purchased.
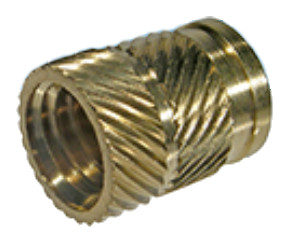
As for the tuning keys, be careful to tighten the very small screws (two for each key) on the rear head: for a better job, use treaded insert (M 2.5 ?) for a safer and more durable screwing, with metal-suitable screws.
The frets are to be fixed with a little glue in the grooves engraved on the fretboard/fingerboard ( refine with thin screwdriver or sandpaper where needed) .Make sure the frets are coplanar using a ruler, flat glass, flat table etc.
An important role will be the choice of filament, keeping in mind that PLA has limited characteristics, but it will be ok for the first prototype..
notes : -longitudinally the connection plugs are more comfortably loose; this space will be filled with glue.
-The bridge of the saddle does not need to be glued: the strings hold it in place and thus it will be easier to replace it.
-Top nut may need a few drops of glue, but not too much to make replacement easier.
-Some plugs have a slot running lengthwise that can be filled with paper to increase pressure, if needed.
- I think it is good practice to sand very lightly, in any case, all the external edges that come into contact, to minimize printing micro-imperfections and optimize the joints and
aesthetics surface continuity.
- the plane surfaces of body are not parallel

References:
Finally, I hope you are able to complete the work, thanks to your manual skill and creativity. You can also add some customization e.g. by alternating different colors. Of course, being a musical instrument, I hope it can produce a decent sound, despite the fact that plastic materials, and moreover, assembled in so many pieces, will give a sound very far from that of thin and seasoned wood. It will be an experiment and a challenge.
I'm really sorry I can't show a print of this project: I spent a lot designing it, but I couldn't print due to lack of time as well as my printer is 180x180 and, right now, it's out of order.
I hope everything goes well and that you'll enjoy building and playing it.
I'd be happy to receive some photos of the guitar ready to play. A video would be the top!!
Thank you very much
Giuliano
Tags
Model origin
The author marked this model as their own original creation.