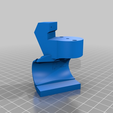
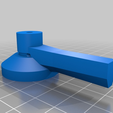
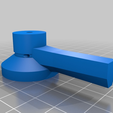
0.2 mm layer height, 60% infill, ABS. If you will use support for the shiftbase, ensure that you do not get any inside the nut trap (mess with threshold setting in your slicer).
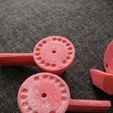
Print one shiftbase regular with the provided orientation and with the modified threshold support settings and one mirrored for the other side of the handlebars. Print the levers upside down (indexing holes up).
I highly recommend treating everything but the shifting surfaces with a light acetone brush and dry after printing, I got away without it for the first iteration but a cheap front derailleur wrecked the lever on the second.
Assembly:
Gather:
2x 30mm M3 bolts smooth top: https://amzn.to/45piznh
Shorter M3 bolt
2x M3 washers: https://amzn.to/3OvE67M
2x M3 nylock nuts: https://amzn.to/3BQzuBp
2x 5/32" headset ball bearings: https://amzn.to/3ICtCje
2x ~4mm pen springs: https://amzn.to/3q91RIN
4x zip ties (more probably, you may want to mount multiple times)
Foam tape (optional)
New shift cables/housing, new or old bar tape.
(These are affiliate links and I may earn commission through purchases made using these links.)
I haven't measured, sorry, but choose the bolts such that they will almost reach the handlebar end of the nut trap, but not so far that they scratch the handlebars.
Install the nuts, they are an interference fit, by either using a short bolt installed without the shift lever, or the long bolts and some creative bracing. I used a thick pair of pliers as a spacer from the bolt head to the shift base body.
For the right hand indexed side:
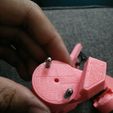
Test fit the springs and the balls in the holes for the right hand shifter, and make sure the fit is snug but not binding. This is crucial to shifting performance. You may need to file/drill a bit to get the fit just right. Once they are fitted, very carefully press the dimpled shifter onto them, ensuring the central axis holes line up and the balls are facing the right holes. It may be easier to compress one into a hole, with the shift lever off-center, compress the other with the hole exposed, and then turn the shifter to center it. Put a drop of oil onto the smooth part of the long M3 bolt, through a washer, into the shift lever+base assembly you have been holding together. (This may be clearer with a video, but if you know how old-fashioned indexed thumb shifters work it should be pretty obvious how this goes together). Tighten the bolt so that there is no gap but do not add too much friction. You may need a bit of friction, depending on your rear derailleur. This setup can work as friction as well, just remove the balls and springs and tighten the bolt as needed.
For the friction side, install the nut in the same way described above, and install the lever and bolt/washer in the same way. Tighten and adjust to desired friction when you have the cable/derailleur installed.
Mounting:
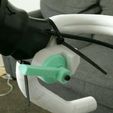
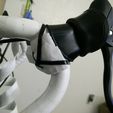
These are mounted with opposed zip ties onto the bars on either side of the brake levers, see photos. Try to position the blocky ends in a spot that won't get in the way of your hands. The block at the bottom of the shift base is meant to be pressed up against your brake lever base, per the photo, to prevent the shift base from rotating around the handlebar. The zip ties do not provide enough clamping force to prevent rotation of the shift base. The block will most likely need to be filed/cut to provide the optimum position of the shift base, also apparent from the photos is the jagged edge I left on mine. You can add a bit of foam in between the shift base and the handlebar if they wobble during a test fit.
The shift cables can be bent in a bit towards the ramps for more gripping space on the tops, but it's not perfect. It may feel like you're forcing them a bit, but they should work fine.
Finish the installation as normal with index cabling and cable housing.
One cautionary note: I have broken a few cables from pulling back too far on the friction-side, the wire gets bent back and forth. I haven't had time to add a cable stop, just don't install in such a way that the lever needs to be pulled back past perpendicular to the cable stop face. I have never broken any cables on the indexed side.

/https://fbi.cults3d.com/uploaders/28593288/illustration-file/d80c850f-7a70-4398-804c-e0d1c0bffcb0/IMG_20180726_2242502.jpg)
