Skip to content

Lighthouse

Advertising
?
Creation quality: 5.0/5 (2 votes)
Evaluation of members on the printability, utility, level of detail, etc.

  • 35k views
  • 240 likes
  • 108 downloads
  • 6 collections
  • 5 comments
  • 3 makes

License
3D design format
STL Folder details Close
  • Base Cover.stl
  • Base No Stairs.stl
  • Base Rail 1_2.stl
  • Base Rail 1_3.stl
  • Base Rail 2_2.stl
  • Base Rail 2_3.stl
  • Base Rail 3_3.stl
  • Base Rail.stl
  • COMPLETE.stl
  • Door Bracket X2.stl
  • Door Handle SCALE.stl
  • Door.stl
  • Glass Strut X8.stl
  • Glass.stl
  • Led Strip Globe.stl
  • Lens Frame X2.stl
  • Lighthouse 2.stl
  • Lighthouse 5.stl
  • Lighthouse Base.stl
  • Lighthouse Body A FIXED.stl
  • Lighthouse Body B FIXED.stl
  • Lighthouse Body.stl
  • Lighthouse Doorway.stl
  • Lighthouse Roof.stl
  • Lighthouse3.stl
  • Lighthouse4.stl
  • Stairs.stl
  • Step Rail Left.stl
  • Step Rail Right.stl
  • Top Rail.stl
  • Window LEDS Diffuser X2 - OPT.stl
  • Window Pane X2.stl
  • Window X2.stl
  • Windowframe X2.stl
  • light_fixture_insert_Br8knitOFF.stl
  • lighthouse_5_Br8knitOFF.stl

Learn more about the formats

Last update 2024-02-07 at 13:06
Publication date 2023-06-08 at 23:11
Design number 1261890

3D printer file info

3D model description

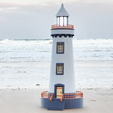
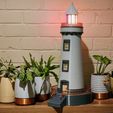
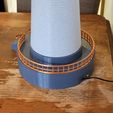
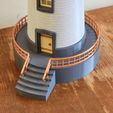
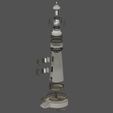
Introducing a beautifully designed 3D printed lighthouse model, crafted to bring a charming beachy feel to any space. This model stands at a height of approximately 600mm, carefully assembled from 38 individual 3D printed parts. Each piece has been pre-oriented for optimal printing. With its captivating design and thoughtful details, this lighthouse serves as a striking piece, evoking a delightful coastal atmosphere wherever it is placed.

Assembly Guide:

Print all the necessary parts, ensuring you have the correct quantity of each component as indicated by the filenames.

Follow this assembly sequence, building the lighthouse from the base up:
a. Begin with the lighthouse body. Use body A and body B if needed for smaller printers.
b. Glue the lighthouse doorway to the body, ensuring a secure fit.
c. Glue the lighthouse body to lighthouse 2.
d. Attach lighthouse 2 to lighthouse 3.
e. Lighthouse 5 should fit snugly inside lighthouse 2, 3.
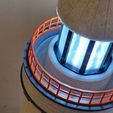
f. Affix the top rail to lighthouse 4.
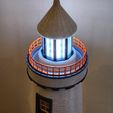
g. Connect the lighthouse main lens assembly with the 8 struts properly oriented against the glass and insert them into the top and bottom lens frame. Glue this completed lens assembly into lighthouse 5.
h. Build your LED strip globe and insert it into lighthouse 5, making sure to align the orientation correctly.
i. If needed, add a paper diffuser to enhance the lighting effect. Otherwise, attach the lighthouse roof.
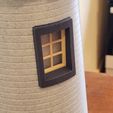
j. Assemble the windows by inserting the frame, pane (paper), and LED diffuser. (if lighting windows, youd need to sort the wiring out at this point)
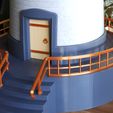
k. Affix the rail pieces to the lighthouse base and insert the door and hinge (you can use wire for a hinge or glue the door shut).
l. Join the lighthouse base and lighthouse doorway together, ensuring your wiring is in place if using electronics.
m. Add door trimmings.
n. Finally, add the base cover.

(Br8knitOFF) https://cults3d.com/en/users/Br8knitOFF/3d-models
has kindly provided a modification of lighthouse 5 if you would like to use the holder provided at this link.
https://www.amazon.com/gp/product/B07FMT7Z8X/ref=ppx_yo_dt_b_search_asin_title?ie=UTF8&th=1

Now includes a complete solid version, I dont recommend this as the main print as some files require a different orientation, however I feel its worth including.

3D printing settings

Requires a bed size of 250x250x250mm to be printed full size.

Prints have been orientated in the correct positions for fdm printing, you will need supports in some areas but is very minimal overall.

I printed my railings without any supports.

IMPORTANT! - Door Handle for some reason will not scale correctly at 100% and must be printed at 10% scale to fit the rest at 100% (longest side should be 7.47mm).

Advertising


Issue with this design? Report a problem.

Would you like to support Cults?

You like Cults and you want to help us continue the adventure independently? Please note that we are a small team of 3 people, therefore it is very simple to support us to maintain the activity and create future developments. Here are 4 solutions accessible to all:

  • ADVERTISING: Disable your banner blocker (AdBlock, …) and click on our banner ads.

  • AFFILIATION: Make your purchases online by clicking on our affiliate links here Amazon.

  • DONATE: If you want, you can make a donation via Ko-Fi πŸ’œ.

  • WORD OF MOUTH: Invite your friends to come, discover the platform and the magnificent 3D files shared by the community!


Sharing and downloading on Cults3D guarantees that designs remain in makers community hands! And not in the hands of the 3D printing or software giants who own the competing platforms and exploit the designs for their own commercial interests.

Cults3D is an independent, self-financed site that is not accountable to any investor or brand. Almost all of the site's revenues are paid back to the platform's makers. The content published on the site serves only the interests of its authors and not those of 3D printer brands who also wish to control the 3D modeling market.

100% secure payment by credit card, PayPal, Apple Pay, Google Pay, etc.
View all payment options.