INTRO:
A couple years ago I made an Honest John using two Pringles cans designed to fly on 24mm motors. But I made no attempt to make it scale so in the end I had a rocket that anyone would recognize as an Honest John, but anyone familiar enough with the actual rocket would see major issues. It was more of a "Dishonest" John. This design is my attempt to correct the discrepancies in that previous design as well as incorporate some new techniques I've learned along the way.
SUPPLIES NEEDED:
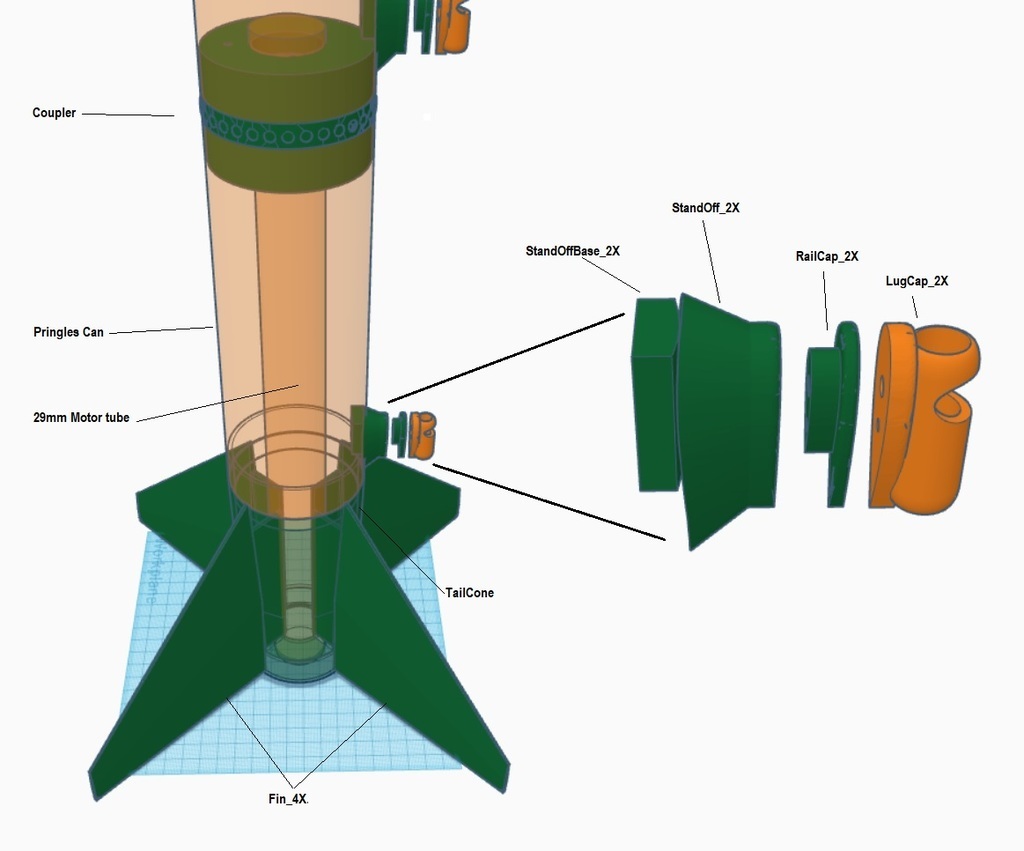
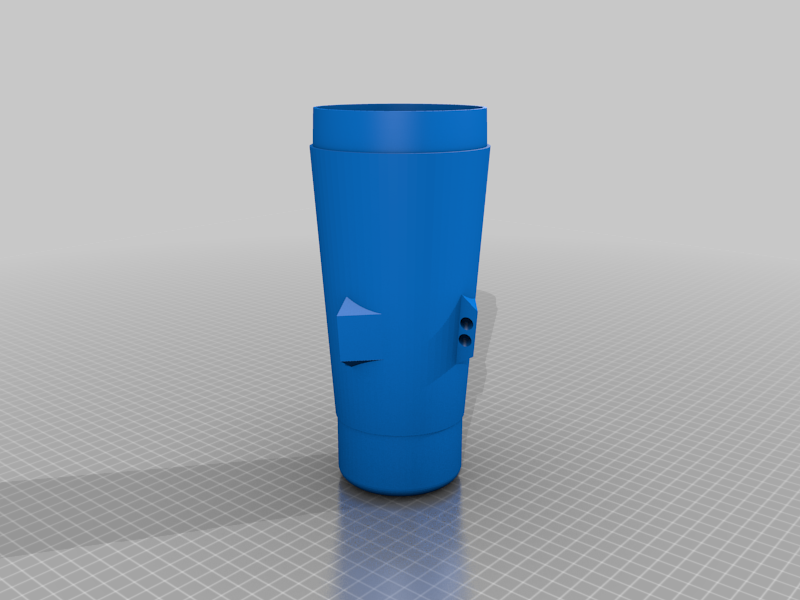
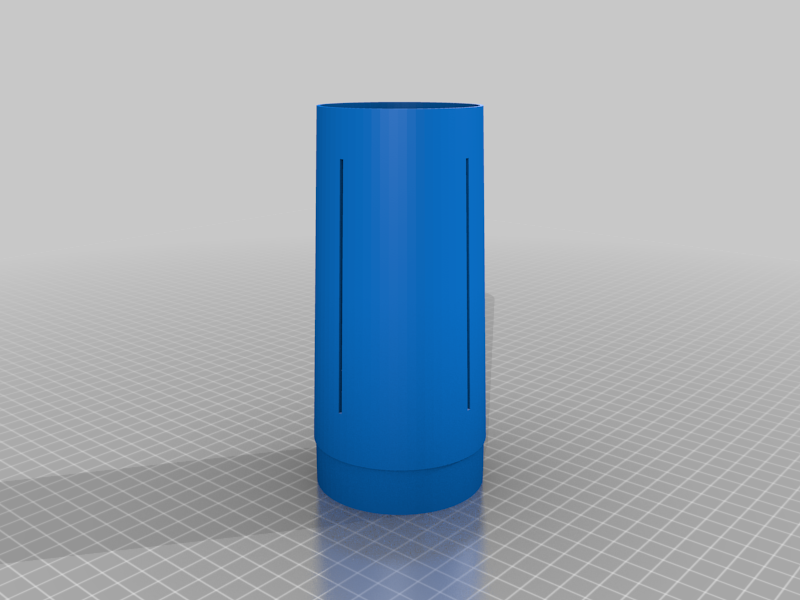
To build this rocket you will need 2 Pringles cans. For scale, one should be trimmed to 208mm long. This will be the "bottom" tube. The other should be trimmed to 201mm long and will be the "Top" tube. To be honest (Oh, a pun!), you will only be cutting about 20mm off the length of these tubes so it won't distort the rocket too much if you don't, but to be SCALE, those are the numbers to use.
You will also need a 29mm motor tube and retainer. Yep, the original didn't fly well on the standard Estes D or E motors so I was using composites in it. I decided to just force the issue on this one and design it for 29mm motors from the get go. I used the "29MM X 34" THICK WALL TUBE" from Apogee (part 10251) but others should fit. For a retainer I used the "29MM ESTES RETAINER", also from Apogee (part 24020) but again, others will work.
You will also need shock cord, of course. I used 550lb kevlar cord from Amazon. A screw bolt for the nosecone, a 30-40" parachute, and some 3mm nuts and bolts.
PRINTING:
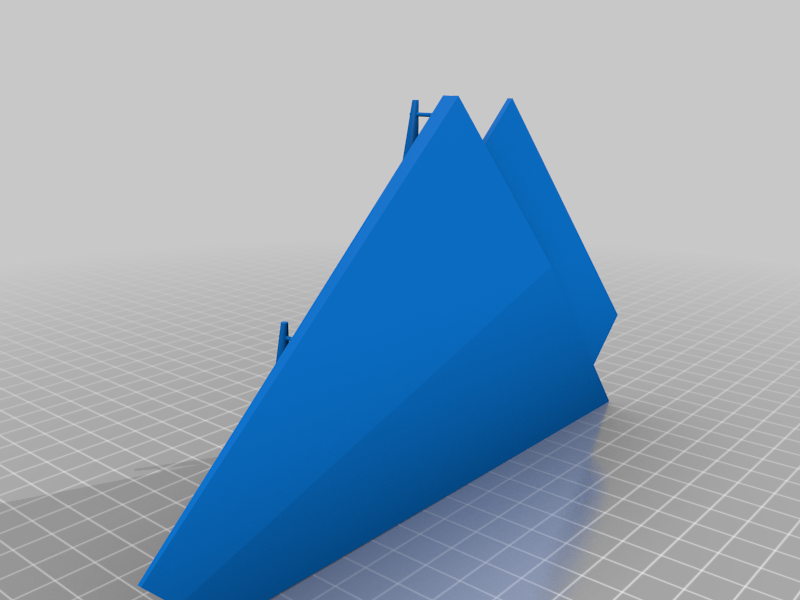
There are two versions of the fins, oriented for proper printing. Print the "Fin_4X" version if you're miserly about filament and REALLY trust your 3D printer to print tall thin things with NO wobble to make layer lines. Or print the "Supported" versions, which print beautifully and you just need to snip the supports off and sand the fins a little. I had to move the z height in cura down .1mm to get the raft to form properly under the fin. I printed the fins with 10% infil.
Otherwise use your best judgement. Nothing should need supports and everything is oriented for best printing. Things that need multiple copies have X in their name. You'll figure it out. It's not rocket science...well...it kind of is, but not that intense.
BUILD NOTES:
I used half that motor tube (the other half was in another rocket), then trimmed it later in the process. The design has the motor tube going through the tailcone, all the way through the bottom body tube and then through the coupler. Glue the retainer to the bottom of the motor tube, then glue the motor tube into the tailcone until the retainer is flush with the bottom. You can use the "TailConeTop" piece (don't glue this in), to insure straight alignment.
The fins go through the slots in the tailcone and are glued to the motor tube. Test fit these first as you may need to sand the taps down a little. The fin should meet the tube on the outside. Note the bottom of the fins WILL NOT be flush with the bottom of the tailcone. They should be a couple millimeters higher. Once the fins are in place you can remove the "TailconeTop" piece and do internal and external fillets. Toss the "TailConeTop" piece if you want. It could be glued in place once the fillets are done, but it's just extra weight and you don't need it.
I marked both Pringles cans with a line against a door jamb to mark where the launch standoffs go. I put the lower stand off just above where the tailcone shoulder would sit and put the upper standoff in the upper tube just above where the coupler shoulder would sit, but you could put both standoffs on the lower tube too, I suspect.
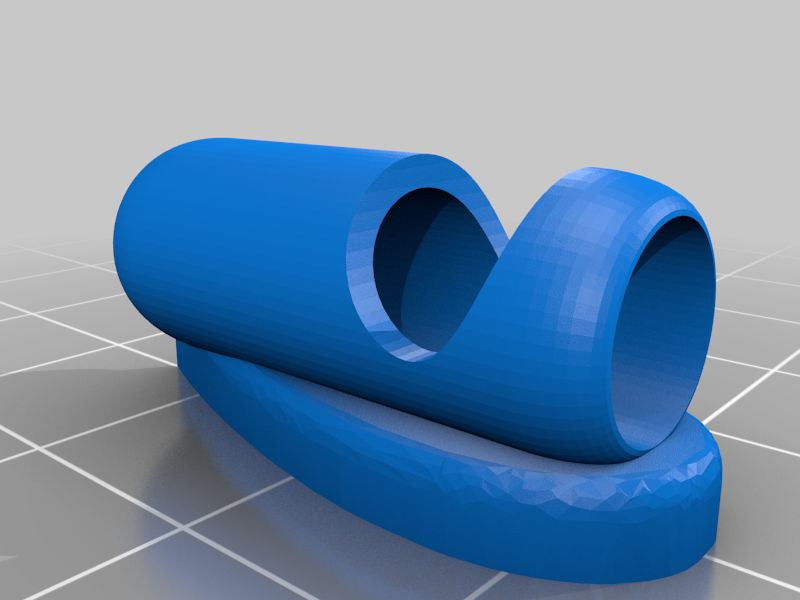
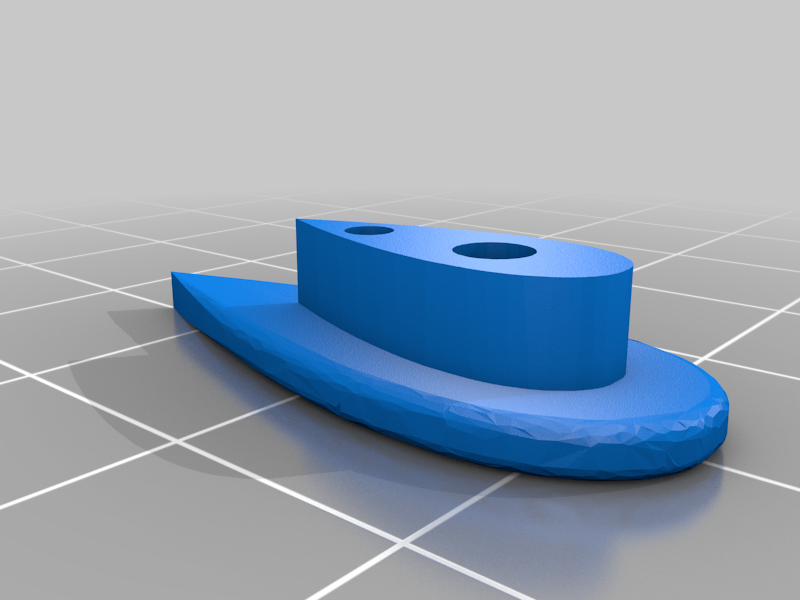
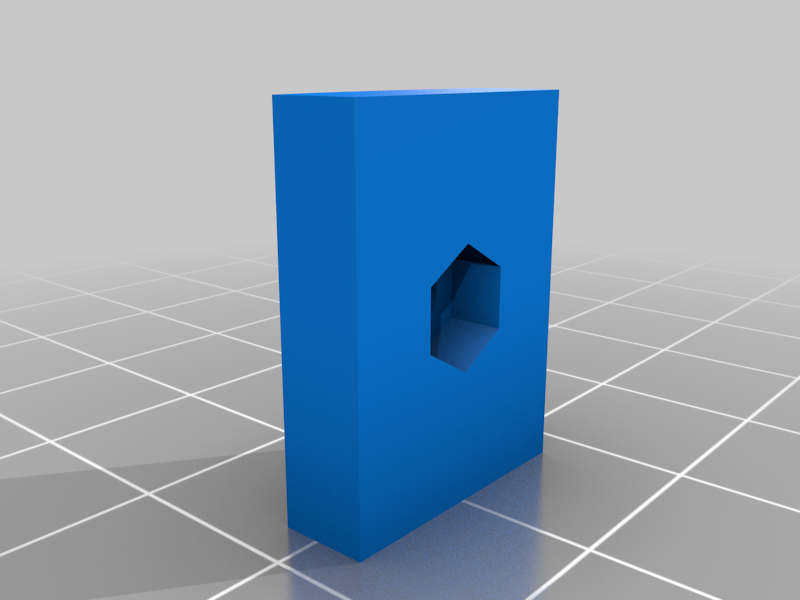
There is a standoff base that goes inside the tube and has a spot for a 3mm nut in it. Glue the nut in. Drill a hole in the body tubes along the line you made where you think the standoffs should go (be sure to leave room for the shoulders of parts). Using a 3mm bolt (I think mine were 25mm long), glue the standoff to the outside of the rocket using the bolt through the tube and into the base to hold it in place. Don't glue the screw, you'll want to remove that. Consult the included image for detail if confused. The end result should be an inner base, an outer standoff, with the body tube sandwiched between them.
Note that the standoffs have a smaller hole in them. This is for a 2mm rod (but a piece of 1.75 filament could work) that should jut about 3mm above the standoff. This helps align the RailCap or LugCap pieces. The 3mm screw should go through the cap you plan to use, through the standoff, through the tube and base and into the nut. The design allows you to switch between using rails to launch, or 1/4" rod.
Make sure to place and glue the standoffs before continuing because you won't have access to the inside of the bottom tube after this next step.
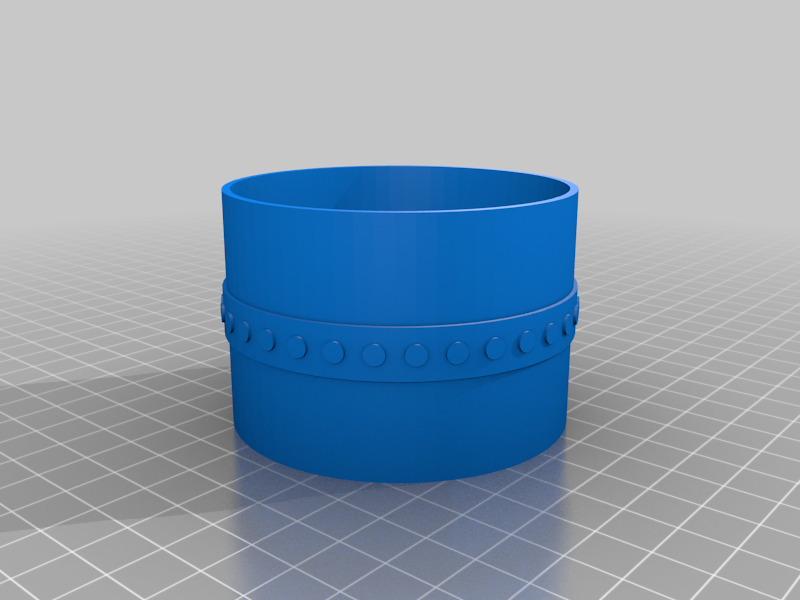
Glue the completed fin assembly with tailcone into the bottom of the bottom tube. Take the coupler piece and thread your shock cord through the little hole in it. I made a loop with a slip not that I put over the motor tube before gluing the coupler in, then pulled the cord tight. Alternatively you could put an eyebolt through the coupler to attach your shock cord to. You do you, it's your rocket. Once you've sorted out your shock cord, glue the coupler into the bottom tube with the motor tube going through it. I had the flat surface UP, but I suppose it could work either way.
You can now glue the top tube onto the coupler. If you split the standoffs putting one on each tube like I did, be sure to line them up before the glue dries.
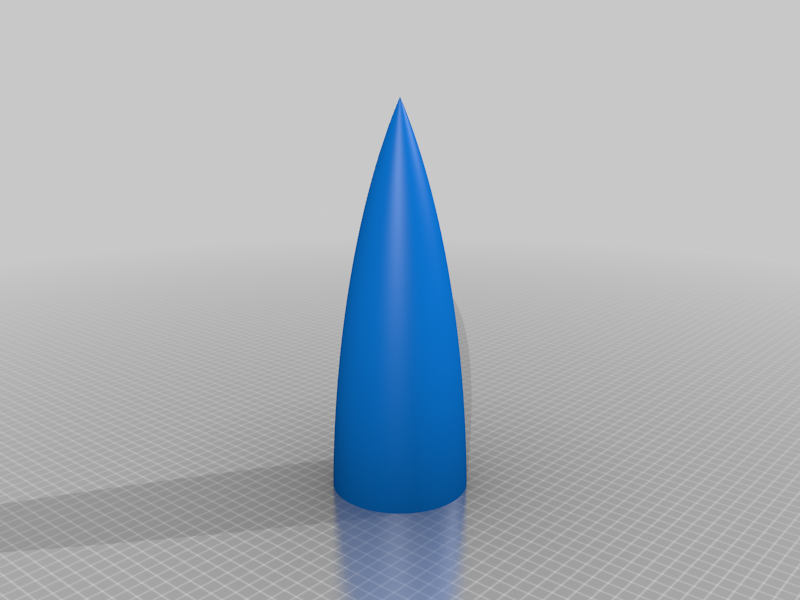
The rest is straight forward. Glue the nosecone pieces together after putting an eyebolt in the bottom part. Attach your shock cord and parachute as you see fit. Put a suitable motor in it and have fun.
I've included the OpenRocket (ORK) file for you to run your own simulations. I over ride they part weights after I have the parts to match the actual weights and I've been printing with Polymaker LW-PLA, so you may have to adjust if you print with other materials.
The CP of this rocket should be right about where the top of the Tailcone shoulder sits in the rocket. The CG will vary with motor, of course, but even with an I243-9 it's well up the body tube. Someone PLEASE print this and launch it with an I-243, btw. It sims to 2906' and about 660mph with that motor. Video tape it if you do, and share it. Probably won't survive but that'd be hella cool to see.
:format(webp)/https://fbi.cults3d.com/uploaders/17181044/illustration-file/b24ac4bc-e3d0-42c5-a85d-b7f7bad433f8/56925d1d-db64-4627-947b-763b058c6184.jpg)


/https://preview3d-images.cults3d.com/7vs9whc38a6p4vjie75tvsddq5zm)
/https://preview3d-images.cults3d.com/pic4sq8xba3ibyu5soau4icdjwer)
/https://preview3d-images.cults3d.com/1awfopeuxg9fbl3i3xaervubqtbq)
/https://preview3d-images.cults3d.com/tyg9q3vv7tz1waymhyhityqn3i9j)
/https://preview3d-images.cults3d.com/92mpzbpc7h0v3mv7g9cqm9kee074)
/https://preview3d-images.cults3d.com/556qdvawwk3wo479vmifg5i5h5r3)
/https://preview3d-images.cults3d.com/0tkl9bco7mok4j5lg7g51rf4798y)
/https://preview3d-images.cults3d.com/16xzpu4t02nndc8h61aaus1ifqhl)
/https://preview3d-images.cults3d.com/lt3udrgc9rvq6321dr93ppu2b5fc)
/https://preview3d-images.cults3d.com/bn59k2rg5nx876xpdzgz40ig98l2)
/https://preview3d-images.cults3d.com/w5cbkqx45xz403x5d5sm8mhocjqa)
/https://preview3d-images.cults3d.com/l24xiksrdr5f1na2a229gd382otj)


