Skip to content

VRS DirectForce Pro Pedal Faceplates

Advertising
Advertising
?
Creation quality: 5.0/5 (1 vote)
Evaluation of members on the printability, utility, level of detail, etc.

  • 1.3k views
  • 3 likes
  • 11 downloads

License
3D design format
STL and ZIP Folder details Close
  • VRS_Pedal_Faceplate_-_Brake_-_M5_Screw.stl
  • VRS_Pedal_Faceplate_-_Brake_-_M5_Thread_Insert.stl
  • VRS_Pedal_Faceplate_-_Throttle_-_M5_Screw.stl
  • VRS_Pedal_Faceplate_-_Throttle_-_M5_Thread_Insert.stl
  • VRS_Pedal_Faceplate_Sources.zip
    • includes/Modules.scad
    • VRS Pedal Faceplate - Brake.scad
    • VRS Pedal Faceplate - Throttle.scad

Learn more about the formats

Last update 2023-12-25 at 22:16
Publication date 2023-11-02 at 00:03
?
Published to Thingiverse on: 2023-11-01 at 12:50
Design number 1552014

3D printer file info

3D model description

The design

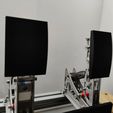
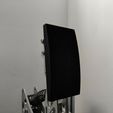
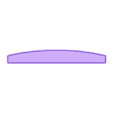
The original VRS faceplates are well designed and well proven by a lot of sim racers. However, it's a matter of taste, if you like the metal plates with holes in it. Especially if you are a sock driver, you may prefer a smoother surface that also isn't that cold on your feet like the original bare metal faceplates.

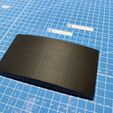
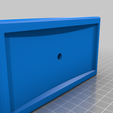
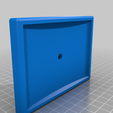
So I designed faceplates that have a similar radius and size as the original plates, but without holes and sharp edges. They need to be screwed from the back for this to work, and only with thread inserts it's durable enough. I tested with M5 screws in 4.6mm holes, but they went loose after 20 hours of driving. So I removed the version without thread inserts. Use M5 thread inserts.

Especially the brake needs to take some forces, so I designed them to be combined with the original faceplates. You don't want the faceplate to break in the first hour of soloing a 4h endurance race around the Nordschleife.

If you want larger faceplates, other screw sizes, or more chamfered edges, the OpenSCAD source files are included as a ZIP download. Just open the SCAD file and adjust parameters in OpenSCAD's customizer area or within the file.

OpenSCAD quickstart guide: Download OpenSCAD. Open the file. In the parameters section on the right change values as needed. Press F6 to render. After it's done rendering (you hear a bling through your speakers and the model appears) press F7 to save the STL that you can then drop in your slicer.

The print and the assembly

  1. Print the faceplates (PLA, 0.2 layer height, 20 % infill, 3 walls, supports on top of the inside).
  2. Insert the thread inserts.
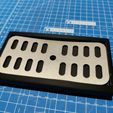
  3. Take off the original faceplates, and put them inside the printed plates. They stay there to strengthen the plates.
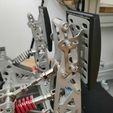
  4. Use a M5x16 screw and put it in from the backside of the pedal, to screw the faceplate combos on. You can also use the original screw, but it's a bit short and countersunk, that will work, but a screw that is not countersunk and long enough would be better. Be sure it's not longer than 16 mm, else the screw will pierce the front.

The remix

You have another idea and want to remix it or base your design on this one? You find the *.scad file in the thing files. I'd be grateful if you ping me, if you find an optimization or an alternation.

3D printing settings

Print as placed in the STL. No change in orientation needed for the intended results.

Default settings like 0.2 layer height and 20 % infill are enough. I would go for at least 3 walls, to make the edges strong.

If you prefer to have some grip on the plates, you may print them with the backside down, or even standing on the short side. The layer edges will create some grip then.

Add supports on the top of the inside. You can also use something like "supports everywhere" option in your slicer, however that will usually also add supports on the chamfers on the outside edges. They should be easy to remove, but if you can spare the minute, use paint on support, support enforcers or whatever they are called in your slicer, on the top of the inside.

Advertising


Issue with this design? Report a problem.

Would you like to support Cults?

You like Cults and you want to help us continue the adventure independently? Please note that we are a small team of 3 people, therefore it is very simple to support us to maintain the activity and create future developments. Here are 4 solutions accessible to all:

  • ADVERTISING: Disable your banner blocker (AdBlock, โ€ฆ) and click on our banner ads.

  • AFFILIATION: Make your purchases online by clicking on our affiliate links here Amazon.

  • DONATE: If you want, you can make a donation via Ko-Fi ๐Ÿ’œ.

  • WORD OF MOUTH: Invite your friends to come, discover the platform and the magnificent 3D files shared by the community!


Sharing and downloading on Cults3D guarantees that designs remain in makers community hands! And not in the hands of the 3D printing or software giants who own the competing platforms and exploit the designs for their own commercial interests.

Cults3D is an independent, self-financed site that is not accountable to any investor or brand. Almost all of the site's revenues are paid back to the platform's makers. The content published on the site serves only the interests of its authors and not those of 3D printer brands who also wish to control the 3D modeling market.

100% secure payment by credit card, PayPal, Apple Pay, Google Pay, etc.
View all payment options.