Skip to content

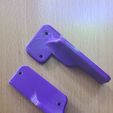
Begode Master Pro V1 tail light bracket set (kickstand delete)

Advertising
Advertising
?
Creation quality: 5.0/5 (1 vote)
Evaluation of members on the printability, utility, level of detail, etc.

  • 750 views
  • 1 like
  • 4 downloads

License
3D design format
STL Folder details Close
  • MProLtBrktV8.stl

Learn more about the formats

3D model size X 30 × Y 43 × Z 118 mm
Publication date 2023-11-10 at 20:00
Design number 1570241

3D printer file info

3D model description

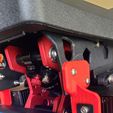
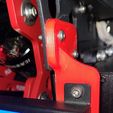
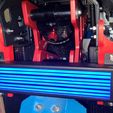
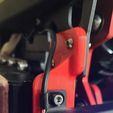
This is a tail light bracket that allows you to remove the heavy, bulky, and rather unstable kickstand on your Begode Master Pro V1. The tail light is normally attached to the kickstand, so after removing my kickstand, I was left to find a way to reinstall the tail light.

I found the stock kickstand on my Master Pro V1 EUC to be very heavy and not overly stable, and it also put a lot of stress on the chassis to the point that my chassis actually broke in 3 places! That was enough reason for me to get rid of it (plus, it weighs almost 2.5lbs / over 1kg).

I spent considerable time designing what evolved to be this fairly simple model. My requirements were numerous:

a) It had to be strong, and lightweight. I didn't want something that would easily break.

b) It had to keep the tail light forward of a line between the tire and the back of the seat, so the light is protected somewhat in a crash / drop.

c) It had to be high enough to be visible - the higher the better while still protected.

d) It had to allow for reasonably easy access to the valve on the air shock, so I could adjust shock air pressure with a minimum of hassle.

The last requirement required a bit of compromise, so what I decided on is using wing nuts on the top / rearmost mounting holes to the EUC chassis (not yet shown in photos). This way, I can easily remove those two bolts (one each side), and flip up the tail-light for easy access to the entire suspension linkage system, including the air shock valve.

The bracket is printed from PLA+, PETG or ABS, and you simply print a mirror image for the left side. You'll notice it has a small, round 'mouse ear' on the bottom to aide in bed adhesion while printing - this is to be trimmed off. To install, simply undo the 4 M4 bolts holding the tail light to your stock kickstand, remove the kickstand (a few other bolts and springs), and install the tail-light on to the new set of printed brackets with the stock hardware (leave these bolts loose until assembly is complete). Now install the brackets to the EUC chassis, just under the seat, again using the stock bolts you removed. For best results, get two M4 wing nuts (or knobs etc.) to be used in the top (rear most) positions of the brackets to the chassis. This allows these two bolts to be quickly and easily removed without the need of tools, so you can access the shock valve for air pressure adjustment.

3D printing settings

Settings are pretty variable for this part, you just want it strong. Here's what I used:

Nozzle: standard 0.4mm
Layer height: 0.28mm
Walls: 4
Top/bottom layers: 4
Infill: 10%

If you haven't calibrated for hole size, consider doing a quick test print to make sure your printer creates the correct hole size. I use a Hole Horizontal Expansion setting (Cura slicer) of 0.3mm with good results.

Advertising


Issue with this design? Report a problem.

Would you like to support Cults?

You like Cults and you want to help us continue the adventure independently? Please note that we are a small team of 3 people, therefore it is very simple to support us to maintain the activity and create future developments. Here are 4 solutions accessible to all:

  • ADVERTISING: Disable your banner blocker (AdBlock, …) and click on our banner ads.

  • AFFILIATION: Make your purchases online by clicking on our affiliate links here Amazon.

  • DONATE: If you want, you can make a donation via Ko-Fi 💜.

  • WORD OF MOUTH: Invite your friends to come, discover the platform and the magnificent 3D files shared by the community!


Sharing and downloading on Cults3D guarantees that designs remain in makers community hands! And not in the hands of the 3D printing or software giants who own the competing platforms and exploit the designs for their own commercial interests.

Cults3D is an independent, self-financed site that is not accountable to any investor or brand. Almost all of the site's revenues are paid back to the platform's makers. The content published on the site serves only the interests of its authors and not those of 3D printer brands who also wish to control the 3D modeling market.

100% secure payment by credit card, PayPal, Apple Pay, Google Pay, etc.
View all payment options.