I have a problem. Well, several probably. One, I like to make rockets out of Pringles cans. Look through my designs...there are WAY too many Pringles rockets in there. I mean seriously!? I don't even like Pringles that much. I mean, they're ok, but I mainly buy them to make rockets out of the cans.
But here's the other problem. A few years back I designed an Honest John made from two Pringles cans (Design is here: https://www.thingiverse.com/thing:4860058). I made no attempt to make that design scale. I just made something that kind of looked like an Honest John. But I guess it wasn't very honest and while I flew it several times, it eventually bothered me that it was so far off from scale. On one launch I forgot to turn on the Chute Release I was using and the rocket landed hard, breaking the nosecone. It was fixable, but it sparked an interest to fix the issues with that design.
So I revised the design, making a new Honest John from two Pringles cans that was MUCH more scale (design is here: https://www.thingiverse.com/thing:6288802). But I made that design with a 29mm motor while my original had a 24mm motor, so I wanted to keep the original too.
But the nosecone on the original, which was the part MOST out of scale, bothered me still. So I re-designed the nose cone for that design. I couldn't use the nosecone from the new design because it's wider and the launch lugs on the old design weren't out far enough. I'm happy with that re-design, though, and have two slightly different Honest Johns to fly.
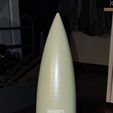
But here's the problem. I still had the original nosecone, which I'd fixed. And though it was beaten a little, I felt bad about the idea of throwing it away. I mean it served it's purpose well through several launches, how could I just throw it away?
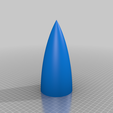
So I didn't. I designed a NEW rocket for the nosecone to live on, and since that nosecone was decidedly out of scale I decided the rest of the rocket could be out of scale too. So I borrowed some from the newer design and re-designed some parts and scaled down the fins and made a rocket which is deliberately NOT the Honest John, but is "close enough" that most people would think it's the Honest John. It's really more of a "Dishonest Joe".
So here it is, the Dishonest Joe. BTW, "Joe" is just a play on "John" and is not intended as a reference to any actual Joe living or dead.
MATERIALS:
* A Pringles can. I used one of the taller Party Stack type cans. They're about 70mm or so taller than the regular cans. Remove the top and bottom of the can by running an x-acto knife along the top (I keep the plastic lid on for this), and then along the metal bottom piece. Sand these level if necessary.
* 160mm of 24mm (BT-50) body tube for the motor tube.
* Shock Cord. I use kevlar line
* A parachute. I suggest 30"
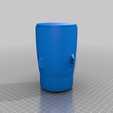
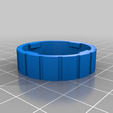
* The parts in this design.
PRINTING:
* Fins: Print the fins with 5% infil. I used 1.6mm walls and Polymaker LW-PLA, but you do you.
* NoseConeBase: Print the NoseConeBase hollow. Again, I used 1.6mm walls.
* All the other parts can be printed as is. Infill and walls don't matter as they're all thin enough to print solid anyway.
CONSTRUCTION:
1) Glue the RetainerMount to the bottom of the motor tube with the slotted portions down.
2) Glue the Engine Block 95mm up from the bottom of the motor tube (this is the length of an Estes E motor)
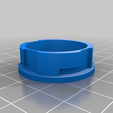
3) Glue the motor tube through the bottom of the Tailcone.
4) Glue the fins through the slots in the Tailcone and to the engine tube inside. You can put the TailConeCap on (don't glue it at this point) to help keep the motor tube centered.
5) Apply internal fillets where you feel it's necessary. Remove the TailConeCap to do this if you used it for alignment.
6) Apply external fillets.
7) Run the shock cord through the little hole in the TailConeCap and glue that cap into the tailcone. I made a loop which I slid over the motor tube then pulled tight when the cap was in place.
8) Glue the completed fin unit into the Pringles can.
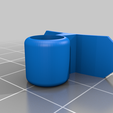
9) Glue the launch lugs on the body tube so that the launch rod goes between where two fins are. I drew a line on the body tube using a door jamb before I glued on the fin unit to make sure these were lined up. The launch lugs should have one placed near the bottom of the Pringles can and another placed near the top.
10) The nosecone comes in two pieces. Glue the top onto the base. Some sanding may be required to get them snugly together.
11) Tie the shock cord to the nosecone and tie on the parachute.
If you make this design, please post a make. I love to see my designs take flight too, so post a video if you can!

/https://fbi.cults3d.com/uploaders/17181044/illustration-file/b73c5c0f-67f4-4dec-9735-bfbef11ac515/301ba7bc-33f4-4b72-b13d-632f6656d3dc.jpg)
