3D model description
I’ve been long searching for unfindable tires for my vintage rc cars. Ultimately, I finally found some, but I like to run my car, and there is no way I spend $$$ bucks for tires that are going to deplete quickly for a vintage rc car. And I really love to run my vintage rc cars so I needed to find a proper solution.
I did tries relying on 3D printing :
- TPU/TPE filament is quite difficult to print on many printers and requires a direct drive setup, and it is even harder to print with lower shores, combined with the difficulty to remove supports it makes it quite hard to print tires properly, and from my first test, it would not be good to run.
- At some point, I found there was some flex resins designed for SLA/DLP printers and I decided to go for a try. And it was a success.
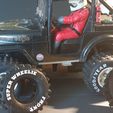
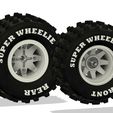
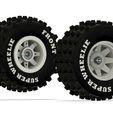
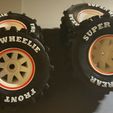
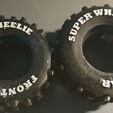
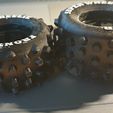
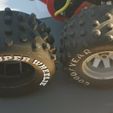
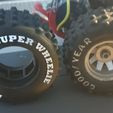
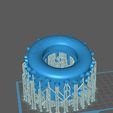
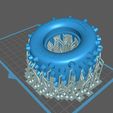
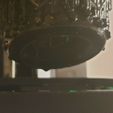
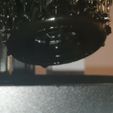
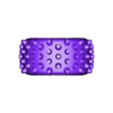
You will find in this publication some Tires and Rims for Marui Super Wheelies, the tires are targeted to be printed using a resin printer with some Flex rubber resin such as Resione F80. The rim can be printed on FDM or MJF, and have been designed in order to avoid glueing the tires. I ran my printed tires in multiple occasions and they are proven to work nicely, with similar wear than commercial tires. The inside face of the printed tire is not that nice due to support, so it may not be good for running but not for shelf queens.
The tire design is based on the original tires I aimed to reproduce with some changes :
- Lettering is different as I wanted to make it in a way this is clear it is a printed tire, and avoid any confusion in the case someone sell a car with those tires : I wanted functionally the same as the original tire, with some lettering but clearly distinguished from the original tire. The target is to run the car not to get them on the shelve
- Pillars were added between the inside rims to ease printability. They had to be removed after the print using a cutter, like you would do with support. If you remove them, you will need internal rings to maintain the tire in place, while it is not needed if you keep the pillars with the 2 parts rims
3D printing settings
Material required for printing and post processing
- 3D SLA or DLP printer with clear identified profile for target resins : I did not want to mess with the settings of flex resins as they are generally very difficult to print. Another thing to note is that big print plate are not recommended as they tend to make flex resin printing more difficult. I used an Anycubic Photon M3 which have the proper specifications for this
- Heating module inside the printer chamber. Resin prints settings are generally provided with some very standard temperature. Lowering temperature would require to adjust settings with longer exposition and timing for moving the bed. Heating module inside the chamber is allowing to ease reproduceability and avoid tinkering on the printing settings. I generally heat the printer chamber 30 minutes before printing, and the bottle or resin would be also heated at 25°C before as well.
- Post processing wash and cure station with 2 containers. The cleaning is always done in 2 steps with IPA. The reason there is two containers is that there is two different IPA bath. The second one needs to be as clean as possible, otherwise the finish aspect of the tires is not going to be perfect. Both container are having IPA inside (about 6 liters each), but the content of the second bath needs to be fresh IPA (or as fresh as possible – I replace IPA in itevery 10 tires), while the first bath doesn’t need to be as fresh (can be used for about 30 tires – I filtered every 15 tires). I use an Anycubic Wash and Cure Plus station.
- A lot of IPA (99%) : Consider starting with at least 15 to 20 liters (it is generally cheaper ordered in big volumes).
Printing
- The resin I had most success with was Resione F80 in black. It works well, and I had a success rate of 100% (within my own testing setup and condition : heated chamber, slicing as per the recommended information for support and print part position and orientation, settings as provided by Resione for the Anycubic Photon M3)
- I sliced my stl with Chitubox, and imported supports configuration as proposed by Resione (see : https://www.resione.com/pages/settings ) , as per the resin exposition settings and used them exactly this way.
- The tire needs to be tilted on the plate (25° to 45°). Heavy support, Density of 90%, plateform only (Pillars between the rings are absolutely necessary for this, otherwise you need to set supports also inside the tire). I had some success with 2 tires in the same plate, but this may not work with bigger beds. I also added 2mm holes on the face of the tire facing the bed (about 6 holes in total) : this is to avoid suction cup effect.
- I suggest to have some replacement FEP in advance as it is a consumable, and I had some case were FEP is distended after a few prints.
Post Processing
- After the print, I remove the print from the bed using a spatula, and remove the support from the tires (the pillars should not be removed at this point).
- Cleaning phase 1: 2 minutes in first IPA bath (not the fresh one)
- Cleaning phase 2 : 2 minutes in fresh IPA Bath
- Let the tire dry for at least 30 minutes
- Curing UV : I generally put the tire in a jar of water for the first 5 minutes of curing, and then 3 times 5 minutes without the jar of water in different orientations. The 5 first minutes in the water jar avoid reactions with air during curing process and the print is much nicer this way (total 20 minutes of UV post processing)

/https://fbi.cults3d.com/uploaders/18599880/illustration-file/713868ff-0cf2-48d9-b62b-bb65efae612e/20230902_145216.jpg)
