3D model description
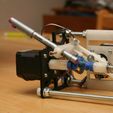
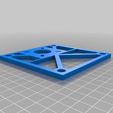
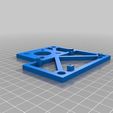
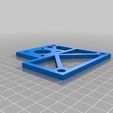
This is a slightly modified endplate for Glasswalker's Revised Fully Printable Eggbot (Spherebot) http://www.thingiverse.com/thing:20398), with the top corner removed to allow the pen to travel further. It's also been run through netfabb to clean it up.
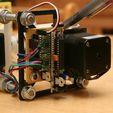
Finally, there's the "standoff" version, which places four tabs one side (either the outside of the left endplate, or the inside of the right endplate) to snap in a 1.8" x 2.5" that I soldered up to control the eggbot with a Modern Devices RBBB board instead of an Arduino.
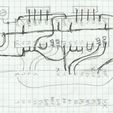
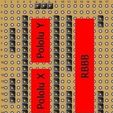
You can see how I formatted the board and wired it up by examining the photos of the board layout and the hand-written wiring diagram.
The RBBB kits can be found at http://shop.moderndevice.com/products/rbbb-kit and the Pololu drivers can be found at http://www.pololu.com/catalog/product/1182.
3D printing settings
- SpherebotEndplate.stl: The reworked endplate, allowing greater pen movement.
- SpherebotEndplate-standoff.stl: The reworked endplate, including four standoffs for snapping in a 1.8" x 2.5" custom circuit board (18 holes by 25 holes, or 17x24 usable)
- Endplate_fixed.stl: The original endplate design, but run through netfabb to clean up some rendering issues.
Actually, you can probably tell from the photo how it's wired up, but I just wanted to add a quick note about power: The USB provides power only for the RBBB, and there's a separate power socket for the motors. I didn't use the RBBB's onboard voltage regulator and power input, because it's 5V output is connected to the USB's 5V -- I opted for keeping all the motors on a separate input with it's own voltage regulator for the servo and drivers.
USB Cable
Update: I bought the USB-TTL converter on ebay for $2.85, shipping included. The item was titled "USB 2.0 to UART TTL 6PIN Connector Module Serial Converter Buildin-in CP2102." It's a little red PCB with a USB plug at one end, and 6 pins on the other, with two of them jumpered together. The jumpered pins are TX and RX. (The diagram on the seller's page is incorrect.)
Using an old 4-conductor telephone cable and a couple of pin headers, I made a cable that connected TX, RX, 5V and GND to the appropriate pins on the RBBB. After installing the CP2102 driver, which Windows found online, I was up and printing without the use of the Modern Device USB BUB.
Important Note: There are several versions of this CP2102 USB-TTL converter on ebay. The one I got isn't the best one to get if you want to program a device (because the DTR pin isn't broken out), but it works just fine for standard serial communications.
Using with Inkscape
We did another one of these in 2014 as a project with my awesome team of mini-makers (elementary school kids), and for this most recent build, we used cocktailyogi's project here to integrate it with Inkscape: http://www.thingiverse.com/thing:302148
I got this project to work with the RBBB board and Linux by removing the C4 capacitor near the RX pin (disabling auto-reset), and putting the whole port name (rather than just a number) into the script file:serialPort = self.testSerialPort( "/dev/ttyUSB0" ) # in .config/inkscape/extensions/http://eggbot.py, line 1348

/https://fbi.cults3d.com/uploaders/31033408/illustration-file/1602e333-851e-4f0f-b6dd-e47103939f21/eggbot-endplate-01_display_large.jpg)
