Skip to content

FMS ATLAS 6WD RECOVERY TRUCK WRECKER WITH WINCH

Advertising
Advertising
?
Creation quality: 5.0/5 (1 vote)
Evaluation of members on the printability, utility, level of detail, etc.

  • 1.8k views
  • 6 likes
  • 11 downloads

License
3D design format
STL Folder details Close
  • recovery truck U LH .STL
  • recovery truck U RH .STL
  • recovery truck U rear .STL
  • recovery truck crane base.STL
  • recovery truck crane left.STL
  • recovery truck crane pulley x2 .STL
  • recovery truck crane right. STL.STL
  • recovery truck crane top bot plates.STL
  • recovery truck front locker x2 .STL
  • recovery truvck front guard.STL
  • recovery truvck main base.STL
  • recovery truvck winch base.STL

Learn more about the formats

Last update 2024-01-26 at 19:18
Publication date 2023-11-25 at 17:15
Design number 1601935

3D printer file info

3D model description

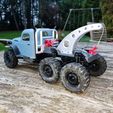
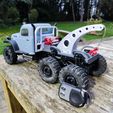
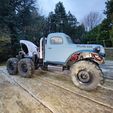
A new look again for the Famous FMS Atlas 6WD RC truck
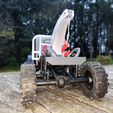
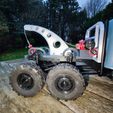
Here we are with a Recovery truck setup you can fit on the rear of the truck. No modification of the truck is required, Just remove all plastic parts on the rear.

this design is inspirated by the Ultimate Wrecker made by Kenny owner of Hauk Designs. Tis is a real truck not a scale one !

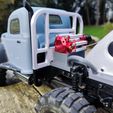
Loving this badass look I decided to try a suitable look alike design on the Atlas. It must have an electric wiinch but none is available at that scale as far as I know. Then I bought a 1/10 one on amazon with its own remote.

the winch is over sized but finaly it does the job with extreme power and torque.

I chosed a metalic style filament for the crane and front gard.
Very easy to print. the top ang bottom part of the crane are printed flat on the bed then need to be bent a bit when glueing.

You have to use M1,4 x 4mm and 8mm for assembly and 4 M2 x 16 screw to fit the whinch.

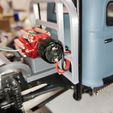
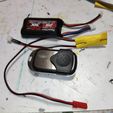
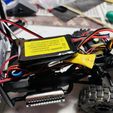
I added the winch controler with a scx24 battery under the Atlas cabin.

The winch I use is this one : https://www.amazon.fr/dp/B09MZB5NZ8?psc=1&ref=ppx_yo2ov_dt_b_product_details

Pulley is in half, to be glued together before assembly.

As usual you have to redrill holes to 1.2mm when a screw has to screw in and redrill to 1.5mm when a screw has to go through freely.

Parts have to be located properly on the bed as I don't know how to do it at the design phase.
special care on that point for the RH and LH parts of the crane

in case you need some support please send an email to luc.tellier@wanadoo.fr

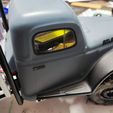
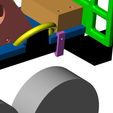
Just add front locker on the file set and one pic to show where it can be placed

3D printing settings

Nothing special
60Β°C bed 205Β°C nozzle, 60mm/s

Advertising


Issue with this design? Report a problem.

Would you like to support Cults?

You like Cults and you want to help us continue the adventure independently? Please note that we are a small team of 3 people, therefore it is very simple to support us to maintain the activity and create future developments. Here are 4 solutions accessible to all:

  • ADVERTISING: Disable your banner blocker (AdBlock, …) and click on our banner ads.

  • AFFILIATION: Make your purchases online by clicking on our affiliate links here Amazon.

  • DONATE: If you want, you can make a donation via Ko-Fi πŸ’œ.

  • WORD OF MOUTH: Invite your friends to come, discover the platform and the magnificent 3D files shared by the community!


Sharing and downloading on Cults3D guarantees that designs remain in makers community hands! And not in the hands of the 3D printing or software giants who own the competing platforms and exploit the designs for their own commercial interests.

Cults3D is an independent, self-financed site that is not accountable to any investor or brand. Almost all of the site's revenues are paid back to the platform's makers. The content published on the site serves only the interests of its authors and not those of 3D printer brands who also wish to control the 3D modeling market.

100% secure payment by credit card, PayPal, Apple Pay, Google Pay, etc.
View all payment options.