Skip to content

gauge for tire profile

Advertising
Advertising
?
Creation quality: 5.0/5 (1 vote)
Evaluation of members on the printability, utility, level of detail, etc.

  • 1k views
  • 5 likes

License
3D design format
STL Folder details Close
  • gauge dial.stl
  • piston.stl
  • pointer.stl

Learn more about the formats

Publication date 2023-12-10 at 17:56
Design number 1634328

slavisko05

3D printer file info

3D model description

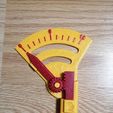
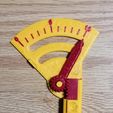
The tire tread depth gauge is made with an enlarged dial 6.5:1 for easier reading of the depth, because with standard gauges where the ratio is 1:1, the divisions are very small and it is difficult to see where the lines match. The accuracy is somewhere around +-0.15mm from some of my personal testing in practice.
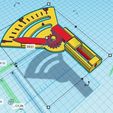
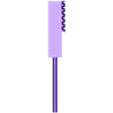
The meter consists of three parts: the dial (also the base of the meter), the pointer and the piston (toothed rack).
I made it from PET-G material at a density of 80%, although I think it can be less dense and from PLA, although we all know that PLA melts at low temperatures, so it is not a very reliable material. The height of the layer is 0.2 mm and in order to get color differences you have to change the filament on the 11th layer and on the 14th layer you can also change the color of the filament with which you started printing. You can set all this in the Cura software in the menu Extensions>Post Processing>Modify G-Code>Filament Change.
Attached is a video on how to measure the depth of the profile with this gauge and I also measured the accuracy of the gauge with a caliper.
The red mark on the hand piston and pinion was placed so that I would know how to serge the parts correctly, and there is a small stop on the left side of the division to prevent the hand from going past the zero division. Of course, when mounting, you just bend the pointer up so that it jumps to the right.
If necessary, sand the parts a little to make the meter work better. Attention should be paid to the possibility of an elephant's foot appearing when printing hands and pistons. That's why we print the piston in the opposite position of the hand so that any thickenings are on the opposite sides.

3D printing settings

Material PET-G
Layer height 0.2mm (first layer too)
no support required
Filament replacement on the 11th layer and 14th layer
Printing time about 2 hours

Advertising


Issue with this design? Report a problem.

Would you like to support Cults?

You like Cults and you want to help us continue the adventure independently? Please note that we are a small team of 3 people, therefore it is very simple to support us to maintain the activity and create future developments. Here are 4 solutions accessible to all:

  • ADVERTISING: Disable your banner blocker (AdBlock, …) and click on our banner ads.

  • AFFILIATION: Make your purchases online by clicking on our affiliate links here Amazon.

  • DONATE: If you want, you can make a donation via Ko-Fi πŸ’œ.

  • WORD OF MOUTH: Invite your friends to come, discover the platform and the magnificent 3D files shared by the community!


Sharing and downloading on Cults3D guarantees that designs remain in makers community hands! And not in the hands of the 3D printing or software giants who own the competing platforms and exploit the designs for their own commercial interests.

Cults3D is an independent, self-financed site that is not accountable to any investor or brand. Almost all of the site's revenues are paid back to the platform's makers. The content published on the site serves only the interests of its authors and not those of 3D printer brands who also wish to control the 3D modeling market.

100% secure payment by credit card, PayPal, Apple Pay, Google Pay, etc.
View all payment options.