Skip to content

Overwatch Big Health

Advertising
Advertising
?
Creation quality: 0.0/5 (0 votes)
Evaluation of members on the printability, utility, level of detail, etc.

  • 294 views
  • 1 like

License
3D design format
STL Folder details Close
  • Overwatch_BigHealth_Case.stl
  • Overwatch_BigHealth_Grip_Bar.stl
  • Overwatch_BigHealth_Grip_Handle_All.stl
  • Overwatch_BigHealth_Grip_Handle_Bottom.stl
  • Overwatch_BigHealth_Grip_Handle_Top.stl
  • Overwatch_BigHealth_Screw.stl
  • Overwatch_BigHealth_Screw_Fake.stl
  • Overwatch_BigHealth_Side.stl
  • Overwatch_BigHealth_Side_Glow.stl
  • Overwatch_BigHealth_Window_Attachment_Lever.stl
  • Overwatch_BigHealth_Window_Attachment_Magnet_Style1.stl
  • Overwatch_BigHealth_Window_Attachment_Magnet_Style2.stl
  • Overwatch_BigHealth_Window_Attachment_Magnet_Style3.stl
  • Overwatch_BigHealth_Window_Full.stl
  • Overwatch_BigHealth_Window_Reduce.stl

Learn more about the formats

Publication date 2024-02-18 at 20:01
Design number 1797408

3D printer file info

3D model description

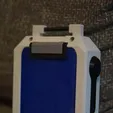
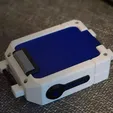
IF THERE IS ANY PROBLEMS LET ME KNOW! THIS IS MY FIRST BIG PROJECT AND ALL OF THIS IS MADE IN BLENDER!

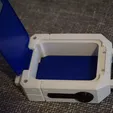
I am currently making the small healthpack as well and they will be able to fit (3 of them) in the big healthpack. Currently the case does not incude the magnet holes for fitting them. I'll update this in the future when everything is done. The size of the completed one is about 210mm x 150mm

Filament used:

Formfutura EasyFil ePETG Transparent Blue
Formfutura Premium PLA Robotic Grey
Formfutura EasyFil ePLA Light Grey
Formfutura EasyFil ePLA Traffic Black

For building your own Healthpack you need:

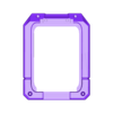
1 Case
2 Windows (Full or Reduce) (PLEASE LOOK DOWN FOR HOW TO PRINT)
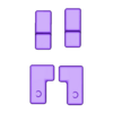
2 Bottom Grip Handle
2 Top Grip Handle (Carefull left and right are different)
2 Grip Bar
2 Side
2 Side Glow
2 Screws*
4 Fake Screws
2 Window Attachment Lever
2 Window Attachment Magnet
8 Magnets: ΓΈ5mm, height 2mm (Might add different sizes holes if needed, lmk!)

*I used @Sneaks screws from his Bench Mountable. Big thanks to him!

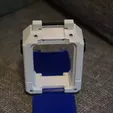
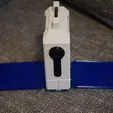
Most parts are made to be glued. The Grip Top can be secured with the Screw and Grip Bottom should not fall out due the tight tolerances. The Lever can and should be able to bend to get in the Attachment Magnet. The Window can be just pushed into the case.

When printing the Window I recommend using the biggest layer height for the best visibility with transparent filament (atleast in my test) and using variable layer height to make the round connecting part smooth as possible.

                            And of course please share you makes!
Advertising


Issue with this design? Report a problem.

Would you like to support Cults?

You like Cults and you want to help us continue the adventure independently? Please note that we are a small team of 3 people, therefore it is very simple to support us to maintain the activity and create future developments. Here are 4 solutions accessible to all:

  • ADVERTISING: Disable your banner blocker (AdBlock, …) and click on our banner ads.

  • AFFILIATION: Make your purchases online by clicking on our affiliate links here Amazon.

  • DONATE: If you want, you can make a donation via Ko-Fi πŸ’œ.

  • WORD OF MOUTH: Invite your friends to come, discover the platform and the magnificent 3D files shared by the community!


Sharing and downloading on Cults3D guarantees that designs remain in makers community hands! And not in the hands of the 3D printing or software giants who own the competing platforms and exploit the designs for their own commercial interests.

Cults3D is an independent, self-financed site that is not accountable to any investor or brand. Almost all of the site's revenues are paid back to the platform's makers. The content published on the site serves only the interests of its authors and not those of 3D printer brands who also wish to control the 3D modeling market.

100% secure payment by credit card, PayPal, Apple Pay, Google Pay, etc.
View all payment options.