Skip to content

Zelda Chest Multi Part with LEDs

Advertising
Advertising
?
Creation quality: 5.0/5 (1 vote)
Evaluation of members on the printability, utility, level of detail, etc.

  • 14.3k views
  • 37 likes
  • 15 downloads
  • 5 collections

License
3D design format
STL Folder details Close
  • 170 Black eye Center.stl
  • 170 Blue eye Center.stl
  • 170 Blue eye ring.stl
  • 170 Clear Front left glass.stl
  • 170 Clear Front right glass.stl
  • 170 Clear top eye glass.stl
  • 170 Gray Chest Bottom.stl
  • 170 Gray Chest Top.stl
  • 170 Gray Front Center.stl
  • 170 Gray Topper Back Left.stl
  • 170 Gray Topper Back Right.stl
  • 170 Gray Topper Front Left.stl
  • 170 Gray Topper Front Right.stl
  • 170 Hinge Pin need 2.stl
  • 170 Light Blue Bottom Trim.stl
  • 170 Light Blue Front center Keystone.stl
  • 170 Light Blue Front center.stl
  • 170 Light Blue Left Ark.stl
  • 170 Light Blue Locking Pin Short.stl
  • 170 Light Blue Locking Pin long.stl
  • 170 Light Blue Locking Pin.stl
  • 170 Light Blue front left decore.stl
  • 170 Light Blue front right Decore.stl
  • 170 Light blue Right Ark.stl
  • 170 Light blue top eye.stl
  • 170 Off White Trim Top Chest.stl
  • 170 Yellow Top Eye Bottom Spacer V1 empty.stl
  • 170 Yellow Top Eye Bottom Spacer V2.stl
  • 170 Yellow Top Eye.stl
  • 170 Yellow eye lock.stl
  • 170 light blue bottom feet.stl
  • Black eye Center.stl
  • Blue eye center.stl
  • Blue eye ring.stl
  • Clear Front left glass.stl
  • Clear Front right glass.stl
  • Clear top eye glass.stl
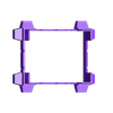
  • Gray Chest Bottom.stl
  • Gray Chest TOP.stl
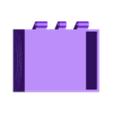
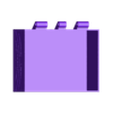
  • Gray Door in Lid Loose fit.stl
  • Gray Door in Lid Tight Fit.stl
  • Gray Front center.stl
  • Gray Topper Back Left.stl
  • Gray Topper Back Right.stl
  • Gray Topper Front Left.stl
  • Gray Topper Front Right.stl
  • Hinge Pin need 2 Easy press in.stl
  • Hinge Pin need 2.stl
  • Light Blue Bottom Feet.stl
  • Light Blue Bottom Trim.stl
  • Light Blue Front center Keystone.stl
  • Light Blue Front center.stl
  • Light Blue Left Ark.stl
  • Light Blue front left decore.stl
  • Light Blue front right Decore.stl
  • Light Blue locking Pin long.stl
  • Light Blue locking Pin.stl
  • Light blue Right Ark.stl
  • Light blue top eye.stl
  • Off White Trim Top Chest.stl
  • Yellow Top Eye Bottom Spacer (V2).stl
  • Yellow Top Eye Bottom Spacer V1 empty.stl
  • Yellow Top Eye.stl
  • Yellow eye lock.stl

Learn more about the formats

Publication date 2024-02-20 at 22:46
Design number 1801793

3D printer file info

3D model description

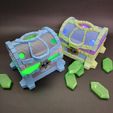
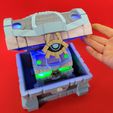
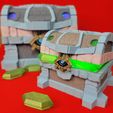
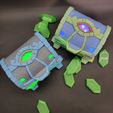
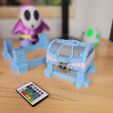
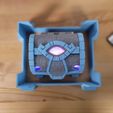
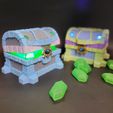
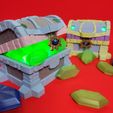
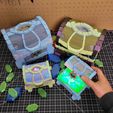
Zelda Tears of the Kingdom, inspired Chest with plenty of room in the lid to add LEDs

Designed to be printed in multiple pieces and the assembled to get the different colors of the chest to stand out.

Such a perfect project for any Zelda or RPG loving gamer. I am including two different versions scaled at different sizes with adjusted clearances between the parts. The original size chest has a compartment 55mm tall x 113mm wide x 89mm deep to store whatever you want. The other larger version is scaled up to 170% and has a compartment 94mm tall x 198mm wide x 157mm deep. Plenty of room for all your rubies!!

Assembly
A couple of things to note once you get all the pieces printed out.
As Always, dry fit the pieces together before glueing to ensure you have the correct pieces you want on the design.
Start assembling the lid by adding the “yellow top eye bottom spacer” to the lid first, this will help you align the rest of the pieces. There are multiple versions of this. V2 spacer creates more of an “eye” effect. While V1 will allow more light to pass through. Note the order of the top center eye pieces. There is a clear glass like piece that gets installed before the top decorative piece.
Add the clear plates on the back of the “front topper pieces”, before glueing the topper pieces to the lid. You will not be able to add them later, and they make excellent diffusers for the LED lights.
Leave the lock hanging on the “Front center” piece and glue the “front center keystone” in place capturing the lock. Don’t get glue near the lock when doing this. The lock should be free to swing as you will need the movement to open the chest once everything is assembled.
The different locking pins are a matter of preference on how hard you want the chest to open. They are different lengths and will require more, or less force to pull the eye lock out of the way. Save this part until the end, once everything else is glued together. I recommend pressing the pin through the inside of the chest and out. Use painters’ tape to hold the pin in place for now. Try opening and closing the chest a few times and determine if that is the correct pin for your needs. Then glue this part in place.
The hinge pins in the back should pop into place without the need for glue. Given their print orientation I was afraid they might break if the unfortunate happens, and I wanted to make them easily replaceable. If they seem too hard to pop in place for you, some light sanding on the fat part of the pin should do the trick.

For an assembly video and more info, You can follow me on instagram,
https://www.instagram.com/pla.n.pa/

If you’re interested in selling prints of my designs, become a Patreon supporter here…
https://patreon.com/planpa3d

I used these lights for both the original size and the 170 scaled up versions.
https://www.amazon.com/gp/product/B07SDLCTXY/ref=ppx_yo_dt_b_asin_image_o00_s00?ie=UTF8&th=1

Filaments used in pictures,
Bambu PLA basic blue gray – Main Chest parts
Bambu PLA Gold Metallic – Yellow eye parts
HATCHBOX Matte PLA Light Lavender – Off white top trim
OVERTURE Rock PLA – Light blue parts
ZIRO Glitter PLA Filament – Clear glass diffusers
JAYO Silk Blue – Front eye decor pieces

Advertising


Issue with this design? Report a problem.

Would you like to support Cults?

You like Cults and you want to help us continue the adventure independently? Please note that we are a small team of 3 people, therefore it is very simple to support us to maintain the activity and create future developments. Here are 4 solutions accessible to all:

  • ADVERTISING: Disable your banner blocker (AdBlock, …) and click on our banner ads.

  • AFFILIATION: Make your purchases online by clicking on our affiliate links here Amazon.

  • DONATE: If you want, you can make a donation via Ko-Fi 💜.

  • WORD OF MOUTH: Invite your friends to come, discover the platform and the magnificent 3D files shared by the community!


Sharing and downloading on Cults3D guarantees that designs remain in makers community hands! And not in the hands of the 3D printing or software giants who own the competing platforms and exploit the designs for their own commercial interests.

Cults3D is an independent, self-financed site that is not accountable to any investor or brand. Almost all of the site's revenues are paid back to the platform's makers. The content published on the site serves only the interests of its authors and not those of 3D printer brands who also wish to control the 3D modeling market.

100% secure payment by credit card, PayPal, Apple Pay, Google Pay, etc.
View all payment options.