Double-Barrel Gatling Disc Shooter
Double-Barrel Gatling Disc Shooter


Print Profile(2)
Description
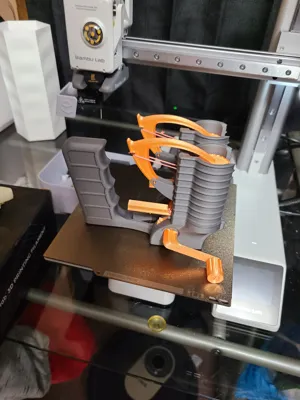
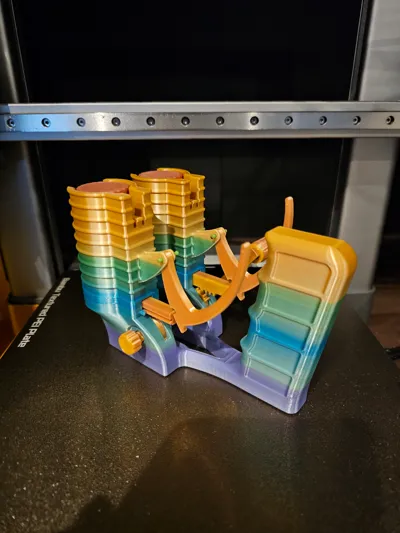
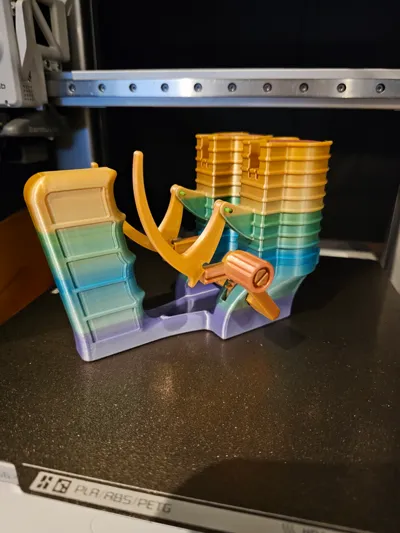
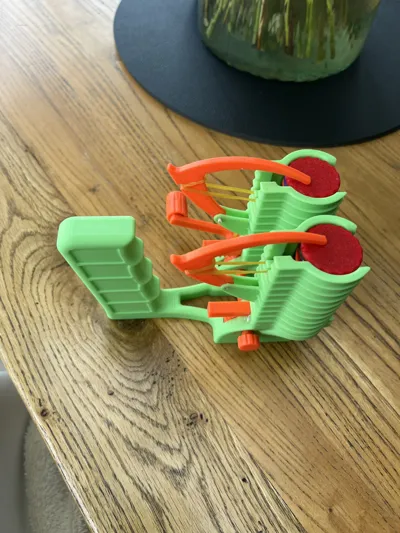
Anything worth doing is worth doing to excess. My 8-shot re-mix of Uhltimate's Disc Shooter, was fun, but why shoot 8 discs when you can shoot 40. Really fast. This double-barrel version of the shooter is crank driven, able to fire up to 8 discs per second. It uses the same basic launch mechanism as Uhltimate's shooter, but each disc is pushed through the launching fork by a rack with intermittent pinion gear. Each side fires two discs per revolution for a total of four disc per turn of the crank.
Note that this shooter is designed for PLA, which is stiffer and stronger than PETG or ABS. Do not try to use CF reinforced filaments, though, as they will be too brittle. I would recommend using Tough PLA or some similar variant that can handle a little flexing better than basic PLA, although basic PLA will work, too.
CAUTION: The discs launch at a speed in excess of 60mph. Do not shoot at animals, pets, siblings, or anyone or anything that could be damaged by a 60+mph projectile.
And please, do not use this outdoors. You will lose discs. A lot of discs. And we don't need any more plastic pollution.
Assembly
1. After printing, you need to remove a couple of tiny built-in supports just underneath the little stub that sticks out of the back of each barrel.
 |
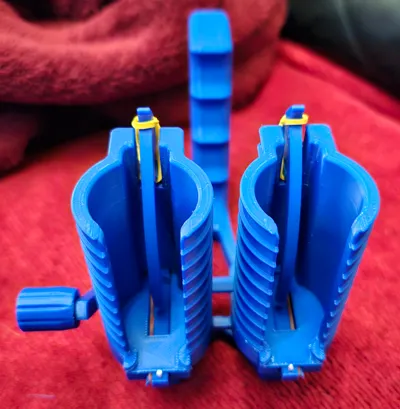
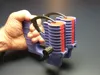
2. The launching fork is a print-in-place feature at the bottom of each barrel that needs to be freed up after printing. You may be able to wiggle the tips of the fingers to get them to break free, or you can wedge a razor or X-Acto knifeblade in the thin gaps above and below each finger, as shown in the photo above.
3. Test fit all of the parts before preceding:
a. Make sure the gears slide on the crankshaft
b. Make sure the plungers (right and left) slide back & forth easily in the slots at the bottom of each barrel
c. Make sure the crankshaft can spin freely in the transverse bore going thru both sides of the shooter
d. Make sure the cap nut threads onto the end of the crankshaft. (If it's tight, you should be able to work it back & forth to loosen it up.)
 |  |
4. Place the gears in the two pockets behind and below the two barrels as shown in the first photo above. You'll be shoving the crankshaft through the housing and through the two gears, but note that the two gears should be off set from each other by 90 degrees, as illustrated in the second photo above. Screw the cap nut onto the end of the crankshaft, and press the knob onto the crankshaft handle.
 |
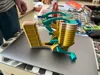
5. You will need four very short, thin rubber bands (about 22mm unstretched length, 1 - 1.5mm wide). If you don't happen to have any, you can take a longer rubber band and tie a knot in it and cut off the excess as shown above. You will also need 4 short pieces of 1.75mm filament x 15-20mm long to use as pins in the assembly. Preferably use PETG or ABS as you will be putting a kink in these pieces to keep them in place.
 |  |
6. Loop one end of the rubber band over the small hook on the end of the plunger piece (1st photo above), with the sides of the rubber band laying in the two notches. Start to insert the plunger into the right or left slot (as appropriate) and then hook the other end of the rubber band over the stub at the back of the barrel (2nd photo).
 |  |
7. Push the plunger all the way forward against the rubber band until the tip sticks out the front side. Place one of the filament pieces through the small hole in the tip to keep the plunger from popping back out. To secure the pin, bend the top and bottom ends slightly forward (1st photo). Trim the pin above and below the plunger tip (2nd photo).
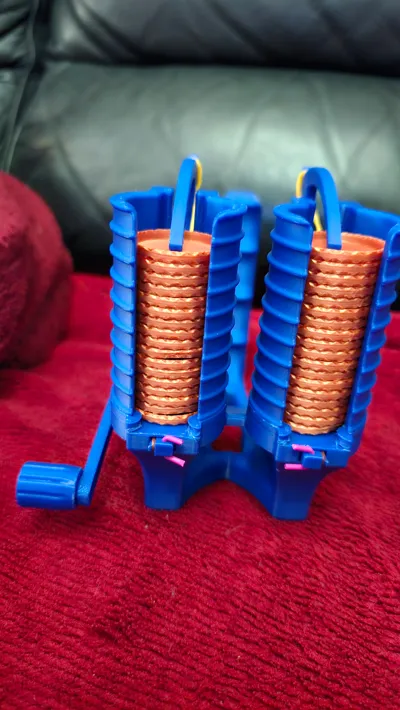
8. Repeat the plunger assembly for the other side. Give the crankshaft a test crank – the two plungers should extend and then snap back alternately as you turn.
9. Assemble the presser arms as shown in the main photos at the very top, again using short pieces of filament as hinge pins. Bend the ends of the pins and trim them off, as you did for the plungers.
10. Loop your last two rubber bands from the hook inside each barrel (at the bottom of the gap in the back) and then over the notch in the back of the presser arm. You are now ready to load and launch!
Comment & Rating (39)