The z-motors in the Comgrow T300 share a single driver, so they cannot correct the position of the two sides independently. Instead, they must resort to a more brute-force top-ramming method: their motors push the gantry against the frame’s upper end-stops to align both sides. This method relies on the physical limits of the machine to ensure the gantry is level.
For the initial T300 units, this method is not only slow and unpleasant, but also quite inaccurate. In these units the right end stop seems to be 0.7mm higher than the left, which plays a substantial role in the extensive range of bed level heights we can observe.
So what’s the alternative?
Instead of aligning the gantry at the top, 350mm away from the bed, I created this Klipper macro that uses the inductive probe to compare the distance from the bed on the two sides, and can tell us how we can adjust the z-positions by hand for perfect alignment.
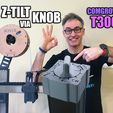
To make those adjustments easier, I’ve designed this replacement for the right knob, with a practical handle and a dial marked in 5-minute increments.
After adding the macro, this new gantry alignment method gets assigned to the original “z-axis tilt calibrate” button on the “Level calibrate” screen on the device:
step 0: Optionally preheat the bed to your print temperature, otherwise the macro will auto-preheat to the default temp of 60°C
step 1: Press Z-axis tilt [CALIBRATE] on the "Level calibrate" screen (on the device).
step 2: Follow the prompts on the device screen
It will either prompt you to adjust the knob position and repeat the probing by pressing [CALIBRATE] again, or if your gantry is level it will keep the motors locked so you can do a bed mesh or start your print.
Notes:
1) Once a bed mesh is created with precisely leveled gantry, no need to re-mesh, it will be enough to just level gantry before prints
2) In macro_z_tilt_via_knob.cfg the setting variable_accuracy:1 → increase the accuracy by changing the 1 to a 0 for more iterations (1=speed vs 0=accuracy)
3) In Macro.cfg the setting variable_bed_mesh_calibrate_target_temp: 60 can be changed to any preheat temperature, which will be used for bed-mesh and this z-tilt alignment (unless you explicitly preheat to some other temp).
4) For mesh calibration to also work with custom preheat values, add this condition to the preheat line in macro.cfg BED_MESH_CALIBRATE: if printer.heater_bed.target<10 else printer.heater_bed.target|int
For details, please watch my video and my comments in macro_z_tilt_via_knob.cfg
UPDATES
Macro v2: Now does a HOME ALL at the end of the gantry calibration process, to make sure MESH CALIBRATE works with accurate z-height values. Be sure to check your newly created mesh before starting a print. The center point should read around Z=0
Macro v3: New "variable_quick:0" option. "0"=safer (default) "1"=quicker. The safer option will HOME ALL between every probing cycle, the quicker option does it the way the video shows. To make HOME ALL quicker, if additional cycle is necessary the printhead is quickly moved near the 0,0 point. I also flipped to probe right then left. Finally, a reminder is added to always check your bed mesh before doing your first print using the new mesh. The middle should show Z=0
Disclaimer
While I have devoted considerable effort and thorough testing to the development of this Klipper macro and STL models, I provide them as-is without any warranty of any kind. I cannot be held responsible for any damage or issues that may arise from their use. Please ensure you understand the macro’s functions and have evaluated its compatibility with your setup before implementation. Your use of this macro and models signifies your acceptance of this disclaimer.

/https://fbi.cults3d.com/uploaders/22944044/illustration-file/072fdbdc-c2e9-4147-8d54-dbb7f5c1001c/t300-z-tilt-via-knob-cults3d.jpg)


