
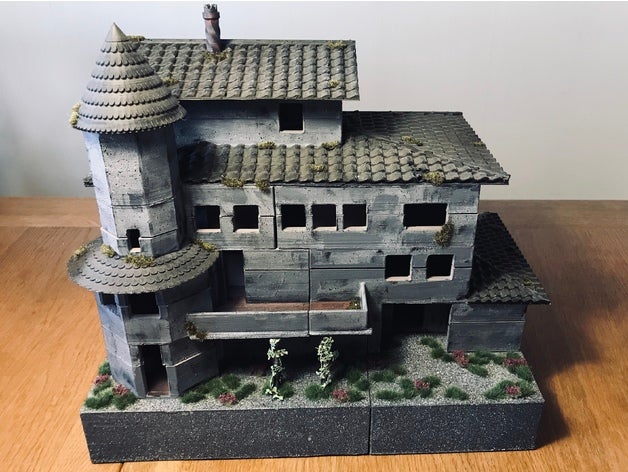
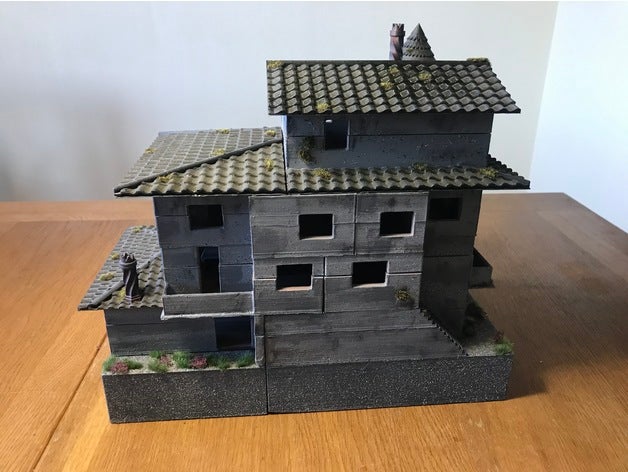
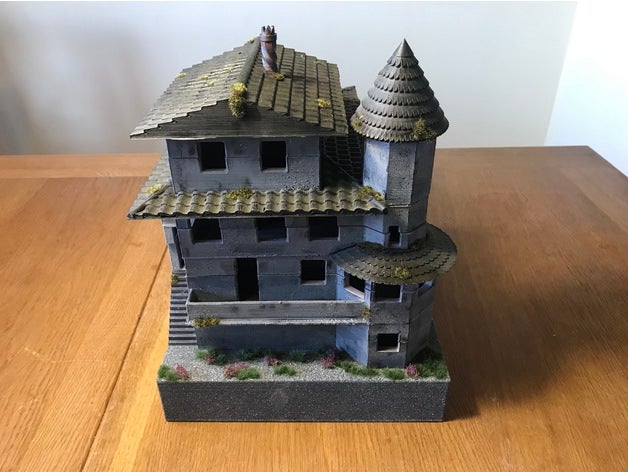
TLDR: This is a playable sized Trollskull manor from the DnD campaign Waterdeep: Dragon Heist. Print one of everything, add some glue and magnets and you’re good to go!
Final result
Print Settings
Printer Brand: Creality
Printer: Ender 3
Rafts: Yes
Supports: No
Resolution: .2
Notes:
Print one of everything (you can choose to only print one roof though – you have two alternatives – alt 1 and 2)
All parts should be printable without supports, I printed at .2 mm which looks great but would sometimes need sanding for magnet fittings.
READ THIS In order to avoid warping – prints take up almost the whole print bed area – I used a brim. Some (most? all?) parts containing floors with walls needing to be glued on to them (see post-printing) have a one layer gap in the bottom for the walls – With a brim this becomes a marking to show how walls attach! Without a print you might need to add supports touching build table or something? So why not use brims?
Note These prints take lots and lots of time, the final product weighs a couple of kilos, so be ready to waste some filament 🙂
Post-Printing
Naming / What to print
Print one of everything.
The naming is PROJECT_LEVEL_SECTION_PART.
Project: Project is of course TSM (Trollskull Manor)
Levels: Basement level is 0, ground floor is 1, etc.
Section: Divided into a left and right part, labeled A or B.
Part: Divided into a bottom part (1) and a top part (2). There’s one part labeled “3” that’s the top roof.
Glue
Glue together the different PARTS of the same section, e.g. TSM_2_a_1 (bottom) and TSM_2_a_2 (top). (NOTE: The TSM_1 sections do not have two parts as that level attaches directly on top of the basement)
As the TSM_2_a_1 contain the upper halves of the walls of the TSM_1_a, it can be challenging to line them up correctly – After some trial and error my suggestion is to secure any walls (TSM___1) to the walls below them using masking tape, adding glue to the top of them and then lining up the corresponding TSM___2 part. NOTE however that the sizes of the parts might not be the same but rather the TSM___1 corresponds to the level below!
This sounds complicated, it’s not entirely uncomplicated, but it’s not THAT complicated when you get into it.
Magnets
Whereas parts stick together with glue – Everything else (sections and levels) stick together using magnets.
All parts come with holes for 8×3 mm magnets (slightly smaller / thinner is fine, and might even be preferable as they will probably be easier to hide).
Take note of polarity when adding magnets, if added correctly there will be only one orientation that any part can be attached and will sort of snap into place when it comes close enough!
Sanding
Tolerances might be a bit tight in places and you will probably need to sand down parts if printing at a reasonable speed and detail level
Painting
Not my expertise but primed with a gray coat, then a stone spray on the outside.
Then just mixed water based colours and then a black wash. Added a protective coat and then some standard moss, grass and vines that I got from a local Warhammer place.
How I Designed This
Slice and dice
This was a very (VERY) long project that just got out of hand…
After seeing the model made by Wootai I just wanted to print that at a playable size on my Ender 3, but the model was way too big to print on that print bed, so I decided to slice up the model, instead of slicing it down the middle I tried slicing at “logical seams” in the architecture (using meshmixer).
I realised that I’d need to put everything together and decided on using magnets (as I like the snapping feeling and have had a hard time with some of the lock mechanisms out there).
When adding magnet holes I realised that the model, even if really nice when smaller, would look kinda boring without any details added…
Also, somewhere along the process I got a tip that a playable sized building is actually really hard to play in, due to the walls covering too much of the area, so that led to the walls being split at roughly half height (so you can still see balconies and windows etc).
Credits:
Hsus
Download 3D models
| File | File size |
|---|---|
 Trollskull Manor
|
25 MB |
In TSM_1_a.stl
Almost the entire floor shows as overhang in the Prusa Slicer. That makes it impossible to print the brim and causes weak adhesion.
Seems like half of the basement is missing from the files. is there somewhere that i can download the second half of the basement?