Skip to content

Flying Model Rocket: Eris 1.1

Advertising
Advertising
?
Creation quality: 0.0/5 (0 votes)
Evaluation of members on the printability, utility, level of detail, etc.

  • 205 views

License
3D design format
ZIP Folder details Close
  • Eris 1.1.zip
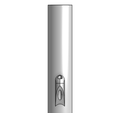
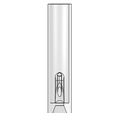
    • Eris 1.1 - Fuselage.stl
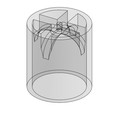
    • Eris 1.1 - Recovery Mount.stl
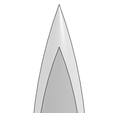
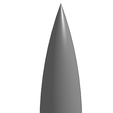
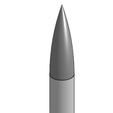
    • Eris 1.1 - Nose Cone.stl

Learn more about the formats

Publication date 2024-01-10 at 17:23
Design number 1702448

aT_Industries

3D printer file info

3D model description

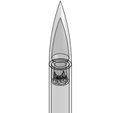
Introducing the first in a series of 3D-printed model rockets: the Eris 1.1!

The Eris 1.1 is a flying model rocket designed to launch using 18mm model rocket motors, classes A through C. It utilizes a 1/8th-inch (3mm) launch rod. It attains altitudes ranging from approximately 400 to 1600 feet (120 to 490 meters), depending on the motor used and wind conditions.

Needed Materials:

PETG filament: Approximately 65 grams
A streamer for recovery (or a ~10-inch parachute, if your launch site is on/close to asphalt or other hard surfaces) - best made from cut-up plastic bags or lightweight mylar; can also be purchased from most manufacturers
A shock cord to attach the nose cone, fuselage, and streamer/parachute (~16in of thin tubular nylon or paracord OR ~20in of Kevlar, at least 100lbs-strength for safety)

Recommended Motors: Estes A8-3, B4-4, B6-4, C6-7
Note - since this rocket must use a friction fit, it may be unsafe to use Quest Composite motors larger than a C.

Assembly Guide:

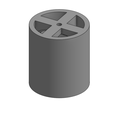
After printing the pieces, tie the shock cord to the base of the nose cone and the recovery mount. You can either tie the cord around the cross-structure on each piece or use a small eye screw. Then, with the recovery section's cross-piece facing toward the nose cone, insert the piece into the upper opening of the fuselage and push it as far back toward the fins as it will go. Glue with super glue (medium CA) or epoxy of any strength.

When ready to launch (also see below), use tape to secure the motor in the aft end of the rocket. Do this by wrapping painter's tape around the motor and then inserting it, such that it is difficult to remove without pliers or a wrench. It may be necessary to sand the inside of the launch lugs or the motor mount depending on the quality of your print. The same goes for the nosecone.

(Tip: add tape only to the front edge of the motor, the opposite of the nozzle. This way, the motor will be partially pushed out of the rocket such that it is easy to remove after flight)

NOTICES
The recovery system, motor, and launch system are not included. Without each of these, the rocket will be unable and/or unsafe to fly.

I am not responsible for any damages to property, individuals, or otherwise caused by failures of this product. Model rocketry regulations exist to prevent such damages, but there is still a chance of a failure of the rocket on any flight, in any conditions, for any reason.

IF YOU ARE NOT PLANNING TO FLY AT A SANCTIONED MODEL ROCKET CLUB, CHECK ALL LOCAL, REGIONAL, AND NATIONAL REGULATIONS ON THE USE OF MODEL ROCKETS IN YOUR COUNTRY.

America's National Association of Rocketry, as well as numerous model rocketry websites, guides, and manufacturers, have information about how to set up, safely launch, and recover flying model rockets. Search for these if you do not have a more experienced model rocketeer/rocketry club to help you.

3D printing settings

These models are for FDM printing using PETG. They have only been test-printed on a Prusa Mini printer, and are designed to fit within its 7in-x-7in-x-7in (177mm-x-177mm-x-177mm) volume. The following settings apply when using PrusaSlicer; however, this rocket is not very dependent on the relative masses of its components, so as long as the nose cone and recovery mount have higher infill amounts than the fuselage, then there should be no issues with stability. Nothing less than 15%, or more than 30% is recommended or necessary.

Fuselage Settings:
0.15mm layer height
Vertical Shells: 2 perimeters
Horizontal Shells: 8 top solid layers, 5 bottom solid layers
Minimum shell thickness: 0.7mm top, 0.5mm bottom
Infill: 20% Gyroid
Overhang Threshold: 50 degrees
Supports: unneeded
3mm outer brim
Raft unnecessary

Recovery Mount Settings:
0.15mm layer height
Vertical Shells: 2 perimeters
Horizontal Shells: 8 top solid layers, 5 bottom solid layers
Minimum shell thickness: 0.7mm top, 0.5mm bottom
Infill: 25% Gyroid
Overhang Threshold and Supports: see below
No brim or raft needed

-Note: to eliminate supports, print this piece upside-down (the open end pointing up)

Nose Cone Settings:
0.15mm layer height
Vertical Shells: 2 perimeters
Horizontal Shells: 8 top solid layers, 5 bottom solid layers
Minimum shell thickness: 0.7mm top, 0.5mm bottom
Infill: 30% Gyroid
Supports: Snug (top and bottom contact Z distance 0.2mm; Rectilinear pattern)
3mm outer brim
Raft unnecessary

Advertising


Issue with this design? Report a problem.

Would you like to support Cults?

You like Cults and you want to help us continue the adventure independently? Please note that we are a small team of 3 people, therefore it is very simple to support us to maintain the activity and create future developments. Here are 4 solutions accessible to all:

  • ADVERTISING: Disable your banner blocker (AdBlock, …) and click on our banner ads.

  • AFFILIATION: Make your purchases online by clicking on our affiliate links here Amazon.

  • DONATE: If you want, you can make a donation via Ko-Fi πŸ’œ.

  • WORD OF MOUTH: Invite your friends to come, discover the platform and the magnificent 3D files shared by the community!


Sharing and downloading on Cults3D guarantees that designs remain in makers community hands! And not in the hands of the 3D printing or software giants who own the competing platforms and exploit the designs for their own commercial interests.

Cults3D is an independent, self-financed site that is not accountable to any investor or brand. Almost all of the site's revenues are paid back to the platform's makers. The content published on the site serves only the interests of its authors and not those of 3D printer brands who also wish to control the 3D modeling market.
100% secure payment by credit card, PayPal, Apple Pay, Google Pay, etc.
View all payment options.