Yellow Modern Snowcat / Snow Groomer

Copyright Claim

Yellow Modern Snowcat / Snow Groomer

Boost
107
160
19
GIF
GIF
GIF
GIF
GIF
GIF
GIF

Print Profile(1)

All
X1 Carbon
P1S
P1P
X1
X1E
A1

Ready to Print Profile with supports 0.2mm layer, 2 walls, 15% infill
Designer
34.7 h
12 plates
5.0(6)

Boost
107
160
19
5
295
505
Released

Description

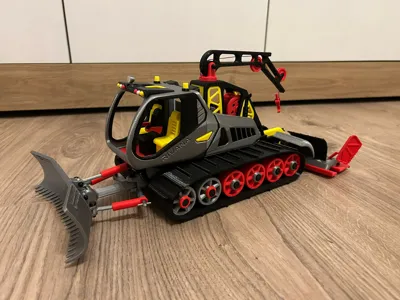
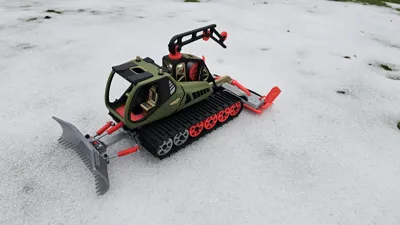
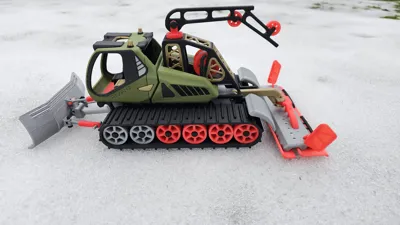
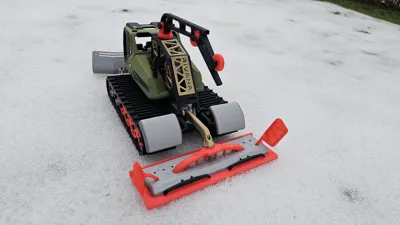
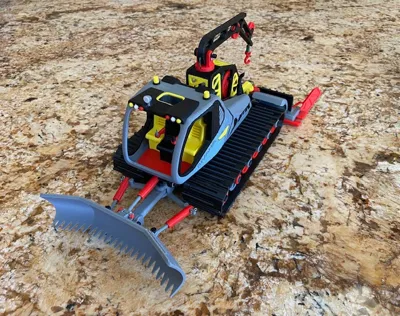
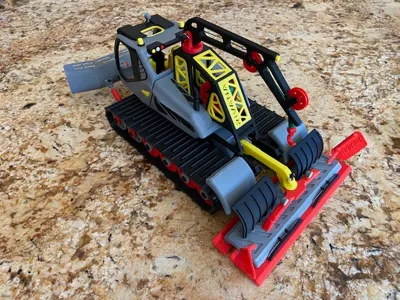
A snowcat/snow groomer is a large vehicle mainly used to pack snow and improve conditions for skiing, snowboarding, and snowmobile trails. Apart from these functions, it can also be modified to fit exploration and other niches


I am very thankful to Mr Benoît Lussier for his feedbacks which has helped me refine the model further.

There are three ways to print this.

  1. As single piece:- Please download STL file but there wont be any movements.
  2. Multiple Pieces :- Download 3mf file with Full_dismantled.3mf.BEST QUALITY OUTPUT. Please use the 3mf file for assembly also.
  3. Combined:- You may use any 3D viewer software like 3D builder in windows to merge components according to your printer and filaments. The sky is the limit for this. You may find a sample file ending with combined.3mf.

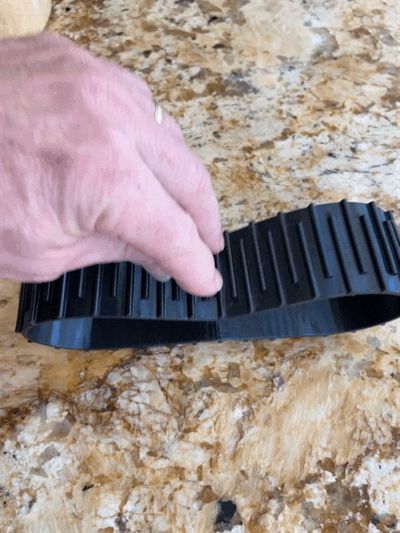
If you want to try TPU for tracks, you can download the "Snowcat_TPU_track.3mf" which has the tracks and gears. You will need to replace all the 12 gears in PLA version with the provided gear for TPU track working. but please note that I haven't tested them.

ASSEMBLY OF MAIN CAB

ASSEMBLY OF UNDERCARRIAGE

ASSEMBLY OF FRONT BUCKET

ASSEMBLY OF REAR GROOMER

ASSEMBLY OF WINCH


The beam of the winch has a 2.25mm diameter path cut through it to route the rope to operate the winge. Here you have two options. either use a rope with max diameter of 2mm or a 1.75mm 3D printing filament. If you choose the first case you can tie the rope to the hook and route the rope through the beam and then through the rotating platform can reach the winding drum. In this case you can skip the winding spool design over the drum and use the hole on the drum to tie the rope and wind. If you choose to use a filament, it would be a make belief thing and thus no need to route it past the rotating plate. See the image for reference. The yellow part is the rope/filament.

MATING OF ALL PARTS

Movements Included

  1. Front Bucket Movments
  2. Rear Groomer swing and lift
  3. Crane Operations
  4. Track movement (only with TPU - Untested)

NOTE The tolerances to some elements are zero which has been intentionally provided to friction lock the elements while not in movements. You may have to fine tune the tolerance from your end using scaling function in slicer to ensure good fit without compromising movements. This also applies for the pins that make rotation possible between elements. Please proceed with printing all the pins after testing printing a pin and testing the fit of a joint. You should be able to find the adequate scaling factor with this.

Supports should be provided as required.

Appreciate the makes uploads. Open for suggestions.

Comment & Rating (19)

Please fill in your opinion
(0/5000)

Very beautiful model! I tried printing the tracks in TPU (first time printing TPU) with 0% infill. Still used the wheels since I had already printed them and, although they don't move too good, they still work. Very nice project!
The designer has replied
1
Reply
Thanks for the feedback bro. Awesome make. I hope you will try my other models too.
0
Reply
very cool:) me and my 4 year old twins had so much fun printing/building this Thank you!
The designer has replied
1
Reply
This looks amazing especially the color scheme. Happy your kids enjoyed it. Do try my other models too like the log skidder or recovery truck. It may teach them about gears and motion.
1
Reply
What a comprehensive and detailed model! Many thanks for the fun project! My learning experience: I happen to recently purchase ASA in a grey color, and had never printed with it before. This use of ASA may have effected some of the printing and fit issues I had - so I would recommend using PLA throughout. 1) Despite using the Textured PEI plate - some of the components I printed with ASA came loose during printing...this was resolved by adding an outside brim to components without significant surface area on the bed 2) The snowcat cab as oriented had corners lifting off plate/warping in ASA...and had to be oriented with the floor of the cab on the plate to increase plate surface area/adhesion, and provide more equivalent cross sectional printing areas (in hopes of reducing strain due to uneven cooling as the print progressed. 3) The front plow kept separating with ASA where the open slots traverse across the length of the blade... which was corrected by adding small "pinning" supports as shown in the photo Again, as one of the drawbacks of ASA is poor bed adhesion, and it has a higher melt temp (which I believe can lead to more thermal strain where dissimilar material volumes exist) - my guess is that these issues would not be encountered if PLA had been used - but I offer the issue and resolution up - in the event someone wants to print with ASA. Like Verman2019 below noted, I also tried to print the separately provided TPU track file (having just received TPU 95AHF in black), and similarly found the track to offer too much resistance to flatten into the required shape. (I estimate it would take 10+ pounds of force to be applied between the furthest outside wheels - which of course will just cause the PLA axles to bend and the track to try to return to it's original round shape. Instead I printed only the formed treads (as part of the full parts package) with the TPU, and they came out awesome - just understand that these will not be functional moving treads. The black doors seemed to be just a tad too big (maybe because of ASA cab) - and despite filing areas of interference, I ended up cracking one of the risers of the cab between the door and back window, as I tried to press in place. After re-printing at 98.55% in both directions (leaving thickness at 100%), they fit perfect, without stressing out the rest of the cab frame. I used some 0.035" Aluminum welding wire to fashion "cotter pins" to keep all the printed pins in place, and will add a couple of small machine screws to hold the small winch pullies in place (once I find them in my shop).
GIF
The designer has replied
1
Reply
Hi Steviej, Thanks for the the detailed review. It really looks awesome. I have been trying to make the TPU tracks better. I will share the latest revision of tracks and the gears with you in chat. You may try with that and let me know the feedback. Again appreciate the make man.
0
Reply
Awsome model. I tried tpu tracks and turned out way too stiff. I mixed and modeled fully working tracks from pla. Now to print the rest of the model.
The designer has replied
0
Reply
Looks cool. You went for the track with links. I also wanted to do that but the number of parts went very high thats why I added TPU tracks for flexible walking. Hope to see your full make soon.
0
Reply
Hello, would you mind sharing the design? I'm printing the model now, I would like to try to make the tracks functional
0
Reply
Print Profile
Ready to Print Profile with supports 0.2mm layer, 2 walls, 15% infill
Die Verbindungen bzw. die Löcher sind perfekt. Alles geht gut ineinander. Manchmal etwas streng aber es geht. Ein tolles Modell. Wenn alles fertig ist mach ich noch ein Foto und stell es rein.
The designer has replied
1
Reply
Danke schön. Ich warte auf das fertige Make
0
Reply
Print Profile
Ready to Print Profile with supports 0.2mm layer, 2 walls, 15% infill
Took me a few tries but once i worked past operator error print came out nice
The designer has replied
1
Reply
Thanks for the review. Hope you would also the pics of your make.
0
Reply
I like your model very much! But I want to print this track part with soft materials. The existing walking structure is only for decoration, and the track will fall off when it moves. Can you upgrade the track and load-bearing wheel part? Thank you very much
The designer has replied
0
Reply
Hi there, I can certainly update the model for you but can you elaborate the design that you want with the walking structure. I am not so aware about such mechanisms. Hope you can give pointers or share rough sketches for the design.
0
Reply
Print Profile
Ready to Print Profile with supports 0.2mm layer, 2 walls, 15% infill
1
Reply
Print Profile
Ready to Print Profile with supports 0.2mm layer, 2 walls, 15% infill
1
Reply
Print Profile
Ready to Print Profile with supports 0.2mm layer, 2 walls, 15% infill
1
Reply