Skip to content

Tread correction for GK1 silencer+Tread and dust cover FREE

πŸ”« 3D models of guns or weapons are dummy objects or prop toys and have no real functionality as weapons. They are intended for entertainment or decorative purposes only. For any design violating our T&Cs, please report them.

Advertising
Advertising
?
Creation quality: 5.0/5 (1 vote)
Evaluation of members on the printability, utility, level of detail, etc.

  • 968 views
  • 10 downloads

License
3D design format
STL Folder details Close
  • Calibrator.stl
  • CapShort(Spacer glued).stl
  • CapStandard.stl
  • GKDustCover.stl
  • Spacer0,5.stl
  • Spacer0.stl
  • Spacer1,2.stl
  • Spacer1,5.stl
  • Spacer1.stl
  • Spacers.stl

Learn more about the formats

Publication date 2024-01-24 at 17:16
Design number 1736396

FoxSoldier

3D printer file info

3D model description

Main mod:

https://cults3d.com/en/3d-model/various/huben-gk1-loading-gate-custom-silencer

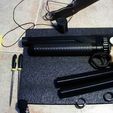
Some users have reported that their Gk1 treading are misaligned, so any moderator/silencer that they put on is altering the point of impact of the projectiles. That con also happen if the barrel is not 100% straight from factory, the way the adaptor seats on the slide forces a complete straight alignment bending the axis of any moderator.

I come with a solution, cause Huben won't.

Instructional video:

https://youtu.be/gKwE5_PiA4o

Instructions:

Zero the open sigths of the gun (use a boresight collimator or just the old grouping/adjustment method).

Put my Tread adaptor (from the loading gate+silencer design) tight on the gun and scratch a mark on the upper surface aligned with the front sight or with any point of reference you want. You need to do that to put the adapter on the same position every time if you extract it for maintanance.

With that, this is more likely to be a permanent add on so, I add a nice cap to cover it.

Put the spacer on the tread fully in, its sits loose, it has to.

I add a ''0'' spacer that has no angle at all (to file it manually) a 0.5 angle, 1, 1.2 and 1.5, use the one you need.

Now put on the moderator, dont fully tread in, leave just little play.

Add a weight on the calibrator.

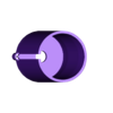
Put the Gk1 straight and add the calibrator in front of the silencer, it should rotate freely, sand file a little of the front end of your silencer if your printer has printed a wider first layers.

Now the tricky part, you should align the moderator with the sights, do not rotate the calibrator to match the open sights of the gun, the calibrator should be aligned with gravity to truly show the missalignment. Manually rotate the spacer and tight the moderator, many times untill calibrator show 0 deviation with the moderator fully tighten, you will tell if because the front sight of the calibrator aligns with your zeroed sights on the gun.

Make a scrath marc on the spacer, aligned with the one you made on the adapter.

Extract the moderator and hotglue the spacer using the marks you have made.

Congratulations!! now you have the only moderator that will ever work with your factory faulty Gk1.

Method 2 (simpler)

Ignore the spacer and just manually file the oposite half of the base of the adapter, re- tighten the moderator and check the alignment as many times necessary.

Finally, shoot your GK1 to test if there is any deviation on the pellets.

3D printing settings

Cap:

0.12mm layer height if you want detail, 0.2mm if you don't care.

Dust cover:

Anything you want.

Calibrator:

Pretty much anything.

Spacers:

Except the ''0'' one (no angle) I recomment to print them at 0.04mm layer height, yeah... you read right, 0.04, or there will be no angle at all!

Advertising


Page translated by automatic translation. See the original version.
Issue with this design? Report a problem.

Would you like to support Cults?

You like Cults and you want to help us continue the adventure independently? Please note that we are a small team of 3 people, therefore it is very simple to support us to maintain the activity and create future developments. Here are 4 solutions accessible to all:

  • ADVERTISING: Disable your banner blocker (AdBlock, …) and click on our banner ads.

  • AFFILIATION: Make your purchases online by clicking on our affiliate links here Amazon.

  • DONATE: If you want, you can make a donation via Ko-Fi πŸ’œ.

  • WORD OF MOUTH: Invite your friends to come, discover the platform and the magnificent 3D files shared by the community!


Sharing and downloading on Cults3D guarantees that designs remain in makers community hands! And not in the hands of the 3D printing or software giants who own the competing platforms and exploit the designs for their own commercial interests.

Cults3D is an independent, self-financed site that is not accountable to any investor or brand. Almost all of the site's revenues are paid back to the platform's makers. The content published on the site serves only the interests of its authors and not those of 3D printer brands who also wish to control the 3D modeling market.

100% secure payment by credit card, PayPal, Apple Pay, Google Pay, etc.
View all payment options.