Grandpa's Favorite Spring Loaded Filament Clip
Grandpa's Favorite Spring Loaded Filament Clip


Print Profile(3)


Description
Updates:


- (8/30/23): Added open/closed double-wings versions, which some people had requested because they found the clip tilted in unevenly wound spools. Also added a mostly cleaned up Fusion360 and STEP files for these variants (in case people want to see my terrible skills and mock me).
- (9/1/23): Added “TightFit” options for the above two double-wing versions that reduces the flexible arm clearance. Use these if you find the arm too loose for your liking.
- (9/4/23): Added 4x “Nameplate” options for the double-wing and tight versions that let you fit names like "PLA", “ABS” or “PETG” onto the clips with the text-embedding tools in slicers.
Why this remix?
I liked many of the ideas in the popular “Grandma's” clip, but I wanted a clip compatible with all types of filament, and found that I was struggling with certain types of stiff filament to easily feed the filament through, particularly with very stiff filaments.
To resolve this problem, I introduce a spring loaded arm, allowing the filament to be fed forward easily. In this case, the arm bends slightly as well as the filament.
Printing/Use Instructions
Printing is easy! I recommend trying the Double Wing (GrandpasClip_DoubleWings.3mf) and/or Double Wing TightFit (GrandpasClip_TightFit_DoubleSidedWings.3mf) variants first if you don't know what to try.
- Lay flat on the bed (should import this way)
- Print at 0.2 layer height.
- I recommend PLA or PETG.
- No supports are needed despite the air-gap to allow the arm to be compliant. The design takes this into account.
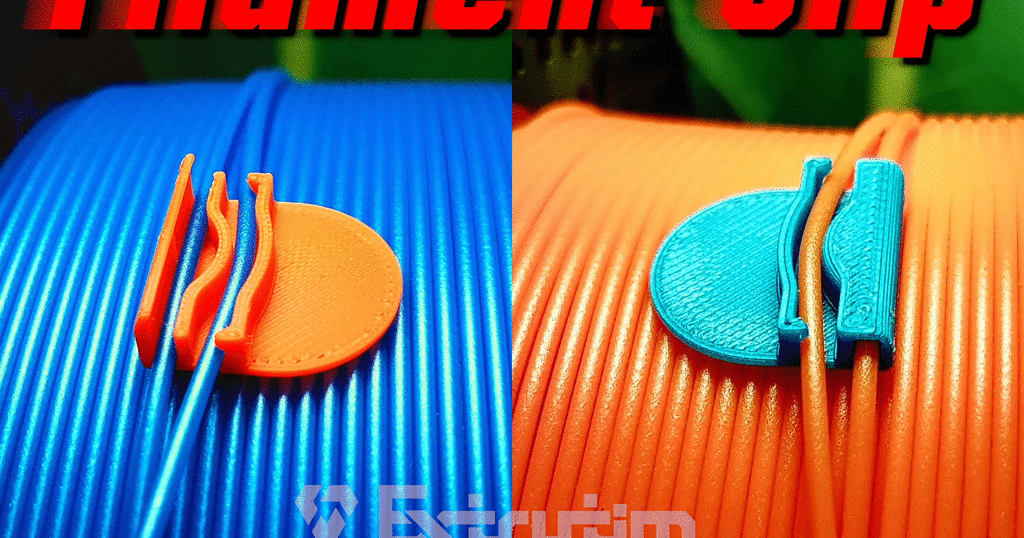
Shown here printed in Prusament Galaxy Silver PLA.
After printing , press the long end of the arm toward the curve to free the arm. You'll get a tiny satisfying “snap” as the arm is freed from the very weak bond with the layers below.

Versions
Comes in a few variants (open/closed) with wide, double-sided, or narrow tabs, as you prefer. These styles somewhat mirror that of the Grandma's clip styles (open/closed).
- Open: you capture the filament on the left side of clip by inserting it in-place from on top.
- Closed (more secure): you capture the filament on the left side of clip by running it through a hole in the clip. This one theoretically can remain on the filament while it's being printed, depending on your feeding setup.
- Double Wing (recommended): These have tabs on both sides to help stabilize the clip on the roll.
- Tight Fit: These double-wing versions have the clearance narrowed between the arm and the curve (from ~1.2 mm to 1.0 mm) for a firmer grip on the filament. You may want these if you print the clip from PETG or the filament you're gripping with the clip is slippery.
Comment & Rating (5)