A1 - Hack - to print TPU Filaflex 70ShoreA and Pulltruded PET
A1 - Hack - to print TPU Filaflex 70ShoreA and Pulltruded PET


Print Profile(1)
Description
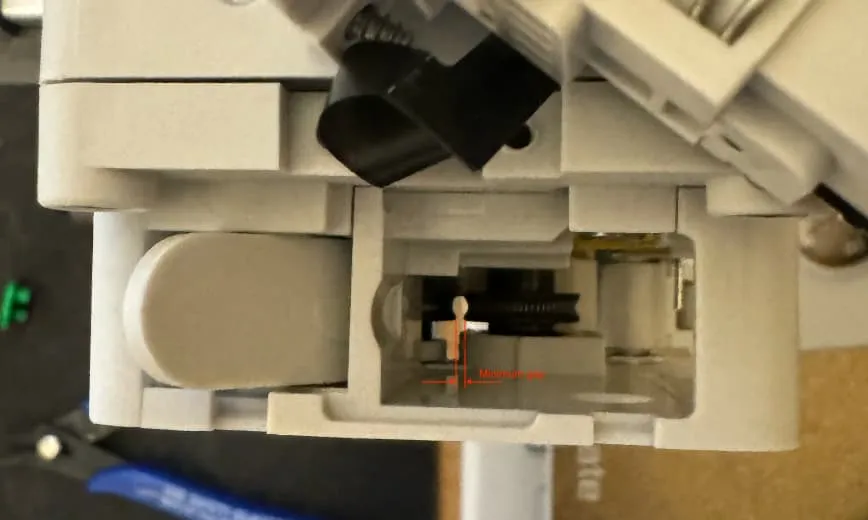
The Problem!
I would like to share an observation regarding the production of pultruded PET with a re-creator. The filament diameter tends to vary significantly during the manufacturing process. In our community, to ensure compatibility with modern extruders, we produce filaments with a diameter ranging between 1.6 to 1.7.
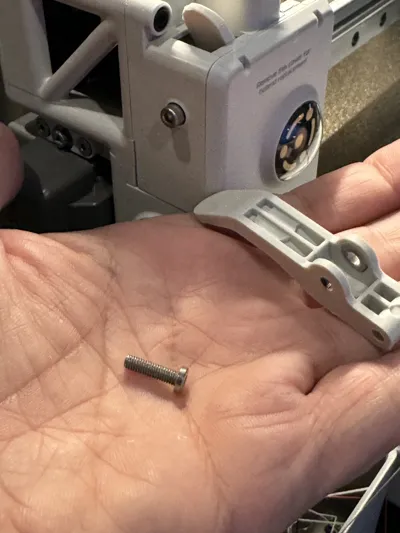
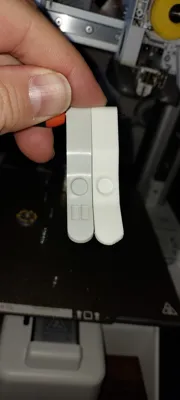
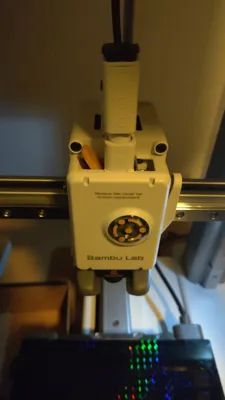
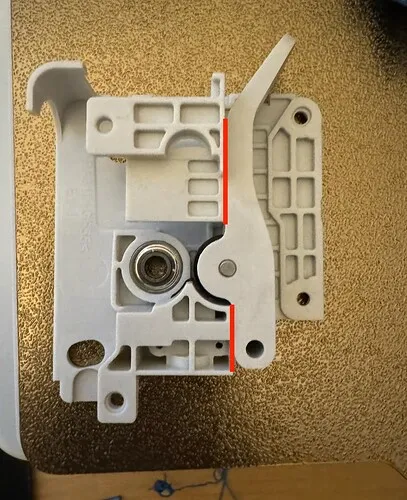
Upon testing the filament on the Bambu A1mini, it came to my attention that the extruder pulley was not gripping the filament adequately, resulting in slippage. Upon disassembling the components, I identified that a modification to the extruder lever containing the counterforce bearing was necessary. This lever serves as a stop against the extruder structure to prevent complete closure.
Some pictures made by https://forum.bambulab.com/u/amzaldua
Solution!
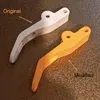
I adjusted this aspect of the lever, ensuring that the pulley now maintains proper contact with the bearing.
This adjustment has improved the filament extrusion process, addressing the issue of slippage encountered during testing on the Bambu A1mini. I believe this modification will enhance the performance of our PET pultruded filament on a broader scale.
 |
|
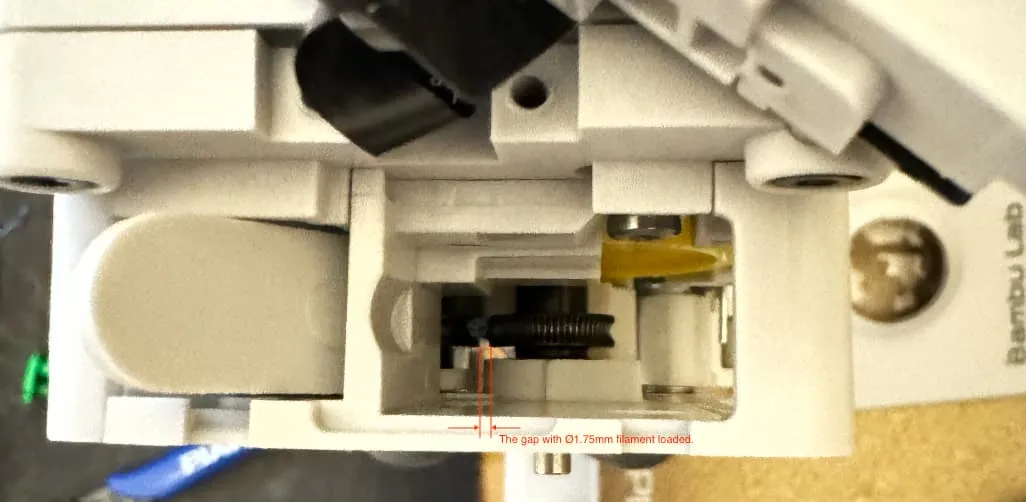
Another issue that this can cause is with the printing of highly flexible filaments such as TPU or TPE with Shore hardness lower than 90 Shora A. This is because the bearing is unable to grip a filament that changes diameter unless it is exceptionally rigid.
I have observed similar design choices in other printers, and I am uncertain as to why the designer created this gap. Hopefully, it is not a crucial element that could lead to unforeseen issues in the future. Regardless, based on my initial tests, the modification has proven effective.
If you decide to undertake this project, please do so at your own discretion and risk. I do not assume responsibility for any issues that may arise from this modification to your equipment.
How To Print!
- Infill Density: 25%
- Layer Resolution: 0.16mm
- Material: Preferably PETG or ABS, but PLA is also acceptable.
- Supports: Supports are necessary for stable and accurate printing.
These settings have been optimized to achieve high-quality results in FDM 3D printing. A layer resolution of 0.16mm provides fine details, and a 25% infill density balances material economy with part strength.
PETG is the preferred material due to its durability and resilience, though PLA is a viable option depending on project requirements.
Ensure supports are included as needed, especially for complex geometries or overhangs. This will ensure successful prints and high-quality final parts.
I printed mine in ABS on another printer!
How to
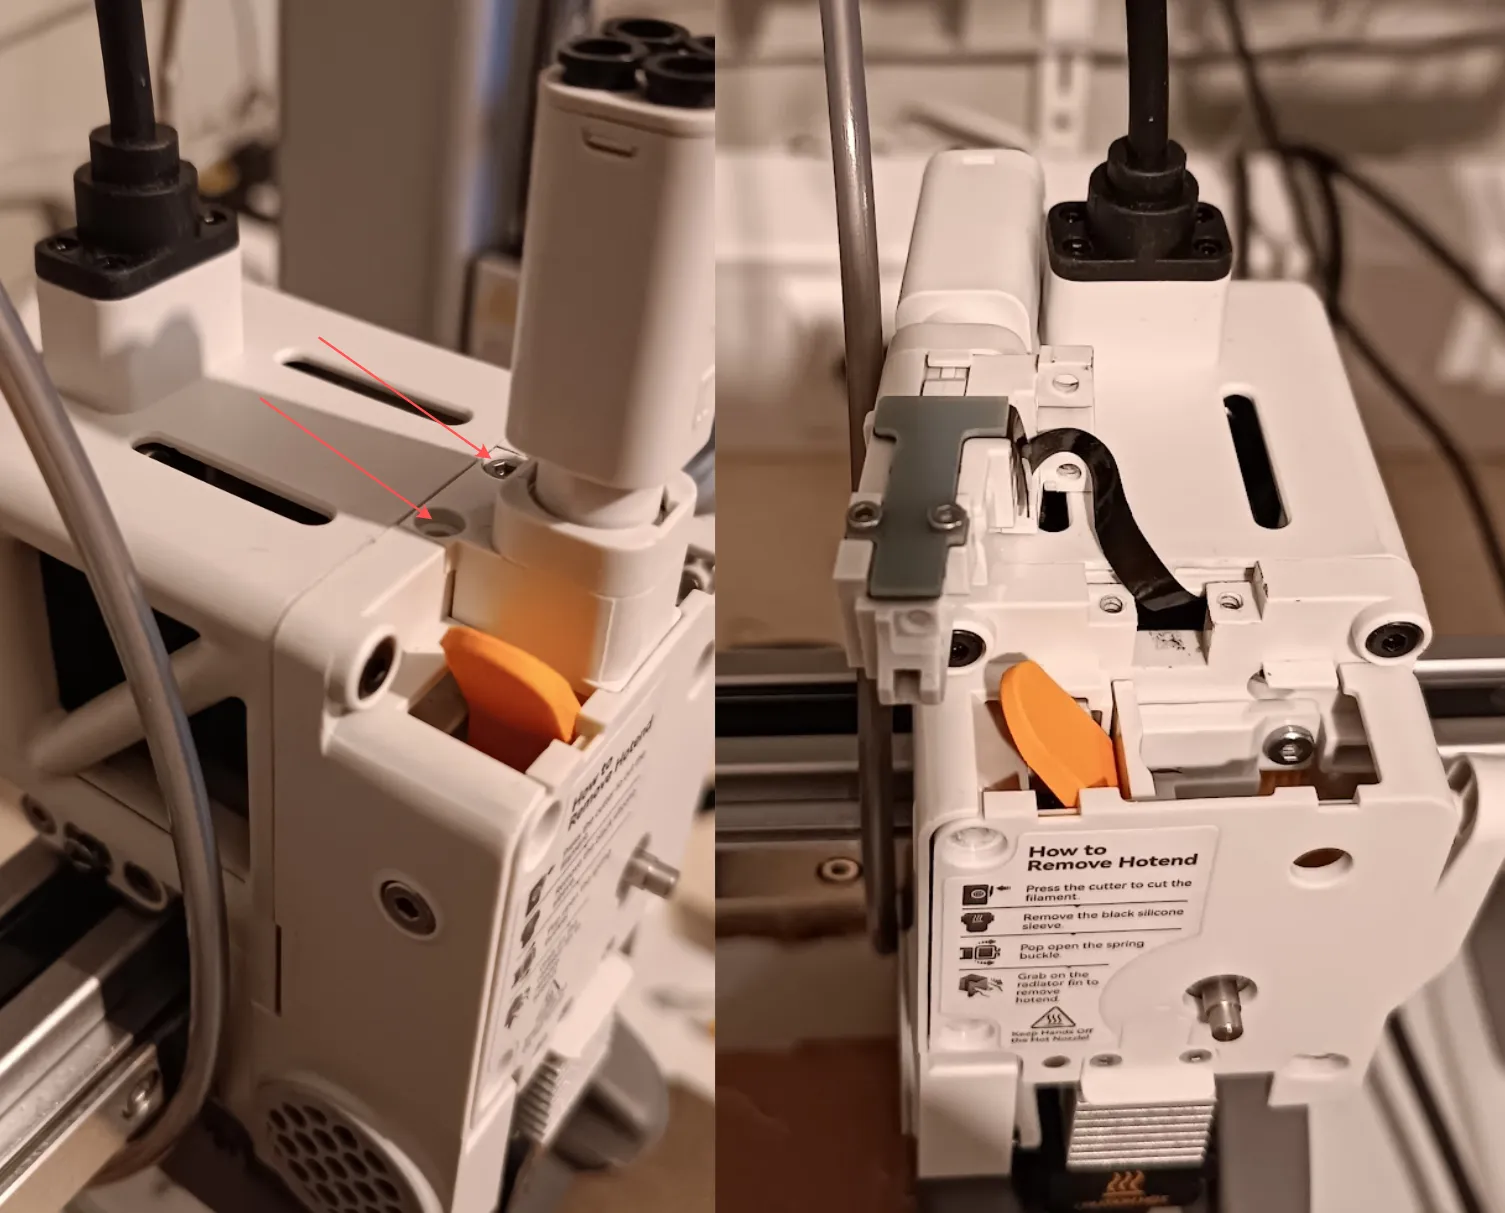
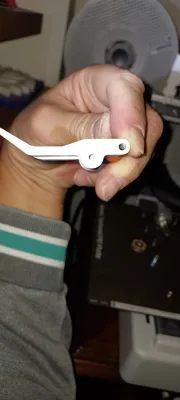
First, take out the PTFE tubes!
second, unscrew the two screens! and save them because they are different!
In the end, take out the Splitter carful with the flat cable is to fragile.

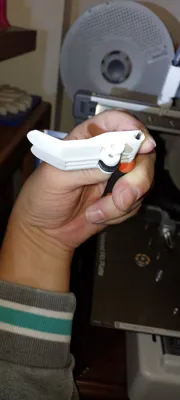
First, take out the hotend!
Then the screws that have arrows!
Careful taking out the cover because a spring and a screw stopper may fall down!

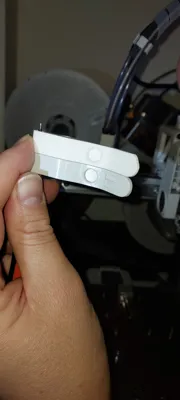
Take out the pin and the bearing from the standart leaver and fit on the one that you printed !
To take out mine I had to use a hammer and some love to take out the pin! careful to don't damage the parts!
At final take it all together again in reverse!
Material Settings
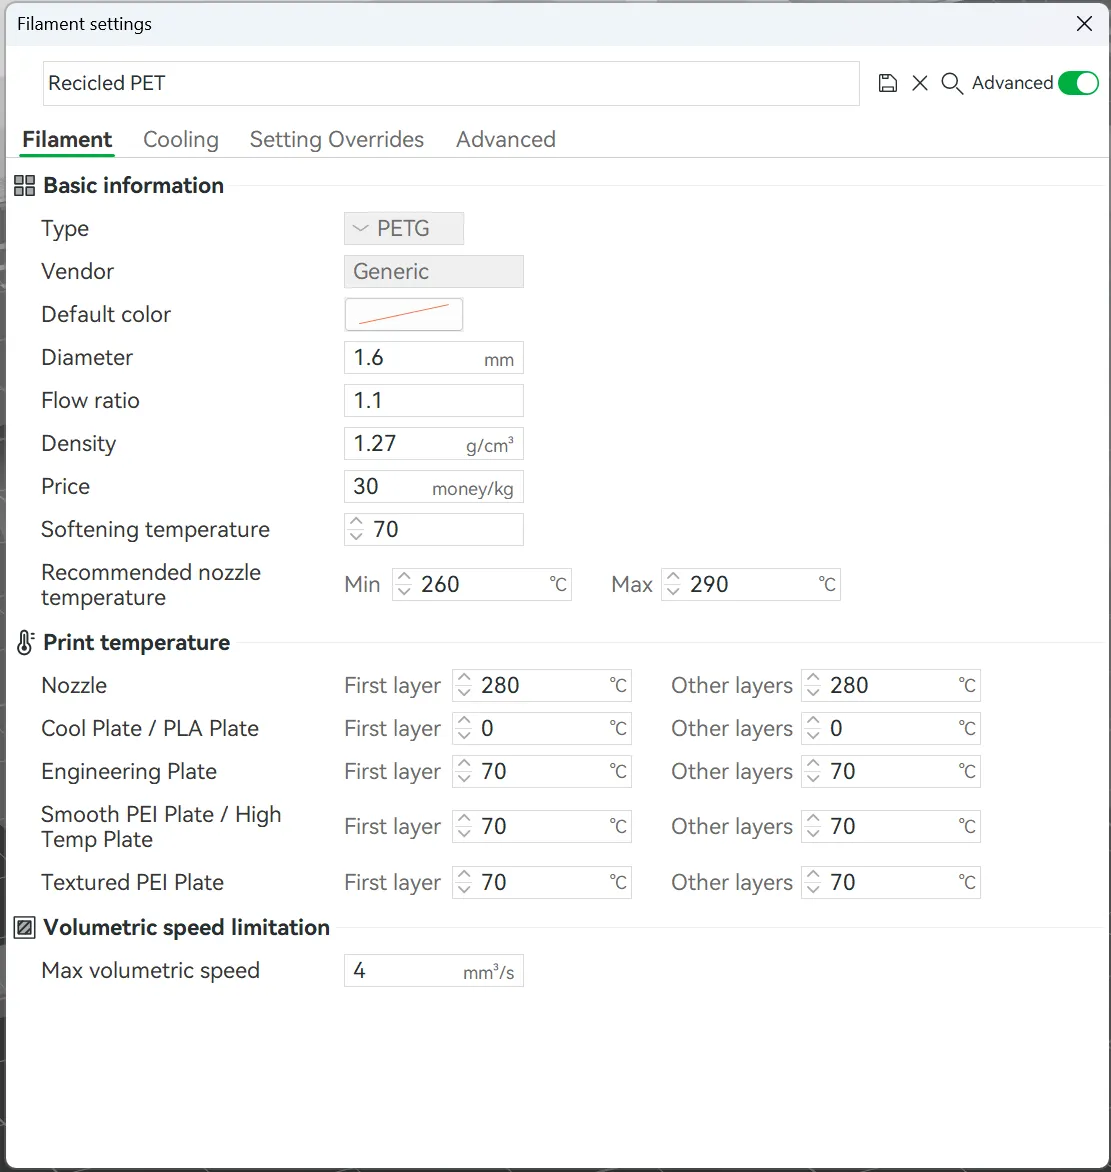
Like we are controlling the max Volumetric speed we don't need to change the speeds of the profiles.
Final Thoughts
If you choose to proceed with this modification, I encourage you to thoroughly document your experience and capture the process through photographs. Your insights and visual representation will be valuable contributions to the community's shared knowledge.
Test the modification extensively, pushing its limits, and share feedback on any adjustments you make. This collaborative approach not only validates successful changes but also aids in the ongoing development and improvement of the modification.
It's essential to exercise caution when modifying your printer, as it carries the risk of damaging specific components. Approach the process with care to mitigate potential losses and ensure the long-term functionality of your equipment.
Your active participation and feedback play a crucial role in advancing our understanding of 3D printing technologies. Enjoy the experimentation!
Side Effects
Like I said, the hack improves the printing of TPU, I am testing it right now because I don't know all the side effects that this hack can create! Use it with Caution!
The tests I made with the available filaments here in EU!
TPE Filaflex 90ShorA - Basic settings - 02Layer - max flow rate : 6.5mm3 - it can be improved i dont push it harder
TPU 3dDfils 85shoreA- Basic settings - 02Layer - max flow rate : 6.5mm3 - it can be improved i dont push it harder
TPU Filaflex 70ShoreA - Basic settings - 02Layer - max flow rate : 1.5mm3 and a flow :1.2 - We have to test to be shore but i fell it can be improved.
All of them were using retraction !on! with 2mm pull!
Comment & Rating (75)