Gridfinity Boxes Filled-in (Fusion 360)
Gridfinity Boxes Filled-in (Fusion 360)


Print Profile(0)
No Print Profile yet. Add one to earn points.
Description
Fusion 360 editable file to customize filled-in Gridfinity blank boxes + Step by step instruction
This is a remix of the original bins by Zack Freedman that you can find here: https://bit.ly/ZFGridfinityDividerBins
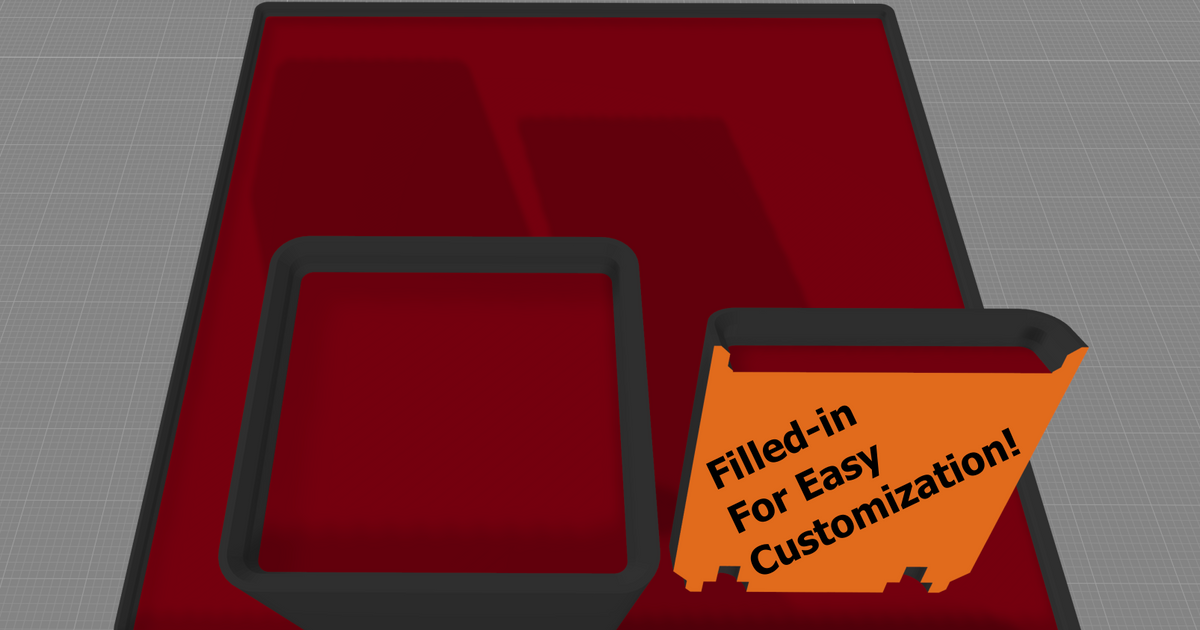
This is the parametric version of the model with the containers filled-in. You can edit the parameters of the model in Fusion 360 to make any size container, you can also edit the file to make it with or without the magnet holes. I'll explain to you how you can do this with step by step instructions.
Instructions on how to edit the model:
1. Download the .f3d file and open it in Fusion 360
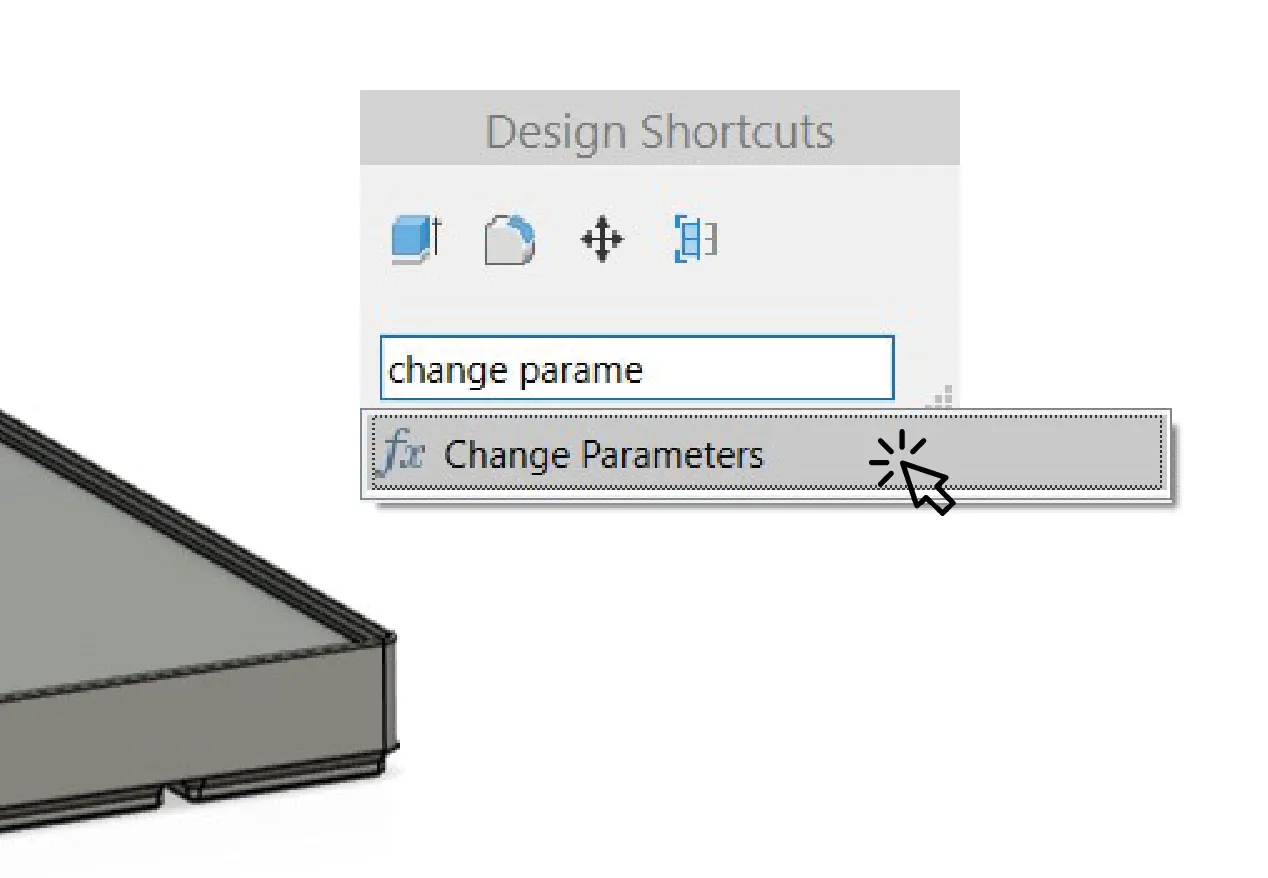
2. You have to find the “Change parameters” function. You can find towarrds the botom of the drop down menu of the modify tab. If you cant find it you can also press the shortcut “S” on you keyboard, a box will appear where you can write “change parameters” and click the option that comes up.

3. Now in the change parameters window you can see there's a lot of User parameters. I've favorited the three most importan ones that will control the width, depth and height of the model. The “slotsWide” and “slotsDeep” parameters will control the quantity of modules in there are in the grid in each direction. The “slotsHigh” will control the height of the container above the nesting base in multipliers of 42mm. This means that a 0.5 (or ½) height will result in a 21mm high container plus the height of the base. If you print two 0.5 high modules and stack them up, they will be the same height as a 1 high module, same thing if you stack three ⅓ high modules and so on.
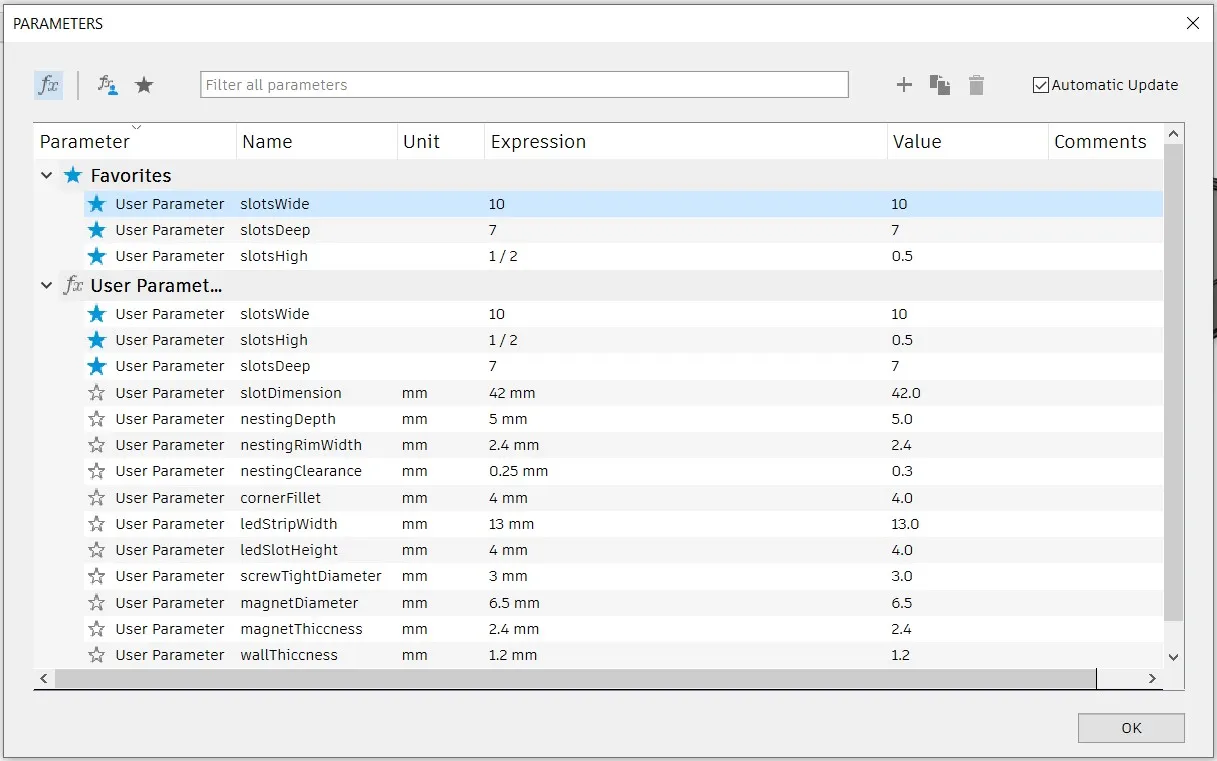
4. You can edit these three parameters by double clicking the numbers in the “Expression” column. You can also edit the other parameters, but that may make your modules incompatible with other gridfinity base plates and accessories. Then press OK

5. You can ignore the warning messages in the bottom right of the screen.
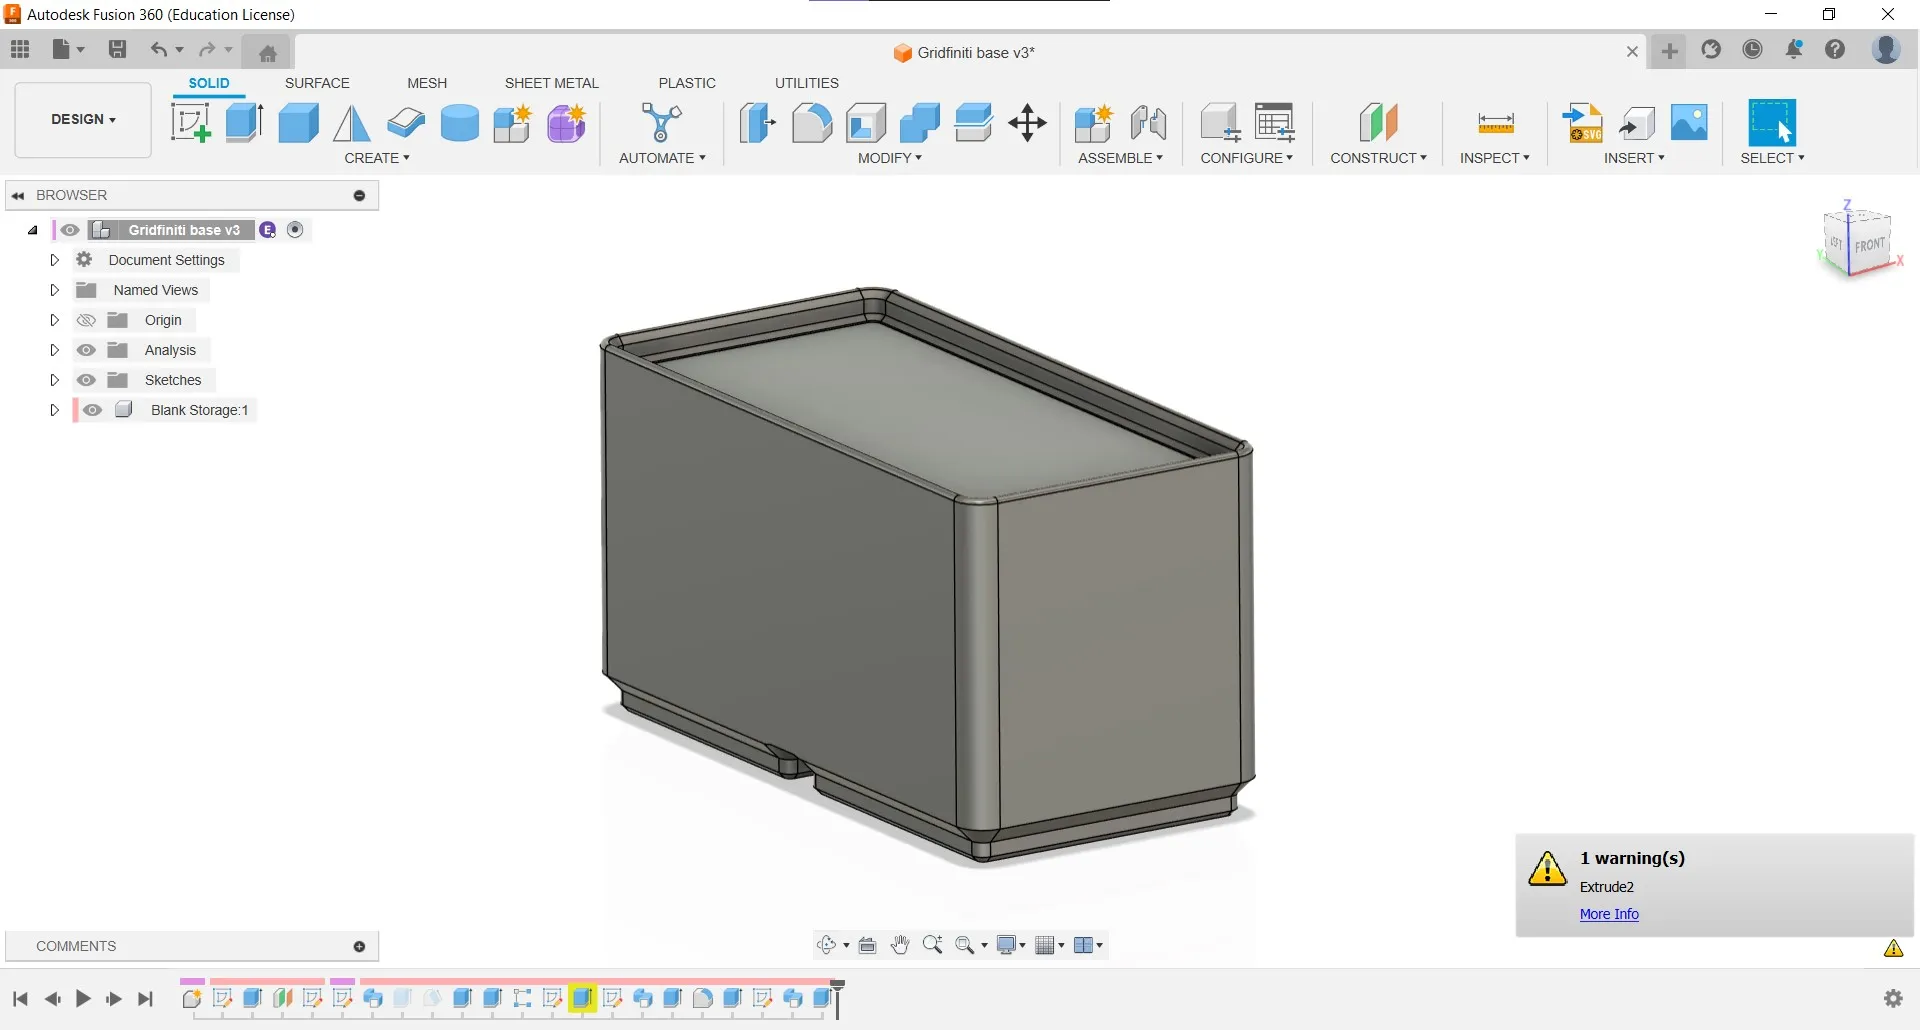
6. If you wanna remove the bottom magnet holes you can do so by selecting the “Extrude4” and “Extrude5” operations in the Design History timeline, then right click and press “Suppress Features”. You can unsuppress them later the same way if you want to.

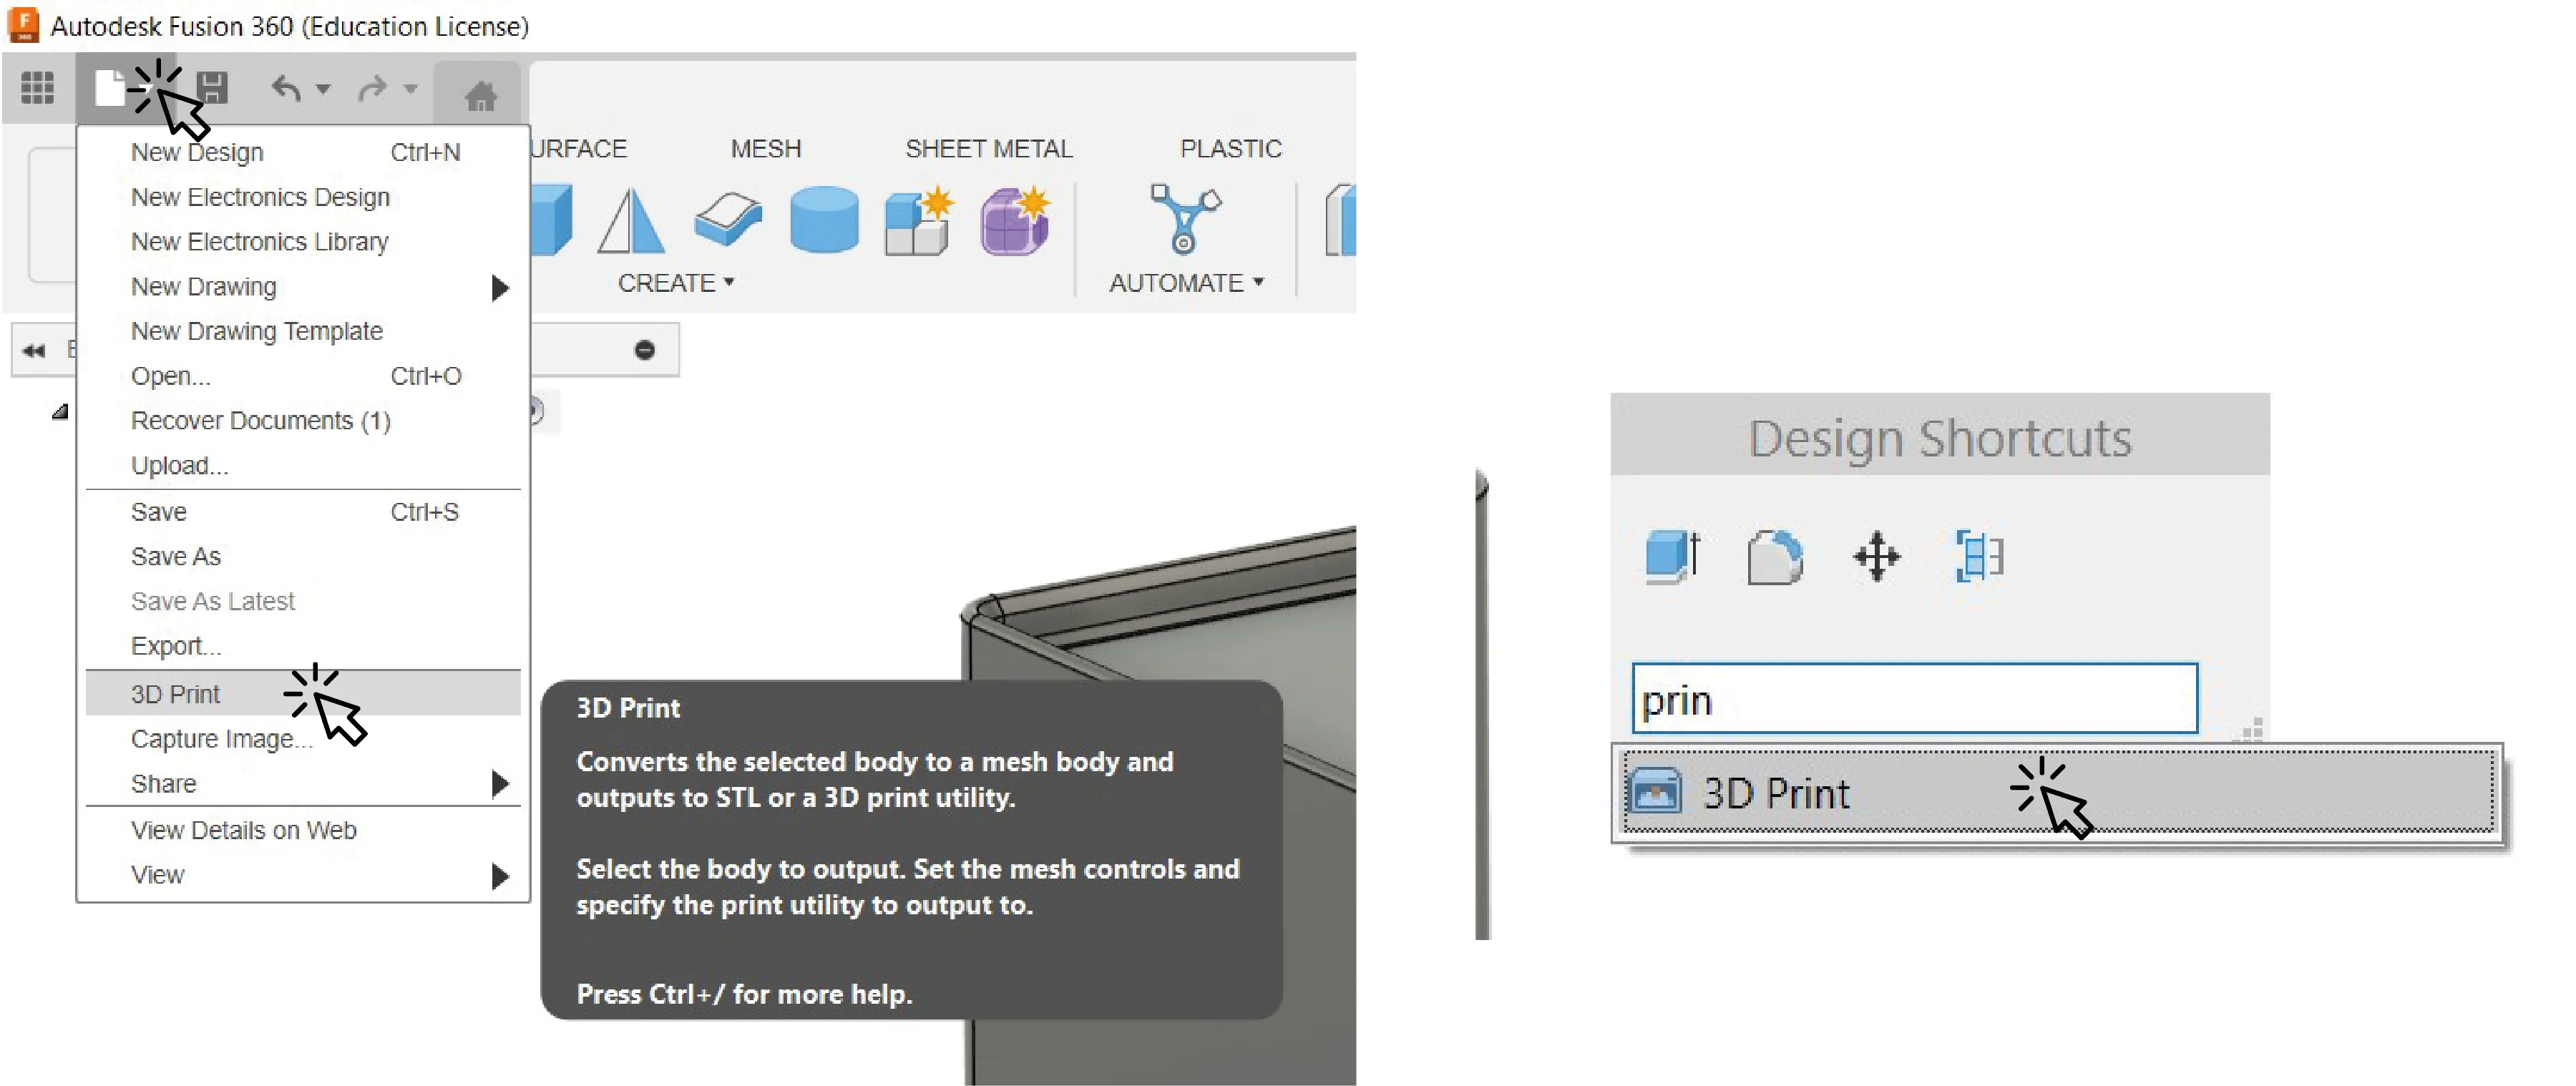
7. To export the model for 3D printing press the “File” drop down menu in the top left corner and then “3D Print”, or you can press keyboard shortcut “S”, write “print” and select the “3D Print” option.
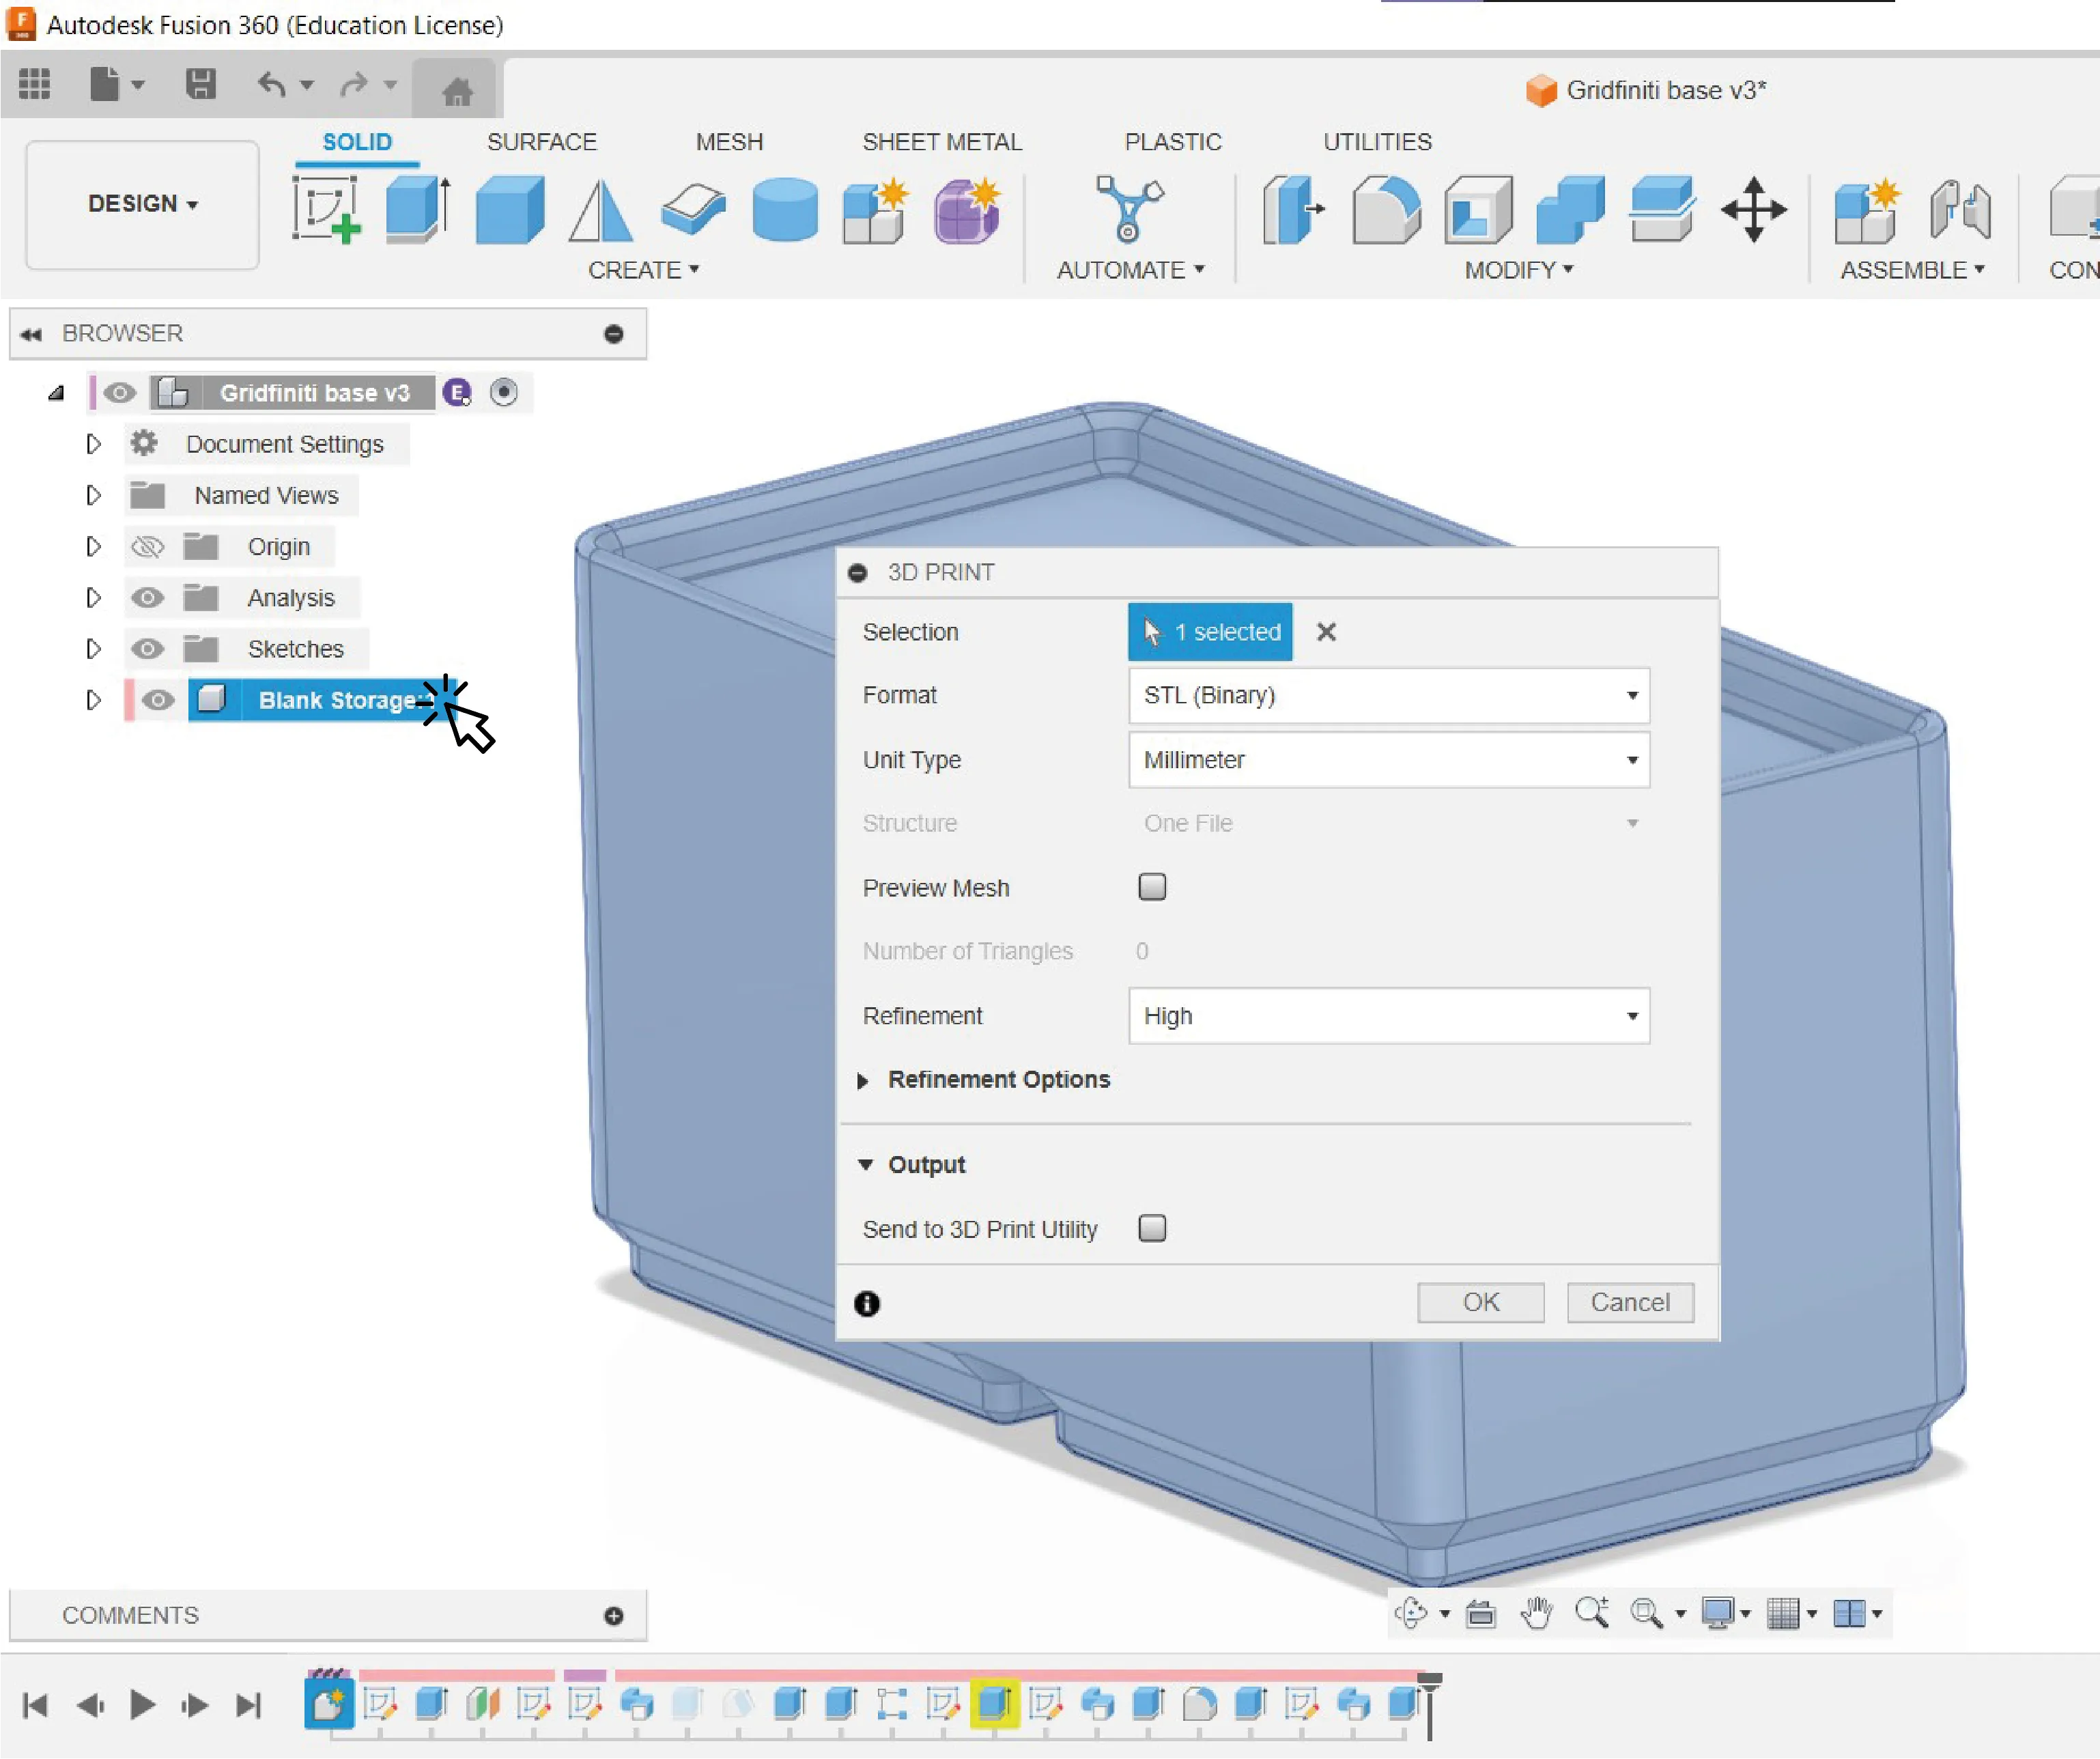
8. Select the “Blank Storage” component in the left of the screen. In this window you can also modify your export settings. You can export the model as an STL, 3MF or OBJ or directly send to your slicer by clicking the “Send to 3D Print Utility”. Click OK
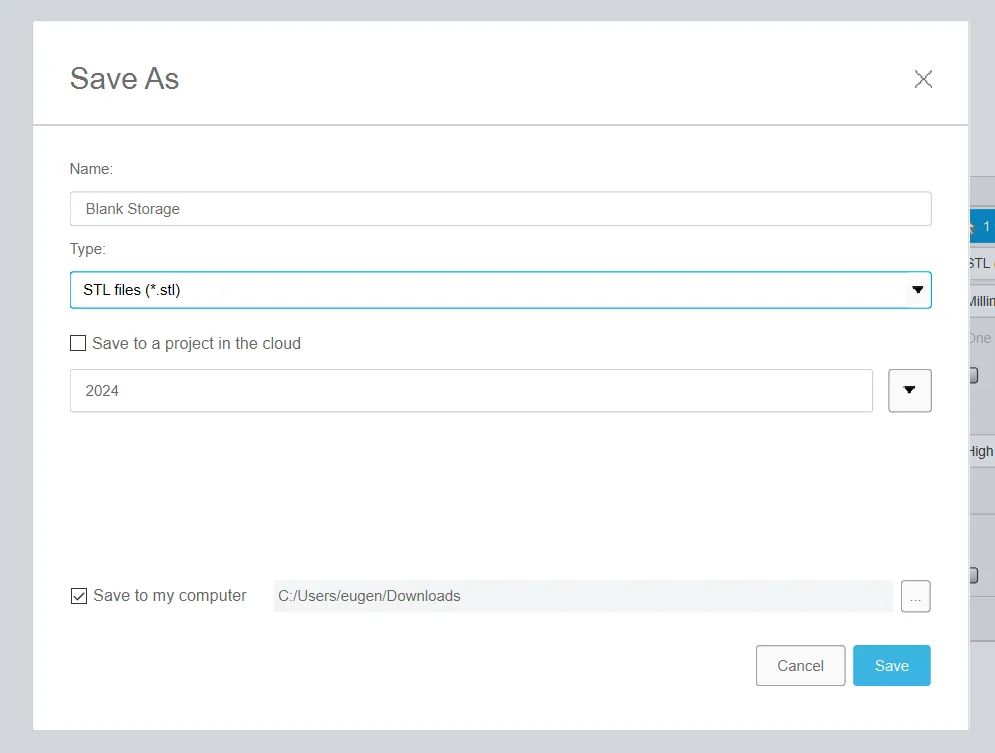
9. A window will pop up where you have to click the “Save to my computer” option an specify the storage route. Click Save and now you have your STL to print.
To legally sell PRINTED models, you may obtain my permission through this link: